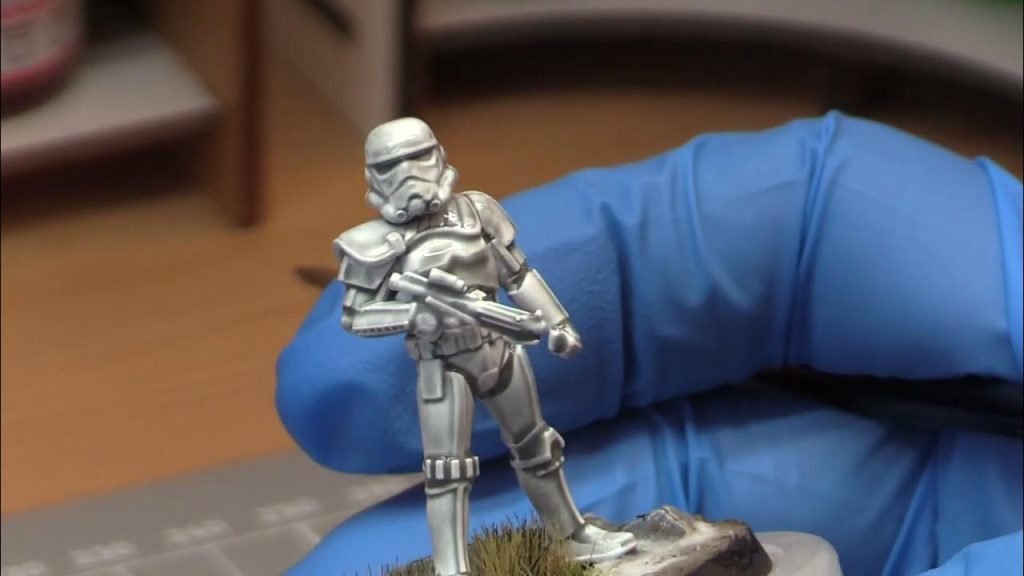
Are your action figures looking dull or chipped? You don’t have to toss them out or settle for worn-out colors.
Repainting your action figures is easier than you think, and it can bring your favorite characters back to life with fresh, vibrant colors. Whether you want to fix small scratches or create a completely new look, this guide will show you simple steps to make your figures stand out again.
Keep reading, and you’ll discover how to turn your old toys into eye-catching masterpieces that you’ll be proud to display.
Choosing The Right Materials
Choosing the right materials sets the foundation for a successful repaint of your action figures. The quality of your tools and paints directly affects the final look and durability of your work. You want materials that offer precision, vibrant colors, and long-lasting results without damaging the figure’s surface.
Essential Tools
Start with a clean workspace and gather tools that help you work efficiently. You’ll need:
- Fine sandpaper:For smoothing surfaces before painting.
- Primer:Helps paint stick better and prevents chipping.
- Masking tape:Protects areas you don’t want to paint.
- Palette:For mixing and thinning paints.
- Magnifying glass:Useful for detailed work on small parts.
Having these tools ready makes your repainting smoother and more precise. Have you tried using a magnifying glass to catch tiny details? It can reveal mistakes you might miss otherwise.
Types Of Paints
Choosing the right paint type impacts how your figure looks and holds up over time. Acrylic paints are popular because they dry quickly and clean up easily with water. They also come in many colors and finishes.
Enamel paints offer a glossy, durable finish but take longer to dry and require solvents for cleanup. If you want a vibrant, lasting paint job, consider acrylics for most parts and enamel for small accents.
Test different paints on spare parts or plastic pieces before applying them to your figure. This step helps avoid surprises like paint peeling or color changes after drying.
Recommended Brushes
Brush choice affects how smoothly and accurately you apply paint. Synthetic brushes work well with acrylic paints, offering good control and durability. Look for brushes with fine, tapered tips to handle tiny details.
Flat brushes help cover larger areas evenly, while round brushes are perfect for lines and details. Avoid cheap brushes that shed bristles—they can ruin your paint job with unwanted fuzz.
Investing in a variety of brush sizes gives you flexibility. Have you noticed how switching from a large brush to a fine-tipped one transforms your detailing work?
Preparing Action Figures
Preparing your action figures before repainting is a crucial step that can make all the difference in the final outcome. Skipping this can lead to paint peeling or uneven coverage. Taking the time to clean and carefully disassemble your figures ensures the paint sticks well and highlights every detail.
Cleaning Techniques
Start by removing any dirt, oils, or old paint residues from your figure. Use warm water mixed with a mild dish soap to soak the figure briefly. Then gently scrub with a soft toothbrush to reach small crevices.
If your figure has stubborn grime, rubbing alcohol on a cotton swab works wonders without damaging the plastic. Avoid harsh chemicals that can melt or warp the material. Have you ever noticed paint peeling off immediately? It’s often due to poor cleaning.
Disassembly Tips
Taking apart your action figure helps you paint hard-to-reach areas and prevents paint from clogging joints. Look for screws or clips holding the parts together. Use a small screwdriver or gentle prying tool to separate limbs and accessories.
Keep track of each piece by placing them in labeled containers or bags. This prevents losing tiny parts and makes reassembly easier. If you’re unsure how to take your figure apart, check online guides or videos for your specific model.
Handling pieces carefully during disassembly also avoids accidental damage. Have you tried repainting without disassembly? You might find it frustrating to get clean lines around joints and intricate details.
Applying Primer
Applying primer is a crucial step when repainting action figures. It creates a smooth, even surface that helps paint stick better and last longer. Skipping this step can lead to uneven colors and paint chipping off easily.
Benefits Of Primer
Primer improves paint adhesion, making sure your colors stay vibrant and don’t peel. It also helps reveal any imperfections on the figure’s surface, such as scratches or mold lines, that you might want to fix before painting.
Using primer can enhance the final look by providing a neutral base, especially when you’re painting over dark or glossy plastic. Have you ever noticed how paint sometimes looks blotchy or uneven? Primer prevents that by giving paint something to grip onto.
Application Methods
You can apply primer in several ways, depending on your tools and the figure’s size. Spray primers offer a quick and even coat, perfect for covering small details without brush marks.
- Hold the spray can about 6-8 inches away from the figure for an even layer.
- Use short bursts rather than a continuous spray to avoid drips.
If you prefer more control, use a fine brush to apply primer carefully in thin layers. This is helpful for touching up small areas or working on delicate parts.
Always allow the primer to dry completely before starting to paint. You’ll notice a slight texture that feels rough to the touch—that’s a good sign your paint will stick well.

Credit: www.tiktok.com
Painting Techniques
Mastering painting techniques can transform your action figures from plain to spectacular. Understanding how to apply base coats, build layers, and add tiny details makes all the difference. Let’s break down these painting steps to help you bring your figures to life with color and depth.
Base Coating
Start with a smooth base coat to create a solid foundation for your paint job. Use thin, even layers of paint to avoid covering up the figure’s intricate details. I learned that rushing this step often leads to a blotchy finish, so patience here pays off.
Spray primers work well for plastic figures, helping the paint stick better. Choose a color that complements your final palette—white for bright colors, black for darker tones. Have you noticed how the right base coat can completely change the vibrancy of your final colors?
Layering And Blending
Layering means applying multiple paint coats to build up color intensity gradually. Thin your paints slightly to maintain control and avoid clumping. I often use a wet palette to keep my paints workable longer, which helps when blending colors smoothly.
Blending adds realism by softening transitions between shades. Try using a damp brush or a sponge to gently mix edges between colors. What areas on your figure could benefit from subtle color shifts to look more natural?
Detailing And Highlights
Details bring your figure’s personality out—think eyes, armor edges, or fabric folds. Use a fine-tipped brush and steady hands to add these small touches carefully. I find that highlighting raised areas with a lighter shade instantly adds depth and makes the figure pop.
Don’t forget washes to emphasize shadows and textures—thin paint with water or medium and apply it to crevices. This technique can turn flat surfaces into dynamic features. What details on your figure deserve the spotlight?
Finishing Touches
Finishing touches are what transform your repainted action figure from just a project into a true work of art. This final step not only enhances the colors and details but also protects your hard work from damage. Taking the time to apply the right coatings can make your figure look professionally done and last for years.
Adding Varnish
Varnish seals the paint and adds a layer of protection against chips and scratches. You can choose between matte, satin, or glossy finishes depending on the look you want. I once used a matte varnish on a superhero figure, and it gave the paint a smooth, flat finish that looked very realistic.
Spray varnishes offer even coverage but always test on a small area first to avoid unwanted cloudiness. Apply thin, light coats and let each one dry completely before adding the next. This careful approach prevents drips and keeps the details sharp.
Protective Coatings
Beyond varnish, some collectors use additional protective coatings for extra durability. Products like clear acrylic sealers or polyurethane sprays provide a tough outer shell. These are especially useful if your figure will be handled frequently or displayed in bright light.
Consider your display environment before choosing a coating. For example, if your figure is displayed under sunlight, UV-resistant coatings can prevent fading. Have you thought about how your action figure will be used or stored? This can guide you to the best protective option.

Credit: www.youtube.com
Troubleshooting Common Issues
Troubleshooting common issues during repainting helps keep your action figures looking fresh. Small problems can ruin the final look. Fixing these issues early saves time and effort. Understanding common problems makes repainting smoother and more enjoyable.
Paint Chipping
Paint chipping happens when the paint peels or flakes off the surface. It often occurs because the surface was not clean or dry before painting. Using the wrong type of paint can also cause chipping. To avoid this, always clean the figure well and use paint designed for plastics.
Fix paint chipping by gently sanding the chipped area. Clean it again to remove dust. Apply a thin layer of primer before repainting. Use thin coats of paint and let each dry fully. Adding a clear sealant at the end helps protect the paint from future chipping.
Color Mismatch
Color mismatch happens when the new paint color does not match the original or desired shade. This can happen if the paint mixes unevenly or if the lighting is different when painting. Test paint colors on a small area first to check the match.
Correct color mismatch by mixing small amounts of paint to find the right shade. Use a palette or mixing tray for accuracy. Repaint the area carefully in thin layers. Allow drying time between coats to see the true color. Adjust as needed until the color matches well.
Displaying Your Repainted Figures
After you’ve put the final touches on your repainted action figures, displaying them thoughtfully can make all the difference. Your display not only highlights your hard work but also protects your figures for years to come. How you choose to showcase them can reflect your style and add personality to your space.
Display Ideas
Think about where your figures will catch the most attention. Clear acrylic cases keep dust away while letting light showcase every detail. You might want to try shadow boxes with themed backgrounds to create mini-scenes that tell a story.
Floating shelves offer a modern look and can be arranged in creative patterns to suit your collection’s size. LED strip lights underneath or behind the shelves add a subtle glow that makes colors pop, especially in dim rooms.
- Group figures by theme or color to create visual harmony.
- Use risers or stands to add depth and prevent figures from looking flat.
- Place figures near natural light but avoid direct sunlight to prevent fading.
Preservation Tips
Display is important, but preserving your repaint work is just as crucial. Keep your figures away from direct sunlight and high humidity areas to avoid paint fading and peeling. A cool, dry spot helps maintain the paint’s vibrancy longer.
Dust your figures gently with a soft brush or microfiber cloth to prevent scratches. Avoid harsh cleaning agents; water or mild soap works best if cleaning is necessary.
| Preservation Tip | Why It Matters | How to Do It |
|---|---|---|
| Keep away from direct sunlight | Prevents paint from fading | Place display in shaded or indoor areas |
| Maintain low humidity | Stops paint from peeling | Use a dehumidifier if needed |
| Clean with soft tools | Avoids scratching delicate paint | Use microfiber cloth or soft brush |
Have you thought about rotating your figures occasionally? This simple habit can reduce prolonged exposure to light and dust, helping preserve your repaint job even more. What unique display setup will best show off your creativity?

Credit: www.reddit.com
Frequently Asked Questions
How Do I Prepare Action Figures For Repainting?
Clean the figure thoroughly with mild soap and water. Remove old paint using a gentle paint remover. Sand rough areas lightly for smoothness. Allow the figure to dry completely before starting the repainting process. Proper prep ensures better paint adhesion and a smoother finish.
What Type Of Paint Works Best For Action Figures?
Acrylic paints are ideal for repainting action figures. They dry quickly, are non-toxic, and provide vibrant colors. Use thin layers to avoid paint clumping. Acrylics also adhere well to plastic surfaces, making them perfect for detailed work and long-lasting results.
How Can I Avoid Paint Smudges On Action Figures?
Apply thin, even coats and let each layer dry completely. Use fine brushes for precision and avoid overloading them with paint. Work in a dust-free environment and handle the figure carefully to prevent smudging. Patience is key for a clean finish.
Should I Seal Action Figures After Repainting?
Yes, sealing protects the new paint from chipping and fading. Use a clear matte or gloss sealant designed for plastics. Spray or brush it on evenly once the paint is fully dry. Sealing extends the life and appearance of your repainted figure.
Conclusion
Repainting action figures can bring them back to life. Simple steps and patience make a big difference. Choose the right paint and tools for the best results. Clean your figure well before starting to paint. Take your time and work in thin layers.
Let each layer dry fully to avoid smudges. Small details make your figure stand out. Enjoy the process and watch your figure transform. This hobby can be fun and relaxing. Your repainted figure will be unique and special. Keep practicing to improve your skills.




