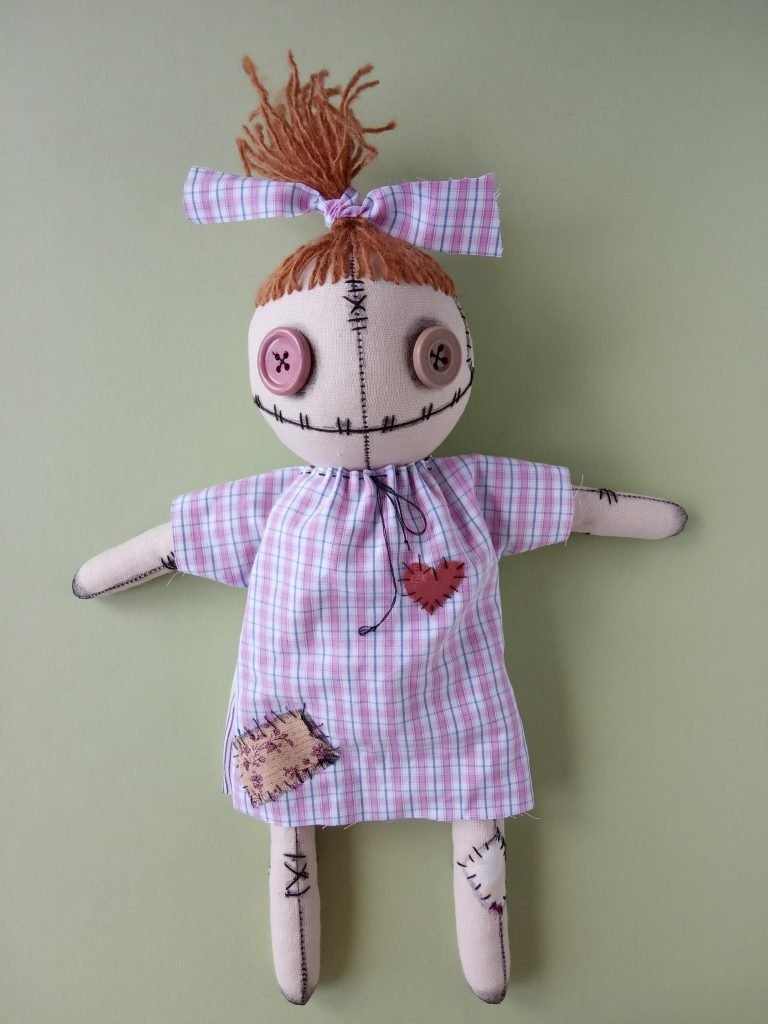
Have you ever wanted to create something that gives people chills at first glance? Making creepy dolls is a fun and creative way to explore your spooky side.
Whether you’re planning a Halloween decoration, a unique gift, or just want to impress your friends with your craft skills, this guide will show you how to bring eerie dolls to life. You don’t need to be an expert—just a little patience and imagination.
Ready to dive into the world of creepy creations? Keep reading, and you’ll learn all the secrets to making dolls that are perfectly unsettling.
Choosing The Right Materials
Making creepy dolls needs careful material choices. The right materials make your doll look scary and last long.
Focus on doll bases, fabric, paint, and accessories. Each part adds to the doll’s creepy effect.
Selecting Doll Bases
Doll bases form the body and face shape. Pick bases that fit the creepy look you want.
Wood, plastic, and porcelain are common bases. Wood is easy to carve and paint. Plastic bases are light and cheap. Porcelain looks old and eerie but breaks easily.
- Wood: strong, easy to shape
- Plastic: light, affordable
- Porcelain: fragile, classic creepy look
Picking Fabric And Paint
Fabric covers the doll’s body and clothes. Choose rough or worn fabrics for a spooky feel.
Paint adds details like eyes, scars, and color. Use matte or dark paint to avoid a shiny, fake look.
- Fabric types: burlap, cotton, old lace
- Paint types: acrylic, fabric paint
- Colors: dark red, black, gray
Gathering Accessories
Accessories make your doll unique and creepier. Small items like buttons, beads, and tiny hats add detail.
Broken or old accessories work best. They give the doll a haunted or abandoned look.
- Buttons and beads for eyes
- Old jewelry pieces
- Miniature hats or scarves
- Fake blood or stitches

Credit: www.reddit.com
Creating The Doll Face
Making a creepy doll face takes careful work. You need to add details that look eerie.
This guide covers sketching, painting, and adding effects to the face of your doll.
Sketching Facial Features
Start by drawing the outline of the eyes, nose, and mouth lightly with a pencil. Keep the lines uneven for a creepy look.
- Draw large, uneven eyes
- Create a crooked nose shape
- Sketch a small, twisted mouth
- Add faint cracks or wrinkles
Painting Eyes And Mouth
Use thin brushes to paint the eyes and mouth. Dark colors add to the scary effect.
| Feature | Color | Tip |
| Eyes | Black, dark brown | Make pupils uneven |
| Mouth | Dark red, black | Paint thin, cracked lips |
Adding Distressed Effects
Distressed effects make the doll look old and spooky. Use sandpaper and paint splatters.
- Lightly sand the face to create scratches
- Use a dry brush to add paint spots
- Add thin cracks with a fine brush
- Apply a wash of diluted black paint
Assembling The Body
Making a creepy doll starts with building its body. You need to carefully put together each part. This makes the doll look lifelike and eerie.
Follow the steps to stuff, attach limbs, and secure joints. Each step helps the doll stay strong and creepy.
Stuffing And Shaping
First, stuff the doll’s body with soft filling. Use cotton, wool, or synthetic fiber for best results. Fill the body evenly to keep shape.
Shape the stuffing as you go. Press and mold the body to form the head, torso, and limbs. Avoid lumps or empty spaces.
- Use small amounts of stuffing at a time
- Firmly press to avoid loose areas
- Create curves for a natural look
Attaching Limbs
Attach the arms and legs to the stuffed body. Use strong thread or wire to connect limbs. This keeps them in place and movable.
Position limbs at the right spots. Sew or tie them tightly to avoid loose parts. Check that the limbs match the doll’s style.
- Sew limbs with strong thread or yarn
- Use wire for bendable joints
- Attach limbs symmetrically for balance
Securing Joints
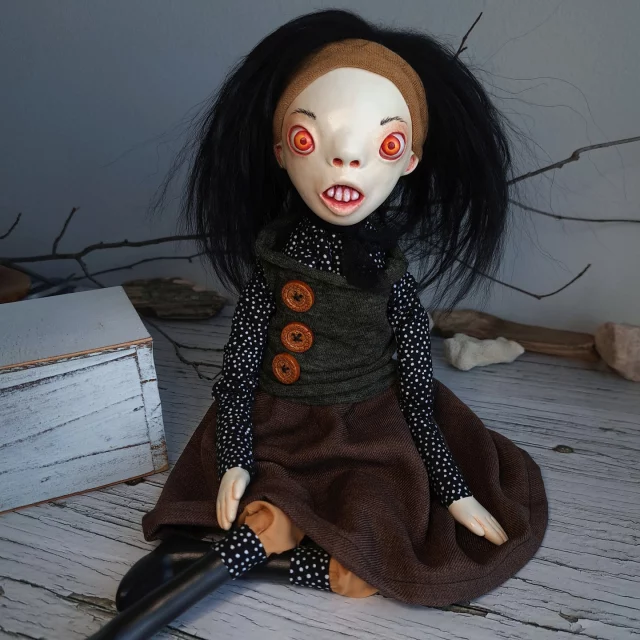
Secure the doll’s joints to keep limbs from falling off. Use buttons, beads, or small rings for joints. This adds a creepy, old-fashioned look.
Fasten joints tightly but allow some movement. This makes the doll poseable and more lifelike. Double-check all connections before finishing.
- Use buttons or beads as joint anchors
- Tie knots inside the body for strength
- Test limb movement after securing
Credit: moodymisfits.com
Designing Spooky Outfits
Creating creepy dolls is fun and spooky. Designing their outfits adds to their eerie charm.
Spooky outfits make your dolls look strange and scary. Choose fabrics and details carefully.
Choosing Fabrics
Pick fabrics that look old or worn out. Rough textures or faded colors work well.
Dark colors like black, gray, and deep red create a spooky feel. Thin, torn fabrics add a ghostly touch.
- Cotton with stains or frays
- Velvet or lace for a creepy vintage look
- Old denim or burlap for rough texture
- Sheer fabric for ghostly effects
Sewing Simple Clothes
Make simple clothes like dresses, shirts, or pants. Use basic shapes to keep sewing easy.
Keep stitches uneven or loose to add an old, worn-out look. Avoid perfect seams for a creepy style.
- Use straight stitches with visible thread
- Make small tears or holes in the fabric
- Use simple patterns like A-line dresses or loose shirts
- Add extra layers for a tattered look
Adding Horror Details
Details can make your doll’s outfit scary. Think about blood stains, patches, or creepy symbols.
Add buttons that look old or mismatched. Use thread colors like red to mimic blood or dark stains.
- Paint fake blood or dirt on the clothes
- Sew on torn patches or ripped fabric pieces
- Add small chains or safety pins
- Use creepy symbols like skulls or eyes
Adding Final Touches
Adding final touches brings your creepy doll to life. These details give your doll character and mood. Small changes can make a big difference in appearance.
Focus on hair, weathering, and props to complete your creation. Each part adds to the eerie effect you want. Take your time with these steps for best results.
Incorporating Hair
Hair makes your doll look more real and creepy. Use different materials like yarn, synthetic hair, or old doll hair. Attach the hair carefully to avoid gaps.
- Choose hair color that fits your doll’s theme
- Glue or sew hair strands to the scalp
- Trim hair unevenly for a wild look
- Add knots or tangles for an aged effect
Applying Weathering Techniques
Weathering makes your doll appear old and worn. Use paints, sandpaper, and stains to create this look. Focus on edges and raised parts for natural wear.
| Technique | Effect | Tools |
| Dry Brushing | Highlights raised areas | Small stiff brush, light paint |
| Sanding | Creates chipped surfaces | Fine sandpaper |
| Staining | Adds dirt and age marks | Tea, coffee, or diluted paint |
| Cracking | Simulates old cracked skin | Crackle medium or glue |
Using Props For Effect
Props add a story to your creepy doll. Choose items that fit your doll’s personality and setting. Place props carefully for the best impact.
- Old toys or miniature tools
- Fake spiders or bugs
- Broken glasses or tiny hats
- Small pieces of fabric or lace
- Miniature books or letters
Safety Tips And Precautions
Making creepy dolls can be fun, but safety is important. Always take precautions to avoid accidents.
Here are some tips to ensure your doll-making process is safe and enjoyable.
Handling Sharp Tools
Using sharp tools requires care and attention. Always work in a well-lit area to prevent accidents.
- Keep tools organized and within reach.
- Use a cutting mat to protect surfaces.
- Wear protective gloves if needed.
Using Non-toxic Materials
Choose non-toxic materials to ensure safety, especially if children are involved. Check labels for safety information.
Look for materials marked as “non-toxic”and “child-safe”.
Storage And Display Advice
Proper storage and display of your creepy dolls will keep them in good condition. Consider the following advice.
| Environment | Recommendation |
| Humidity | Keep in a dry place |
| Sunlight | Avoid direct sunlight |
| Dust | Use a display case |

Credit: www.reddit.com
Frequently Asked Questions
What Materials Are Needed To Make Creepy Dolls?
You need fabric, stuffing, old clothes, paint, glue, and sewing tools. Accessories like buttons, yarn, and wire add eerie details. Use materials that look aged or worn for a spooky effect.
How Do I Give Creepy Dolls A Scary Face?
Use paint or markers to create exaggerated, uneven facial features. Add dark shadows around eyes and mouth to enhance creepiness. Experiment with stitches or scars for a haunted look.
Can I Use Old Dolls To Make Creepy Dolls?
Yes, old dolls are perfect for creepy crafts. Modify their faces, clothes, and hair to add a sinister vibe. Distress their surfaces with sandpaper or paint for an aged effect.
How To Safely Add Creepy Effects To Dolls?
Use non-toxic paints and adhesives. Work in a well-ventilated area to avoid fumes. Handle sharp tools carefully, and wear gloves if using hot glue or scissors.
Conclusion
Creating creepy dolls can be a fun and spooky craft. Use simple materials and your imagination. Small details make each doll unique and eerie. Practice helps improve your skills quickly. Enjoy the process and share your creepy dolls with friends.
Keep experimenting with new ideas and designs. Your creepy doll collection will grow with time. Happy crafting!




