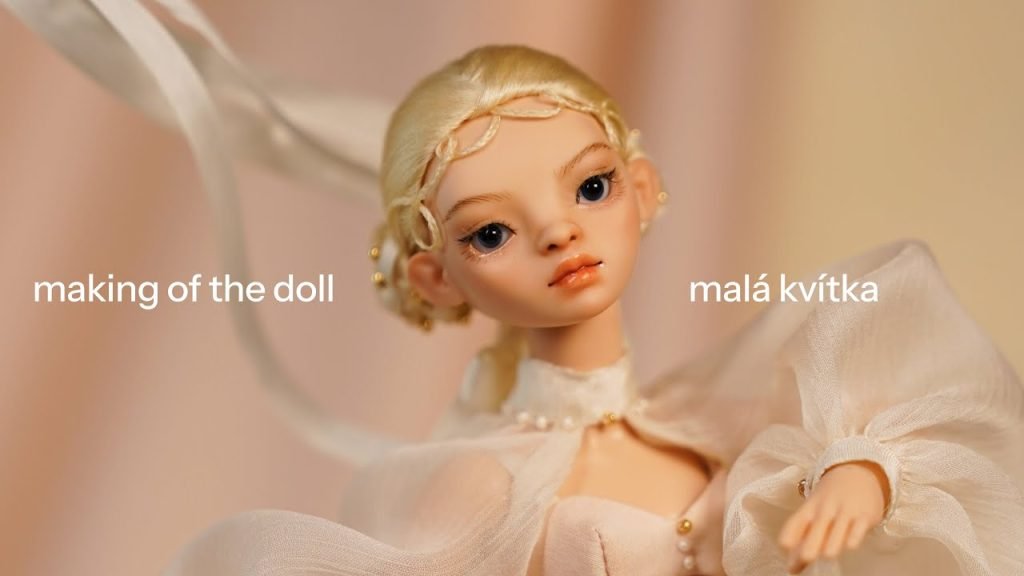
Have you ever wanted to create your very own Ball-Jointed Doll (BJD)? Imagine holding a doll crafted by your own hands, with every detail perfectly tailored to your style.
Making BJD dolls might sound tricky, but with the right steps, you can bring your unique vision to life. In this guide, you’ll discover simple, clear instructions that make the process fun and achievable. Ready to unlock your creativity and build a doll that’s truly yours?
Keep reading, and let’s get started!
Materials And Tools
Making BJD (Ball Jointed Doll) dolls is a rewarding craft that demands precision and the right materials. Before you begin shaping your doll, gathering the proper tools and supplies is essential. These items will shape your experience and the quality of your final creation.
Essential Supplies
Start with a clean workspace and these basic materials:
- Polymer clay or resin– the main substance for sculpting the doll’s body.
- Ball joints and elastic cords– necessary for the doll’s movement and articulation.
- Wire armature– provides structure and support during sculpting.
- Paints and sealants– for adding realistic details and protecting the surface.
Having these ready helps avoid interruptions while you work. What would you find frustrating to run out of mid-project?
Choosing The Right Clay
Not all clays behave the same. Some harden in the oven, while others air dry. Polymer clay like Super Sculpey is popular because it holds fine details and cures firm in a home oven.
Consider your skill level and the doll’s size. Softer clays are easier to mold but less durable. Harder clays take longer to shape but offer better stability. What characteristics matter most for your vision?
Tools For Sculpting
Your hands are powerful tools, but specialized sculpting tools make a huge difference. Basic tools include:
- Needle tools for fine lines and texture.
- Loop and ribbon tools for carving and hollowing.
- Silicone-tipped shapers for smoothing surfaces.
- Sandpaper or files for refining edges after baking.
Investing in quality tools can save time and frustration. Have you ever tried sculpting with just household items? The right tool often makes the process feel effortless.
Designing Your Doll
Designing your BJD doll is a creative and exciting part of the process. This step shapes your doll’s personality and look. Careful planning helps bring your vision to life. Focus on key details that make your doll unique. These include the character’s style, pose, and size. A clear design plan guides your entire project.
Conceptualizing The Character
Start by imagining who your doll will be. Think about age, mood, and background. Write down traits like shy, brave, or playful. Decide on the doll’s story or role. This helps in choosing the right facial expression and outfit. Think about what makes your doll special. This step sets a strong foundation for design.
Sketching The Doll
Use simple sketches to visualize your ideas. Draw the doll in different poses and angles. Focus on facial features and hairstyle. Try various expressions to find the best fit. Rough sketches save time and show how parts work together. Keep your lines light and easy to change. Sketching helps see the doll before making it.
Determining Proportions
Proportions make your doll look balanced and natural. Decide the size of the head compared to the body. Choose arm and leg lengths that match your concept. Use a simple ratio chart for reference:
| Body Part | Proportion to Head |
|---|---|
| Torso | 2 to 3 heads |
| Legs | 3 to 4 heads |
| Arms | 2 to 2.5 heads |
Check proportions by comparing parts side by side. Adjust until the doll looks natural. Good proportions improve pose and movement. They also help in sculpting and assembling later.
Sculpting The Head
Sculpting the head is one of the most rewarding parts of making BJD dolls. It sets the entire character and mood of your doll. You get to shape the personality before adding any color or clothes, so take your time to enjoy the process.
Creating The Face
Start with a smooth ball of clay or resin as your base. Use your fingers and simple tools to gently form the basic shape of the face—think about the jawline, cheekbones, and forehead. Keep checking the symmetry by looking at your work from different angles.
Don’t rush the rough shaping. A well-proportioned face makes the later details easier to add. Ask yourself: what kind of expression do you want your doll to have? Calm, curious, or maybe a little mischievous?
Adding Facial Features
Once the face shape feels right, focus on the eyes, nose, and mouth. Use fine tools or a needle to carve out eye sockets and lightly mark where the nose will sit. Adding small details like nostrils and lip lines brings your doll to life.
Be patient and work slowly—tiny adjustments can change the whole look. If you’re unsure, step back frequently to see if the features look natural. You might be surprised how a slight curve in the lips can change your doll’s emotion entirely.
Detailing Hair And Ears
Hair and ears add personality and balance to the head shape. For ears, start with small clay pieces and gently attach them, shaping the curves and folds carefully. Hair can be sculpted directly or added later with wigs, but carving subtle hairlines gives depth.
Try different textures by using various tools—needles for fine strands or brushes for rougher styles. Think about how hair interacts with the face: does it cover the ears or frame them? This detail pulls your doll’s look together perfectly.

Credit: morezmore.wordpress.com
Crafting The Body
Crafting the body of your BJD doll is where your vision starts to take shape. This stage demands precision and patience, as every curve and joint affects the doll’s pose and personality. Paying close attention here will set a solid foundation for a beautiful, functional doll you’ll be proud of.
Torso Construction
The torso forms the core of your doll’s body. Begin by choosing a sturdy but workable material like resin or polymer clay. Ensure the size fits your overall design—too bulky or too slim can limit movement or aesthetics.
Shape the front and back panels separately, then join them smoothly. Don’t forget to hollow out the inside if you want to reduce weight or allow for internal joints. A well-balanced torso helps your doll stand or sit naturally.
Designing Limbs
Limbs give your doll its character and poseability. Start by sketching the arm and leg shapes to match your torso scale. Keep proportions consistent to avoid awkward poses.
Use wire armatures inside the limbs for added strength, especially if you want your doll to hold poses. Cover these with your chosen material, smoothing seams carefully for a natural look. Remember, the length and thickness of limbs can change the doll’s feel dramatically.
Joint Mechanisms
Joints are the heart of your doll’s flexibility. Decide whether you want simple ball joints, elastic stringing, or more complex hinge joints based on how much movement you need. Each joint type has its pros and cons—ball joints offer smooth rotation, while elastic stringing provides tension for holding poses.
Test each joint’s range of motion as you build. Small adjustments here prevent frustration later when posing your doll. Have you thought about adding magnetic joints for easy detachment and customization? It’s a neat trick that can save time and keep parts safe.
Painting And Finishing
Painting and finishing breathe life into your BJD doll, turning a blank canvas into a unique character. This stage demands patience and precision, but the results are deeply rewarding. Each brushstroke adds personality, making your doll truly yours.
Skin Tone Application
Start with a clean, smooth surface to ensure the paint adheres well. Use thin layers of acrylic paint or specialized pastel powders to build up the skin tone gradually. Lightly apply color in small, circular motions to avoid streaks and create a natural look.
Consider mixing different shades to match the skin tone you want—warm peach, cool beige, or even fantasy colors. Don’t rush; it often takes several thin layers to achieve depth and realism. Think about how shadows and highlights naturally fall on skin and mimic that in your painting.
Facial Details
Adding facial details is where your doll’s personality shines. Use fine-tipped brushes or watercolor pencils to paint eyebrows, eyelashes, and lips with care. Small details like freckles or blush can make a huge difference in making the face look alive.
Try testing your brush strokes on paper first to gain control before working on the doll’s face. Patience is key—taking breaks can help you spot uneven lines or spots that need more blending. What expression do you want your doll to have? Let that guide your detailing process.
Sealing The Paint
Sealing protects your hard work and keeps the paint from chipping or fading over time. Use a clear matte or satin sealant spray designed for dolls or miniatures. Apply multiple thin coats instead of one thick one to avoid cloudiness or drips.
Make sure to seal in a well-ventilated area and allow each coat to dry completely. This step also allows you to add more layers of paint or details later without damage. Have you considered how the finish—matte or glossy—affects the doll’s overall look?
Costuming The Doll
Costuming the BJD (Ball Jointed Doll) is where your doll’s personality truly comes alive. The clothes you create not only enhance the doll’s appearance but also tell a story. Paying attention to fabric, sewing, and the little details transforms a simple figure into a unique character you’ll be proud of.
Fabric Selection
Choosing the right fabric is key. You want materials that match the style and scale of your doll’s outfit. Lightweight cotton works well for casual wear, while silk or satin can add elegance to formal dresses.
Think about texture and drape. How does the fabric move? Does it hold shape or flow freely? These qualities affect how natural the costume looks on your doll.
Don’t overlook stretch fabrics for tight-fitting pieces. They can make dressing your doll easier and reduce bulk around joints.
Sewing Techniques
Small stitches make a big difference. Hand sewing often works better than a machine for delicate seams on tiny garments. Try using a backstitch for strength and neatness.
Seam allowances should be narrow but consistent to avoid bulky edges. Press seams flat with a warm iron to keep your outfit looking crisp.
Experiment with darts and pleats to shape the fabric around your doll’s curves. These details add realism and improve fit.
Accessories And Details
Accessories bring your doll’s outfit to the next level. Add miniature buttons, lace trims, or tiny bows to make costumes more interesting.
Consider using beads or embroidery to create patterns or textures. These details catch the eye and show your effort.
What small touch could make your doll’s outfit unique? Maybe a handcrafted necklace or a tiny handbag. These finishing touches often become your favorite part of the costume.
Assembling The Doll
Assembling the BJD doll brings all parts together into a living, poseable figure. It takes care and patience to make sure each piece fits perfectly. The process starts with stringing, moves to testing mobility, and ends with final adjustments. Each step ensures the doll looks natural and moves smoothly.
Stringing The Parts
Stringing connects the doll’s limbs and head using elastic cords. Use strong, stretchable elastic to hold the parts tight but flexible. Begin by threading the elastic through the body’s holes and attach the limbs in order.
- Cut elastic slightly longer than needed for easy handling.
- Use a stringing tool or small hook to pull the elastic inside.
- Tighten the elastic to secure the parts but avoid over-stretching.
- Tie strong knots and hide them inside the body.
This keeps limbs firmly attached and allows for smooth bending.
Testing Mobility
After stringing, check how well the doll moves at joints. Test arms, legs, and head for easy bending and rotation. The doll should hold poses without falling or sagging.
- Move each limb gently to feel resistance and flexibility.
- Check if the elastic is too loose or too tight.
- Ensure the joints do not pop out during movement.
- Look for smooth, natural motion in all directions.
Final Adjustments
Make small changes to improve the doll’s fit and balance. Adjust the elastic tension if limbs are floppy or too stiff. Add small pads or silicone rings inside joints for better grip.
- Tighten or loosen elastic to perfect tension.
- Use cotton or foam to fill gaps for stability.
- Reposition parts slightly to improve posture.
- Clean any marks or dust before final display.
These final touches give the doll a polished, professional look.

Credit: www.youtube.com
Displaying Your Creation
Displaying your BJD doll is just as important as the time you spend crafting it. How you present your creation can highlight its unique features and tell a story that draws people in. Thoughtful display turns your doll from a simple figure into a piece of art that invites admiration and sparks conversation.
Pose Ideas
Posing your doll effectively can show off its articulation and personality. Try natural stances like sitting, walking, or a relaxed lean to create a lifelike vibe. You can also experiment with dynamic poses that reflect emotion or action, such as dancing or stretching.
Think about the mood you want to convey. Does your doll look more mysterious with a tilted head and crossed arms? Or does it appear joyful with an open posture and raised hands? Small adjustments in the pose can make a big difference.
Creating A Scene
Building a scene around your doll adds context and depth. Use miniature furniture, fabric backgrounds, or themed props to enhance the story you want to tell. A cozy reading nook or a bustling street corner can turn your doll’s world into something viewers want to explore.
Keep the scale consistent to maintain realism. Simple items like tiny books or plants can make your display more inviting without overwhelming the doll. Sometimes, less is more—focus on details that complement rather than compete with your doll.
Photography Tips
Good photos can capture your doll’s beauty and the effort behind it. Use natural light whenever possible to avoid harsh shadows and highlight textures. Position your doll near a window during the golden hour for soft, flattering light.
Experiment with angles—shoot from eye level to create intimacy or from below to give your doll a commanding presence. A plain background helps the doll stand out, but you can also try blurred backgrounds to add depth. Don’t forget to clean the doll and props before shooting to keep every detail sharp and clear.
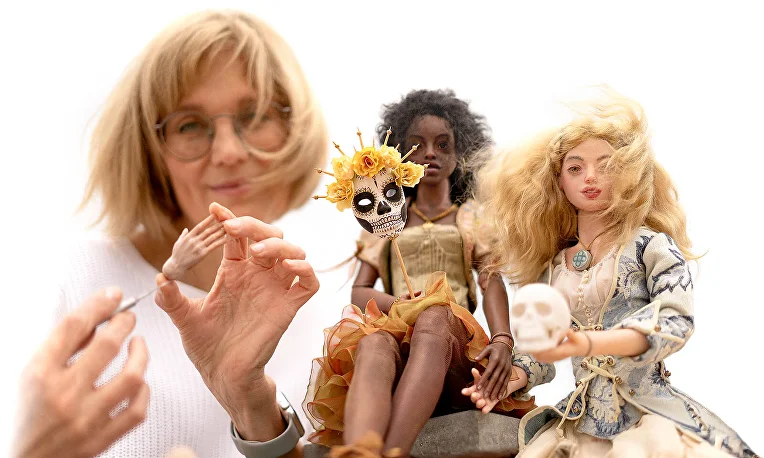
Credit: haritonova.world
Frequently Asked Questions
What Materials Are Needed To Make Bjd Dolls?
To make BJD dolls, you need resin, sculpting tools, sandpaper, paint, and doll eyes. Additional materials include glue and stringing elastic. These items help create detailed, poseable dolls with a smooth finish. Quality materials ensure durability and a professional look for your custom BJD doll.
How Do You Sculpt A Bjd Doll’s Face?
Start with a basic head shape using clay or resin. Use sculpting tools to define facial features like eyes, nose, and lips. Smooth the surface and add fine details. This process requires patience and precision for realistic expressions and proportions.
What Is The Best Way To Paint Bjd Dolls?
Use high-quality acrylic paints or pastels for painting BJD dolls. Apply thin layers for a smooth finish and allow drying between coats. Seal with a matte varnish to protect the paint and add realism. Proper painting enhances your doll’s overall aesthetic.
How Do You Assemble A Bjd Doll After Sculpting?
After sculpting and painting, assemble the doll by attaching limbs with elastic strings. Insert eyes and hair wig carefully. Ensure all joints are tight for smooth movement. Assembly requires attention to detail for a fully poseable and stable doll.
Conclusion
Making BJD dolls takes time and patience. Each step helps you create a unique doll. Use the right tools and follow instructions carefully. Enjoy shaping and painting your doll’s features. Personal touches make your doll special and one of a kind.
Practice improves your skills little by little. Keep trying, and don’t be afraid to experiment. Your creativity will bring your doll to life. Making BJD dolls can be a fun and rewarding hobby. Start today, and see where your imagination leads.




