Have you ever wished you could bring your favorite character—or even yourself—to life as a Funko Pop? Making a custom Funko Pop lets you do just that.
It’s fun, creative, and gives you a one-of-a-kind collectible that no one else has. In this guide, you’ll discover simple steps and insider tips to turn your ideas into a unique Funko Pop figure. Whether you’re a beginner or just looking to improve your skills, this article will help you create something truly special.
Ready to start? Let’s dive in!
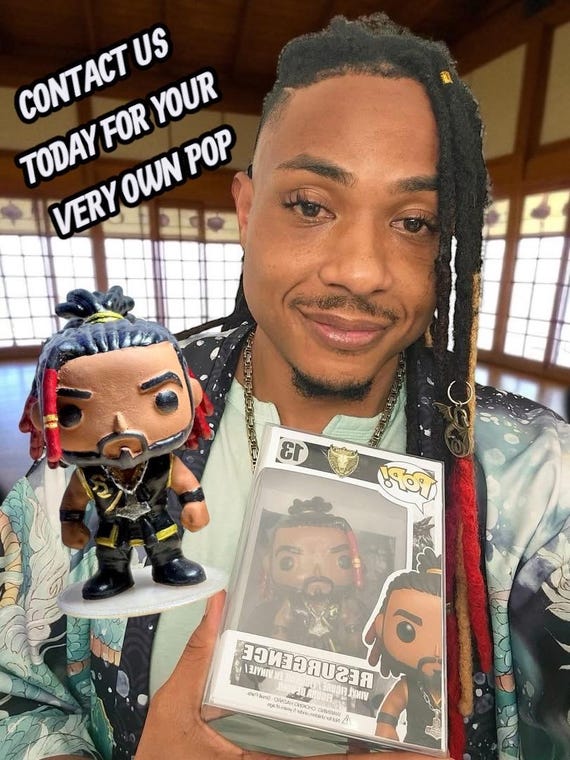
Credit: www.etsy.com
Materials Needed
Creating a custom Funko Pop requires the right materials. These tools and supplies help bring your unique design to life. Gathering everything before starting makes the process smooth and fun.
Base Funko Pop Figure
Start with a plain or existing Funko Pop figure. This figure serves as your canvas. Choose one similar in shape to your custom idea.
Acrylic Paints
Acrylic paints work best for painting Funko Pops. They dry quickly and stick well to plastic. Select colors that match your design.
Paint Brushes
Use small, fine-tipped brushes for detailed work. Medium brushes help cover larger areas. Keep brushes clean for clear lines.
Modeling Clay
Modeling clay adds new shapes or details to your figure. Polymer clay is popular because it hardens after baking. Use it to create custom features.
Sealant Spray
Sealant spray protects your paint and clay work. It gives a smooth, lasting finish. Choose a matte or glossy finish based on your preference.
Craft Knife And Sandpaper
A craft knife helps trim excess clay or modify the figure. Sandpaper smooths rough edges. Handle tools carefully for best results.
Glue
Use strong glue to attach clay pieces or fix parts. Super glue or plastic adhesive works well. Apply sparingly to avoid mess.
Palette And Water Container
A palette mixes paint colors easily. A water container cleans brushes between colors. Both keep your workspace organized.
Design Planning
Design planning sets the foundation for creating a custom Funko Pop that truly stands out. It’s your chance to bring your unique idea to life before any paint or glue touches the figure. Taking time here saves frustration later and helps ensure your final product matches your vision.
Concept Sketches
Start by sketching your idea on paper or digitally. You don’t need to be an artist; rough outlines work fine. Focus on the character’s pose, facial expressions, and distinctive details that make it special.
Sketching helps you spot design challenges early. Maybe the head is too big for the body, or the pose looks awkward. Adjusting on paper is easier than reworking the figure later.
Ask yourself: What key features define this character? Is it a unique hairstyle, costume, or accessory? Highlight these in your sketches to guide your sculpting and painting.
Choosing Colors
Colors bring your character to life. Pick a color palette that reflects the personality and mood you want to convey. Don’t overwhelm with too many shades; simplicity often makes a stronger impact.
Think about the materials you’ll use—some paints may look different when dry or under various lighting. Testing colors on a small surface can prevent surprises.
Consider color contrast to make details pop. For example, a dark outfit with bright accessories draws attention to those areas. What colors do you feel best express your character’s vibe?
Preparing The Base
Preparing the base is a crucial step in making a custom Funko Pop. It sets the foundation for your design and ensures the final product looks clean and professional. Taking the time to properly prepare the figure will save you from headaches later on.
Choosing A Base Figure
Start by picking a base figure that closely matches the shape and size you want for your custom. It’s easier to work with a figure that already has the right pose or body type. You don’t have to reinvent the wheel; sometimes a simple repaint or minor modifications make a big difference.
Think about the character you want to create. Does your base have the right hairstyle, outfit, or accessories? You can mix and match parts from different Pops, but the closer the base is to your vision, the less work you’ll have.
Removing Existing Paint
To get a fresh canvas, you need to remove the original paint from your base figure. This step is key for a smooth paint job and helps new layers stick better. Use gentle products like isopropyl alcohol or nail polish remover with acetone, but be careful not to damage the plastic underneath.
Apply the remover with a cotton ball or soft cloth, rubbing gently to avoid scratching. After stripping the paint, wash the figure with warm soapy water and let it dry completely. Have you ever tried painting over old paint and ended up with peeling or uneven spots? Preparing the surface right avoids that frustration.

Credit: www.fiverr.com
Sculpting Additions
Sculpting additions allow you to personalize your Funko Pop beyond the basic figure. These enhancements bring character and uniqueness to your custom creation. Small details like hats, horns, or special clothing make your Pop truly one of a kind.
Adding sculpted parts requires some skill but is very rewarding. It also improves the overall look and feel of your figure. Use simple tools and materials designed for model crafting.
Using Clay
Clay is the best material for sculpting on Funko Pops. It is easy to shape and sticks well to the figure. Polymer clay is popular because it hardens after baking. Air-dry clay works too but may be less durable.
Start with a small amount of clay for each addition. Roll, pinch, or smooth it into the shape you want. Attach the clay directly to the Funko Pop with gentle pressure. Use sculpting tools or toothpicks to add texture and details.
After sculpting, bake the clay according to instructions. This makes the additions hard and permanent. Paint the additions once the clay cools for a polished look.
Creating Accessories
Accessories add personality and depth to your custom Funko Pop. Think about items like glasses, weapons, or bags. Use lightweight materials such as foam, felt, or thin plastic sheets.
- Cut shapes carefully to fit the figure’s size.
- Glue parts with strong, quick-drying adhesives.
- Paint or decorate accessories to match your design.
Accessories can be fixed or removable. Removable ones add playability. Fixed accessories give a seamless, professional finish.
Painting Techniques
Painting your custom Funko Pop is where your creation truly begins to come alive. The right painting techniques can add depth, personality, and a professional touch to your figure. It’s not just about color—it’s about how you apply it to make every detail pop.
Base Coat Application
Start by applying a smooth, even base coat to your Funko Pop. This layer sets the tone for all the colors that follow, so choose a primer or base paint that suits your final color scheme.
Use thin layers of paint instead of thick ones to avoid losing the figure’s fine details. Let each layer dry completely before adding another to prevent smudging or uneven texture.
Have you noticed how a good base coat can make later colors look brighter and more vibrant? It acts like a blank canvas, so don’t rush this step.
Detailing With Brushes
Using the right brushes can make a big difference when you start adding details. Fine-tipped brushes are essential for eyes, patterns, and small accessories.
Control your brush pressure to keep lines clean and sharp. A steady hand and patience will help you avoid paint bleeding into unwanted areas.
- Try using a dry brush technique for subtle shading or texture.
- Keep a damp cloth nearby to quickly fix minor mistakes before they dry.
- Consider layering paint to build up color intensity gradually.
What details will you focus on to make your Funko Pop truly unique? Sometimes, the smallest touches create the biggest impact.
Sealing And Finishing
Sealing and finishing your custom Funko Pop is a key step for lasting quality. It protects the paint and adds a professional look. Proper sealing stops colors from fading or chipping during handling and display.
Choosing the right finish also affects the figure’s final appearance. You can make your Pop shine bright or keep it subtle and smooth. This step lets you customize the look to match your style.
Applying Sealant
Use a clear spray sealant designed for painted surfaces. Hold the can about 8-12 inches from the figure. Spray a thin, even coat to avoid drips or pooling. Let it dry completely before adding more layers.
Apply 2-3 light coats for full protection. Allow each coat to dry for at least 15-20 minutes. Sealants help keep paint safe from fingerprints and dust. They also strengthen the figure’s surface.
Adding Gloss Or Matte Finish
Gloss finish gives your Funko Pop a shiny, vibrant look. It reflects light and makes colors pop. Matte finish provides a smooth, non-reflective surface. It reduces glare and offers a natural look.
- Gloss is great for bright, bold characters.
- Matte works well for muted or vintage styles.
Choose the finish based on your character’s personality. Spray the finish after sealing, using the same light coat method. Allow each coat to dry fully for best results.
Display Ideas
Displaying your custom Funko Pop is as important as creating it. A great display highlights your figure’s details and personality. It also keeps your collection safe from dust and damage. Thoughtful display ideas can turn your room into a mini gallery.
Choosing Display Cases
Display cases protect your custom Funko Pop from dust and accidental falls. Clear acrylic cases offer great visibility and durability. Glass cabinets provide a classic look and keep multiple figures organized. Consider cases with adjustable shelves for different figure sizes. Stackable cases save space and allow creative arrangements. Choose cases that fit your room’s style and lighting.
Lighting Options
Good lighting makes your custom Funko Pop stand out. LED strip lights are popular for their brightness and low heat. They come in various colors to match your display theme. Spotlight lamps focus light on one figure for dramatic effect. Natural light works well but avoid direct sunlight to prevent fading. Small battery-powered lights add flexibility and portability. Experiment with lighting angles to find the best look.
Troubleshooting Tips
Creating a custom Funko Pop can be exciting, but small mistakes like paint smudges or broken parts can happen. Don’t let these setbacks ruin your project. With the right troubleshooting tips, you can fix these issues quickly and get your figure looking perfect again.
Fixing Paint Smudges
Paint smudges are common, especially if you’re working with multiple colors or layers. If you catch a smudge before the paint dries, gently wipe it off with a damp cotton swab. Be careful not to spread the paint further.
If the paint has dried, lightly sanding the area with a fine-grit sanding stick can smooth out bumps. After that, repaint the spot carefully with a small brush. Using thin layers helps avoid future smudges and gives you more control over details.
Have you tried using a sealant? Applying a clear matte or gloss sealant after each paint layer can protect your work and prevent smudges when handling. This simple step saved me hours of touch-ups on my last custom Pop.
Repairing Broken Parts
Accidents happen, and broken parts are frustrating but fixable. Use a strong, quick-drying adhesive like super glue to bond small breaks. Hold the pieces firmly together for at least 30 seconds to ensure a solid hold.
For larger or more delicate parts, using a two-part epoxy provides extra strength. Apply a tiny amount with a toothpick to avoid excess glue spreading onto visible areas. Patience is key—let the glue cure fully before moving your Pop.
If a piece is missing or too damaged, sculpting a replacement with air-dry clay or epoxy putty can work wonders. Shape it carefully to match the original, then sand and paint once dry. Have you ever fixed something that seemed impossible? Sometimes, a little creativity goes a long way.

Credit: www.tiktok.com
Frequently Asked Questions
How Do I Start Making A Custom Funko Pop?
Begin by selecting a base Funko Pop figure. Gather paint, sculpting tools, and reference images. Plan your design and work in small, detailed steps for best results.
What Materials Are Needed For Custom Funko Pops?
Essential materials include acrylic paints, sculpting clay, brushes, and sealant. You may also use fine sandpaper and glue for detailing and assembly.
Can I Customize Funko Pops Without Sculpting Skills?
Yes, you can customize using paint and decals. Simple modifications like repainting and adding accessories require minimal sculpting experience.
How Long Does It Take To Make A Custom Funko Pop?
A custom Funko Pop can take from a few hours to several days. Time depends on detail level, drying times, and your experience.
Conclusion
Creating a custom Funko Pop lets you show your unique style. It takes some patience and simple steps. Choose your design, gather materials, and start crafting. Each piece you make tells a story. Enjoy the process and have fun with every detail.
Customizing pops can be a relaxing hobby. It also makes a great gift for friends. Keep practicing, and your skills will grow. Give your collection a personal touch today.




