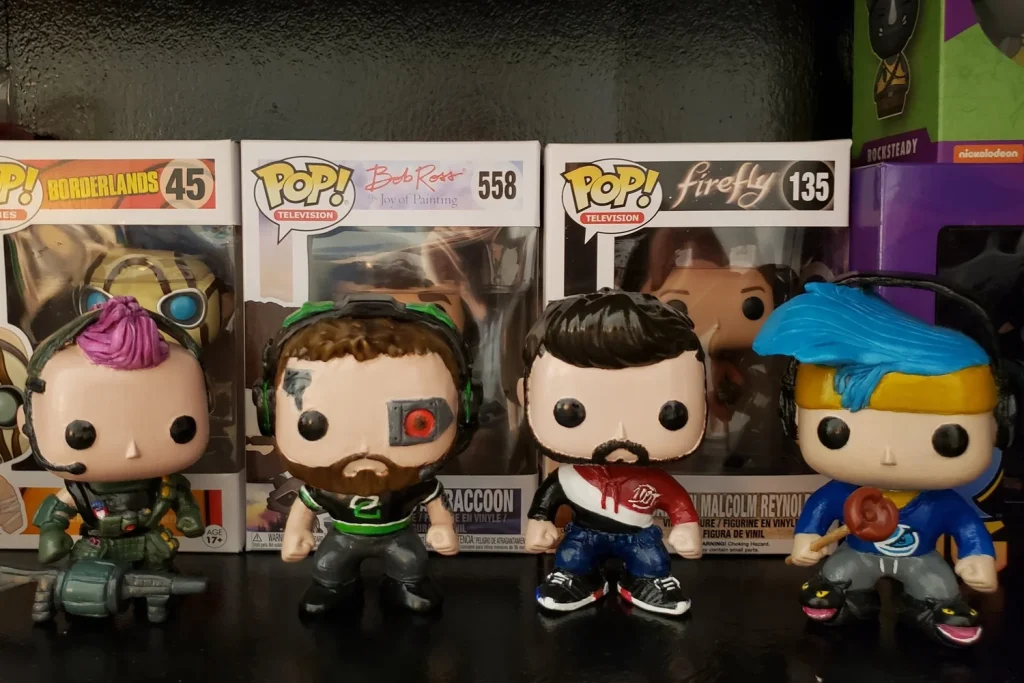
Are you tired of seeing the same old Funko Pops on every shelf? What if you could make your collection truly one-of-a-kind?
Customizing a Funko Pop is easier than you think, and it lets you bring your favorite characters to life in your own unique way. Whether you want to add a personal touch or create a completely new design, this guide will show you how to transform your Funko Pop into a masterpiece that stands out.
Ready to unlock your creativity and impress everyone with your custom creation? Keep reading to discover simple steps and expert tips that anyone can follow.
Choosing The Right Funko Pop
Choosing the right Funko Pop is crucial for customization. It sets the base for your creative journey. With countless options, it’s important to select wisely. Consider the character’s appeal and design details.
Popular Characters And Designs
Popular characters offer a familiar canvas. Fans love customizing heroes like Spider-Man or Batman. Their iconic designs inspire creativity and unique twists. Explore characters from movies, games, or TV shows. Choose one that excites you.
Designs with distinct features are ideal. Characters with colorful outfits or accessories stand out. They make customization enjoyable and rewarding. Pick designs with elements you can enhance.
Blank And Diy-friendly Options
Blank Funko Pops are perfect for customization. They offer a clean slate for your ideas. These are often white with no predefined features. Perfect for unleashing your creativity.
DIY-friendly options are flexible. They allow easy painting and sculpting. Choose Pops with smooth surfaces and minimal details. This makes alterations simple and fun.
- Consider your skill level.
- Start with simpler designs.
- Experiment with colors and textures.
Selecting the right Funko Pop is the first step to crafting your masterpiece. Think about what inspires you and dive into the creative process.
Essential Tools And Materials
Customizing a Funko Pop can be an exciting creative adventure, but having the right tools and materials makes all the difference. Without them, even the best ideas can fall flat or become frustrating. Let’s look at the essentials that will help you bring your vision to life effectively and enjoyably.
Painting Supplies
Choosing the right paints sets the foundation for your customization. Acrylic paints are a favorite because they dry quickly and offer vibrant colors. Consider a variety of brushes—from fine detail tips to broader ones—to handle different parts of your Pop.
Don’t forget a palette for mixing colors and some water containers for cleaning brushes. Have you ever struggled with a paint that just didn’t stick? Using a primer before painting can improve adhesion and make your colors pop.
Sculpting And Detailing Tools
Adding texture or reshaping parts of your Funko requires some basic sculpting tools. Clay like epoxy putty or polymer clay works great for crafting custom features. Use sculpting knives, small spatulas, and needle tools to refine shapes and add fine details.
Patience is key here; sculpting can be tricky but highly rewarding. Have you tried using toothpicks or old brushes to create texture? These everyday items often work wonders when you don’t have specialized tools on hand.
Adhesives And Sealants
Strong adhesives help attach new parts securely, while sealants protect your finished work. Super glue or a two-part epoxy can bond materials firmly, but apply carefully to avoid messes. For sealing, matte or gloss clear coats shield your paint and sculpting from wear.
Sealers also enhance the look, so choose one that matches the finish you want. Ever noticed how a shiny sealant can make colors look brighter? That’s the magic of a good sealant working for your custom Pop.
Preparing Your Funko Pop
Preparing your Funko Pop is a crucial step before diving into customization. It sets the foundation for a smooth painting process and ensures your design lasts longer. Neglecting preparation can lead to uneven paint, peeling, or loss of detail, which no collector or artist wants.
Cleaning And Priming
Start by giving your Funko Pop a thorough clean. Use warm water with mild soap and a soft brush or cloth to remove dust, oils, and any factory residues. This simple step helps the paint stick better and prevents bubbling or chipping later.
After drying completely, apply a primer suitable for vinyl or plastic. Priming creates a smooth surface and enhances paint adhesion. You can choose spray primers for an even coat or brush-on primers for more control.
Think about how your primer color affects your final look—white primer brightens colors, while gray can tone them down. Don’t rush this step; wait for the primer to dry fully before moving on. Have you ever tried painting without priming? The difference in finish is striking.
Removing Factory Paint
If you want a completely blank canvas, removing the original paint is essential. Use gentle methods like rubbing alcohol or acetone on a cotton swab to avoid damaging the vinyl. Be cautious—test a small area first to see how the material reacts.
For tough spots, fine-grit sandpaper can lightly scuff the surface, but don’t overdo it. Excessive sanding might ruin details or create uneven textures. Patience is key here; take your time to avoid mistakes that are hard to fix later.
Have you noticed how factory paint sometimes peels after a few years? Removing it yourself gives you control and confidence in your custom design. What’s the most challenging part you’ve faced while prepping your Pop?

Credit: www.tiktok.com
Painting Techniques
Painting your Funko Pop opens up a whole new level of customization. It lets you transform a simple figure into a unique piece that reflects your style. Understanding basic painting techniques is key to getting clean, vibrant, and long-lasting results.
Base Coating
Start with a smooth base coat to prepare the surface for other colors. Use a primer or a thin layer of acrylic paint that matches your final color palette. This step helps paint stick better and prevents colors from blending unintentionally.
Apply the base coat in thin, even layers. Thick coats can obscure details on your Funko Pop. Let each layer dry completely before adding the next one to avoid smudging.
Layering And Blending Colors
Layering adds depth and dimension to your figure. Begin with the darker shades and gradually add lighter tones on top. This technique highlights the contours and shapes of your Funko Pop.
For smooth transitions between colors, try blending while the paint is still wet. Use a clean brush or a small sponge to gently mix the edges. Have you tried blending two colors that seemed impossible to merge? It’s all about patience and subtle strokes.
Adding Fine Details
Details bring your Funko Pop to life. Use a fine-tipped brush or even a toothpick for tiny elements like eyes, buttons, or patterns. Steady your hand by resting your wrist on the table to avoid shaking.
Take your time with these details; rushing can lead to mistakes that are hard to fix. If you make an error, a small amount of rubbing alcohol on a cotton swab can help clean it up before the paint fully dries.
Sculpting And Modifying
Sculpting and modifying your Funko Pop can turn a simple figure into a unique piece that truly reflects your style. This process lets you add personality and detail that mass-produced figures often lack. Whether you want to enhance facial features, alter poses, or create entirely new accessories, getting hands-on with sculpting materials is key.
Adding Clay Features
Adding clay to your Funko Pop allows you to create custom details like new hair, accessories, or facial expressions. Use air-dry clay or polymer clay, which are easy to shape and stick well to the vinyl surface. Make sure to smooth the clay with a bit of water or a sculpting tool to avoid rough edges.
Try building small parts in layers rather than one thick piece; this prevents cracking and helps the clay dry evenly. Have you ever wanted your figure to sport a hat or a unique hairstyle? Adding clay features gives you complete control over these creative touches.
Carving And Reshaping
Carving lets you reshape existing parts of your Funko Pop, such as slimming down a bulky head or altering the shape of hands. Use a small craft knife or fine sandpaper to carefully remove material. Always carve slowly and check your progress frequently to avoid removing too much.
This technique works great if you want to correct imperfections or change the character’s expression. Think about how subtle changes can make your figure stand out—have you ever noticed how a slight eyebrow adjustment can add attitude?
Using Epoxy Putty
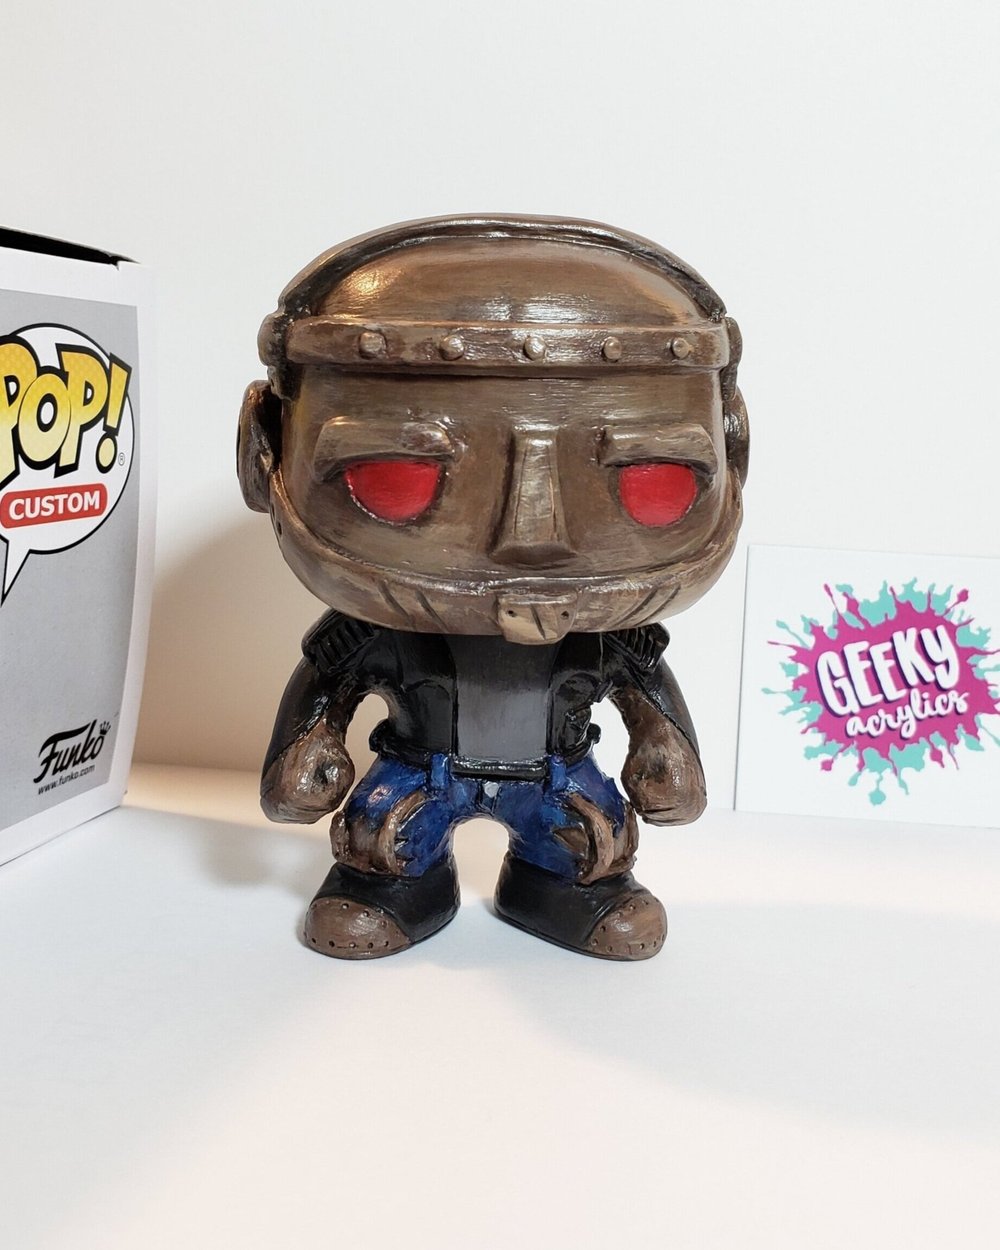
Epoxy putty is a powerful tool for customizing because it hardens into a durable, paintable surface. It comes in two parts that you mix before applying, giving you a workable time of about 5 minutes to shape it. You can mold fine details or create structural additions like armor, weapons, or elaborate clothing.
One tip from my experience: keep a small bowl of water nearby to wet your fingers and tools, which stops the putty from sticking too much. Are you ready to add complex details that won’t wear off over time? Epoxy putty will help you achieve that lasting impact.

Credit: www.reddit.com
Custom Accessories And Props
Custom accessories and props bring your Funko Pop to life. They add personality and create a unique look. Small details make a big difference. Crafting tiny items lets you tell a story with your figure. Securely attaching these pieces keeps your creation intact and lasting.
Creating Miniature Items
Start by choosing simple objects that match your Funko Pop’s theme. Use materials like polymer clay, foam, or paper. Shape the items carefully using small tools or your fingers. Paint them with acrylics for bright, lasting colors. Let each piece dry fully before handling. Keep sizes proportional to your Funko Pop for balance.
Attaching Accessories Securely
Select adhesives that work well with plastic and your chosen materials. Super glue or hot glue work best for strong bonds. Use a toothpick or small brush to apply glue precisely. Hold the accessory in place until the glue sets. Avoid excess glue to keep the look clean. Check attachments regularly to ensure they stay firm over time.
Sealing And Finishing
Sealing and finishing are crucial steps in customizing your Funko Pop. They protect your hard work and give your figure the perfect final look. Whether you want a sleek shine or a subtle matte effect, the finish you choose impacts both appearance and durability.
Matte Vs Glossy Finishes
Matte finishes offer a smooth, non-reflective surface that reduces glare and highlights painted details without distracting shine. They create a more natural, understated look, which works well for characters with muted tones or realistic styles.
Glossy finishes, on the other hand, provide a shiny, reflective surface that makes colors pop and gives your figure a vibrant, polished look. This finish is great for characters with bold colors or those you want to stand out on your shelf.
Think about the vibe you want your customized Funko Pop to give off. Do you prefer a subtle, soft touch or something eye-catching and bright? Your choice will affect how your figure interacts with light and how details are perceived.
Protecting Your Artwork
Sealing your work is essential to prevent paint chipping, fading, or smudging over time. A good sealant acts like a shield against dust, moisture, and accidental scratches.
Use spray sealants designed for collectibles, and apply them in thin, even layers. Multiple light coats are better than one heavy coat to avoid drips or uneven texture.
Try sealing in a well-ventilated area and allow plenty of drying time between coats. This ensures the best durability without compromising your paintwork.
Have you ever seen a perfectly painted figure lose its charm because the paint started peeling? Taking the time to seal your Funko Pop properly will keep your creation looking fresh and vibrant for years to come.
Troubleshooting Common Issues
Customizing a Funko Pop can be a fun and rewarding experience, but it’s not without its challenges. You might run into paint smudges or even accidentally break a piece during your creative process. These common issues don’t have to ruin your project—knowing how to troubleshoot them can save your custom figure and keep your momentum going.
Fixing Paint Smudges
Paint smudges happen more often than you’d like, especially if you’re working with multiple layers or colors. The key is to act quickly before the paint fully dries. You can gently wipe away the smudge with a damp cotton swab if it’s still wet.
If the paint has dried, lightly sanding the area with fine-grit sandpaper smooths out imperfections. Then, carefully repaint the spot using a small brush. Have you tried thinning your paint? Thinner paint layers reduce smudging and give you better control.
Repairing Broken Parts
Breaking a small part of your Funko Pop can be frustrating, but it’s often fixable. Use a strong, quick-drying adhesive designed for plastics to reattach broken pieces. Hold the parts together firmly for a minute or two to ensure a solid bond.
If the piece is missing or too damaged, consider sculpting a replacement using epoxy putty. This material can be molded and painted to match your figure. Have you ever thought about turning a break into a unique design element? Sometimes imperfections add character to your custom piece.
Inspiration And Ideas
Finding the right inspiration for customizing your Funko Pop can make the entire process more exciting and personal. Ideas can come from anywhere—your favorite movies, hobbies, or even your own imagination. The key is to connect with something meaningful to you, which will shine through in your finished piece.
Popular Custom Themes
Many creators start with themes that resonate widely. Some popular choices include:
- Pop Culture Icons:Characters from movies, TV shows, and video games often inspire custom Funko Pops. Imagine turning your favorite superhero into a unique figure with a twist.
- Personalized Versions:Some customize Pops to look like themselves or friends, adding a fun, personal touch.
- Seasonal Themes:Holiday or seasonal designs, like Halloween or Christmas, add festive flair to your collection.
Think about what excites you most. Could it be a blend of your hobbies and favorite characters? Your creativity is the limit.
Showcasing Your Creations
Once you finish customizing, sharing your work can be incredibly rewarding. You might surprise yourself with how others appreciate your creativity.
Try these ways to showcase your Funko Pops:
- Social Media:Platforms like Instagram and TikTok let you reach fellow collectors and artists instantly. Use hashtags to connect with the community.
- Display Shelves:Create a dedicated space at home where your custom Pops can shine. Lighting and themed arrangements can make a big difference.
- Online Marketplaces:If you’re confident, selling or trading your creations can open new doors and inspire others.
How will you share your customized Funko Pop story with the world? Your unique touch deserves an audience.
Credit: www.geekyacrylics.com
Frequently Asked Questions
How Do I Start Customizing A Funko Pop?
Begin by choosing a base Funko Pop figure. Gather supplies like paint, brushes, and sealant. Plan your design clearly before painting.
What Materials Are Best For Funko Pop Customization?
Use acrylic paints for vibrant, lasting colors. Fine brushes help with details. Sealants protect your design from wear.
Can I Customize Funko Pop Without Painting?
Yes, use accessories, decals, or clay additions. These methods add unique details without paint. They are beginner-friendly and reversible.
How Long Does Funko Pop Customization Usually Take?
It varies by design complexity. Simple paint jobs take a few hours. Detailed work might need several days for drying.
Conclusion
Customizing a Funko Pop lets you create a unique collectible. It brings your favorite characters to life in new ways. Small changes can make a big difference. You can use paints, clay, or accessories. Each step is simple and fun to try.
Personal touches make your Funko Pop special. Enjoy the process and express your creativity. Your customized figure will stand out on any shelf. Keep practicing to improve your skills over time. Happy customizing!




