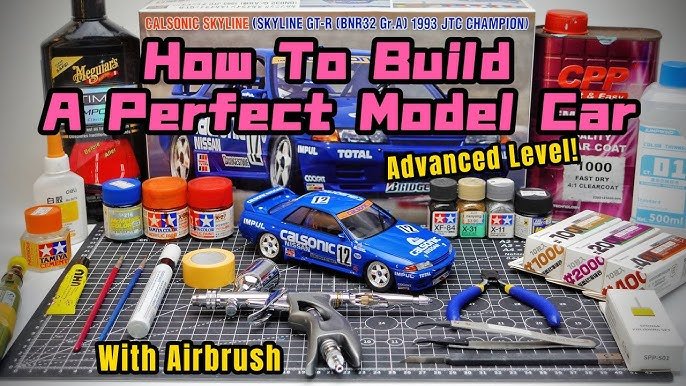
Have you ever wanted to create your very own toy car? Imagine the fun and pride you’ll feel when your hands bring a cool, speedy car to life.
Building toy cars isn’t just for experts—it’s something you can do step by step, even if you’ve never tried before. In this guide, you’ll discover simple, clear instructions that make the process exciting and easy. Ready to turn your ideas into a real, rolling toy car?
Let’s get started and unlock your creative side!

Credit: www.youtube.com
Materials Needed
Gathering the right materials is the first step to building toy cars. Using simple, easy-to-find items makes the process fun and smooth. Focus on materials that are safe and easy to work with.
Choose materials that fit your design and tools. This helps create a sturdy and attractive toy car. Below are some key materials needed for this project.
Body Materials
- Wood blocks or craft sticks
- Plastic or foam sheets
- Cardboard pieces
- Light metal sheets (optional)
Wheels And Axles
- Plastic or wooden wheels
- Metal rods or wooden dowels for axles
- Small bearings for smooth rotation (optional)
Tools And Fasteners
- Glue (wood glue or strong craft glue)
- Small nails or screws
- Screwdriver or hammer
- Sandpaper for smoothing edges
- Paint and brushes for decoration
Additional Materials
- Rubber bands for traction
- Markers or stickers for details
- Small magnets (for special features)
- Plastic caps or buttons (for headlights)

Credit: www.youtube.com
Choosing The Right Design
Choosing the right design is a crucial step in building toy cars that are both fun to play with and visually appealing. Your design will affect how easy the car is to build, how well it performs, and how much joy it brings. Think about what kind of toy car you want—fast racer, classic model, or maybe a quirky custom creation.
Consider The Purpose Of Your Toy Car
Ask yourself what you want your toy car to do. Should it zoom quickly across the floor, or is it meant to look cool on a shelf? A fast car needs a lightweight, aerodynamic shape, while a display model can focus more on detailed features.
Knowing the purpose guides your design choices and saves you from frustration later. What fun is a car that looks great but can’t move smoothly?
Choose Materials That Match Your Design
Your design will decide which materials work best. For example, if you want a sleek racer, lightweight wood or plastic is ideal. If durability is your priority, sturdy materials like metal or thick plastic might be better.
Think about how easy it will be to cut, shape, and join these materials. Have you tried building with something that was too hard to work with? It can turn a fun project into a frustrating one.
Balance Simplicity And Detail
A simple design can be perfect for beginners or quick projects. It lets you focus on building skills without getting overwhelmed. But if you’re up for a challenge, adding details like decals, paint, or small accessories can make your car unique.
Remember, the best design fits your skills and time. Would you rather finish a cool car quickly or spend days on a complex model that might never get finished?
Plan For Functionality And Movement
Think about how your toy car will move. Will it roll on wheels, glide on sliders, or maybe even have a pull-back motor? Your design needs to leave enough space for these parts and make sure they fit well.
Test your ideas on paper or with simple prototypes. Have you noticed that some cars look great but don’t roll properly? Planning movement early prevents that problem.
Preparing The Workspace
Setting up your workspace is the first important move before building toy cars. A well-prepared area helps you stay organized and focused, making the whole process smoother and more enjoyable. Think about how much easier it is to find tools and parts when everything has its place.
Choosing The Right Location
Pick a spot with good lighting and enough room to spread out your materials. Natural light works best, but a bright desk lamp can do the trick too. Avoid cramped spaces where you might feel rushed or cluttered.
Gathering Essential Tools And Materials
Collect all the tools you’ll need: screwdrivers, glue, sandpaper, and small clamps are common essentials. Keep parts like wheels, axles, and wooden blocks close by. Having everything at hand saves time and keeps frustration away.
Organizing Your Workspace
Use small containers or trays to separate parts by size or type. Labeling these containers can prevent mix-ups, especially if you have many small pieces. A clean and tidy space lets you focus on building rather than searching.
Ensuring Safety Measures
Safety should never be overlooked. Keep sharp tools out of reach if children are around and wear protective glasses if you’re sanding or cutting. A clutter-free area also reduces the risk of accidents.
Have you noticed how much easier it is to concentrate when your workspace is neat? Take a moment to arrange your area before starting. It could make the difference between a frustrating experience and a fun, successful build.
Step-by-step Assembly
Building a toy car is a rewarding project that combines creativity with hands-on skills. The key to success lies in carefully assembling each part, paying attention to details that affect both appearance and performance. Let’s break down the assembly process into clear steps so you can build a toy car that runs smoothly and looks great.
Building The Chassis
The chassis is the foundation of your toy car. Start by selecting a sturdy base material like wood or plastic that can hold all parts firmly.
Cut the base into the desired shape and size, ensuring it’s balanced to avoid wobbly rides. Drill holes where the axles will go, making sure they are aligned perfectly straight. Misaligned holes can cause your car to veer off course.
Consider reinforcing the chassis with small braces or glue to keep it rigid. Have you noticed how a solid base makes a car feel more stable when you push it?
Attaching The Wheels
Wheels bring your toy car to life, so attaching them properly is crucial. Choose wheels that fit well on the axles and spin freely without too much friction.
Insert the axles through the chassis holes, then slide the wheels on. Secure the wheels with nuts, clips, or glue depending on your design.
Test the movement by rolling the car on a flat surface. If the wheels don’t spin smoothly, check for tight spots or misalignment. A simple adjustment here can transform how far and fast your car can go.
Creating The Body
The body gives personality to your toy car. Use lightweight materials like balsa wood, foam, or plastic sheets to build the shape you want.
Cut and assemble the body parts with glue or small screws. Paint or decorate your car to reflect your style or favorite colors.
Think about aerodynamics—does your design look like it can cut through air easily? Even small changes in shape can affect how your car performs when pushed.
Adding Decorative Elements
Adding decorative elements transforms your toy car from a simple model into a unique creation that reflects your style. This step lets you customize colors, patterns, and small details that bring personality and character to your build. Think about what makes a car visually exciting to you—speed stripes, shiny finishes, or quirky decals—and then bring those ideas to life.
Painting The Toy Car
Painting is the foundation of your toy car’s look. Choose bright, bold colors or sleek metallics depending on the vibe you want to create. Use spray paint for an even coat or fine brushes for detailed work—both have their perks.
Before painting, sand the surface lightly to help the paint stick better. Applying a primer first can also make colors pop and last longer. Remember to paint in thin layers, letting each dry to avoid drips or clumps.
Have you tried mixing colors to create your own shade? It’s a simple trick that can make your car truly one of a kind. Test on a spare piece of wood or plastic before applying it to your car.
Adding Stickers And Details
Stickers and decals add personality quickly and easily. Look for designs that match your theme—flames, numbers, racing logos, or custom shapes. Apply them carefully to avoid bubbles and wrinkles.
If you want a sharper look, use a clear coat spray over the stickers to protect them from peeling or fading. Small details like tiny headlights, mirrors, or even a mini license plate can elevate your toy car’s realism.
Have you thought about using household items like buttons or beads for headlights? Sometimes, the best ideas come from what’s already around you. Adding these little touches makes the car feel alive and finished.
Testing And Playing
Testing and playing with your toy car brings your creation to life. This stage lets you check how well the car moves and feels. It also shows which parts work well and which need fixing. Playing with the car helps you enjoy the hard work and sparks new ideas for improvement.
Safety Checks
Safety is important before any play session. Examine all parts carefully. Make sure wheels spin smoothly and parts stay tight. Check for sharp edges or small loose pieces. These could cause injuries or get lost easily.
Use a soft cloth to wipe the toy car clean. Avoid rough surfaces that might damage the car. Always supervise young children during playtime. Keep the toy car away from water to protect wooden or electronic parts.
Enjoying The Toy Car
Find a flat, smooth surface to test your car. A table, floor, or driveway works well. Push the car gently and watch it roll. Notice how far and fast it goes.
Try different ways to play:
- Make a small race track with books or blocks
- Challenge friends or siblings to races
- Use ramps to see how the car jumps
- Decorate the car with stickers or paint
Playing with your toy car builds creativity and fine motor skills. It also brings joy and pride in your work.
Tips For Creativity
Creativity is the heart of building toy cars. It makes the process enjoyable and helps you create something truly unique. Here are some tips to spark your imagination and push your toy car projects to the next level.
Experimenting With Materials
Don’t limit yourself to traditional materials like wood or plastic. Try using items from around your home, such as bottle caps for wheels or cardboard scraps for the body.
Mixing materials can lead to surprising results. For example, combining metal pieces with lightweight foam can give your toy car both durability and speed.
Have you ever thought about using recycled items? Old toys, broken electronics, or even kitchen utensils can provide interesting textures and shapes. This not only boosts creativity but also teaches resourcefulness.
Customizing Designs
Adding your personal touch turns a simple toy car into a masterpiece. Paint your car with bold colors or add stickers and decals that reflect your style.
Think about adding features like spoilers, headlights, or even tiny interiors. These little details can make your car stand out and feel more realistic.
Ask yourself what story your toy car tells. Is it a race car ready for the track or a rugged off-roader? Let your design choices reflect that story, making your creation more meaningful and fun to play with.

Credit: www.youtube.com
Frequently Asked Questions
What Materials Are Best For Building Toy Cars?
Wood, plastic, and metal are great materials for toy cars. Wood is easy to shape, plastic is lightweight, and metal offers durability. Choose materials based on your design, safety, and the tools available for crafting.
How Do I Make Toy Car Wheels Spin Smoothly?
Use small axles and lubricate them lightly to ensure smooth wheel rotation. Make sure wheels fit well on axles without too much friction. Proper alignment and balance also help wheels spin freely and improve car movement.
Can I Build Toy Cars Without Advanced Tools?
Yes, basic tools like scissors, glue, and simple saws work well. You can use household items and craft supplies to build toy cars. Creativity and patience matter more than advanced tools for beginners.
How Do I Paint And Decorate Toy Cars Safely?
Use non-toxic, water-based paints for safe decoration. Apply thin coats and let each layer dry fully. Avoid small parts that can peel off and pose choking hazards for kids.
Conclusion
Building toy cars can be fun and simple. Start with basic materials and follow easy steps. Each small part adds to your car’s look and function. Practice helps improve your skills every time. Enjoy the process and be patient with mistakes.
Creating toy cars brings joy to both kids and adults. Keep trying, and your cars will become better. Share your creations with friends and family too. This hobby can teach you about design and mechanics. Have fun building your own toy cars today!




