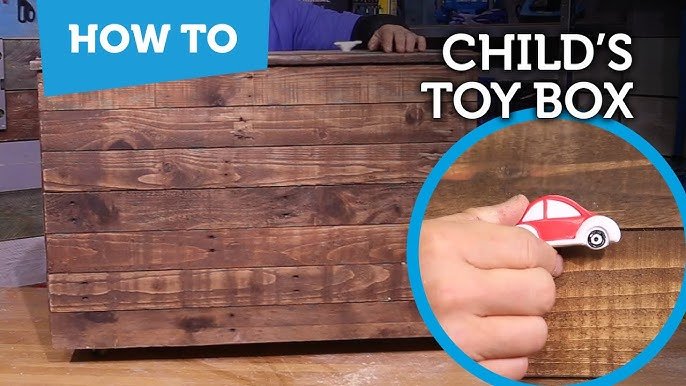
Are you looking for a simple way to organize your child’s toys while adding a touch of charm to their room? Building a wooden toy chest might be the perfect project for you.
Imagine having a sturdy, beautiful chest that not only keeps toys tidy but also becomes a treasured piece in your home. In this guide, you’ll discover easy steps to create your own wooden toy chest, even if you’re new to woodworking.
By the end, you’ll have the confidence and know-how to build something practical and special for your family. Ready to get started? Let’s dive in!
Materials And Tools
Gather quality wood, screws, nails, and wood glue for a sturdy toy chest. Basic tools like a saw, drill, hammer, and measuring tape make the building process easier and safer.
Building a wooden toy chest is a rewarding project. It combines creativity with craftsmanship. To create a sturdy and beautiful piece, careful selection of materials and tools is essential. This guide will walk you through the necessary supplies.Choosing The Right Wood
Selecting the appropriate wood affects the chest’s durability and appearance. Pine is affordable and easy to work with. Oak offers strength and elegance, perfect for a classic look. Cedar repels insects, making it ideal for storing toys. Consider the wood grain and finish, as these will impact the final look.Essential Tools Needed
Having the right tools makes construction easier. A saw is crucial for cutting wood to size. A drill helps in creating holes for screws. A sander smooths edges and surfaces. A measuring tape ensures accuracy in dimensions. Clamps hold pieces together during assembly. Safety gear like goggles and gloves protect during work.Additional Supplies
Besides wood and tools, several supplies are needed. Wood glue secures joints and adds stability. Screws and nails hold pieces tightly together. Hinges allow the lid to open and close smoothly. Handles make the chest easy to move. Paint or stain gives the chest a polished finish. Sandpaper is used for final smoothing.
Credit: www.ana-white.com
Planning Your Toy Chest
Planning your toy chest sets a strong base for the entire project. It guides every cut, joint, and finish. Careful thought here saves time and effort later. Focus on size, safety, and shape first. A clear plan makes building easier and the final product better.
Design And Dimensions
Think about where the toy chest will stand. Measure the space carefully to fit well. Decide on the size based on the toys it must hold. Keep it low enough for kids to reach inside. Choose a style that matches the room’s decor.
- Height: Easy for children to access
- Width and depth: Fit the available space
- Shape: Simple or decorative based on taste
Safety Considerations
Safety is key for any children’s furniture. Avoid sharp edges by planning rounded corners. Use non-toxic wood finishes and paint. Plan a lid that stays open or closes slowly. Check for gaps where fingers could get caught.
- Rounded edges and corners
- Safe, non-toxic materials
- Secure lid with slow-close hinges
- Sturdy construction to prevent tipping
Sketching The Layout
Create a simple drawing to guide your work. Sketch front, side, and top views for clarity. Mark all dimensions clearly on the sketch. Highlight where the hinges and handles will go. This visual plan helps avoid mistakes and speeds up work.
- Draw all sides of the chest
- Label measurements and parts
- Note hardware placement
- Review for balance and function
Cutting The Wood Pieces
Cutting the wood pieces is a crucial phase in building your wooden toy chest. Accurate cuts ensure the chest fits together perfectly, giving it strength and a polished look. Taking your time here can save you from frustrating adjustments later on.
Measuring And Marking
Start by measuring each piece twice before making any marks. Use a reliable tape measure and a pencil with a sharp tip for clear lines. Mark the cut lines clearly on the wood, and add arrows to show which side to cut.
Have you ever cut a board only to realize the measurements were off? I learned the hard way that even a small error can throw off the entire assembly. Taking extra care here prevents wasted wood and time.
Using The Saw Safely
Safety is key when using saws. Always wear safety goggles and keep your fingers clear of the blade. Secure the wood firmly with clamps to avoid slipping during the cut.
Choose the right saw for your cuts. A circular saw works well for straight lines, while a jigsaw handles curves better. Don’t rush—steady, controlled cutting will give you cleaner edges.
Preparing Each Panel
After cutting, check each panel for smoothness and accuracy. Sand the edges lightly to remove splinters and sharp corners. This step not only makes the chest safer but also helps the paint or stain adhere better.
Lay out the panels in the order they’ll be assembled. Seeing them together can help you spot any mistakes before you move on. Have you ever caught a miscut just in time? It’s a small win that makes a big difference.

Credit: www.bentswoodworking.com
Assembling The Chest Frame
Assembling the chest frame is where your wooden toy chest truly starts to take shape. This part requires patience and precision to ensure the structure is sturdy and safe for children. Pay close attention to how each piece fits together; a well-assembled frame will hold up for years of play.
Joining The Sides
Begin by aligning the side panels of the chest. Use clamps to hold the edges firmly in place, preventing any slipping during assembly.
Apply wood glue along the edges before securing them with screws or nails. This combination creates a strong bond that can withstand rough use.
Check that the corners form perfect right angles using a carpenter’s square. Have you ever noticed how even a slight misalignment can make the whole chest wobbly?
Attaching The Bottom
Once the sides are joined, it’s time to fix the bottom panel. Position it inside the frame so that it rests evenly on the edges of the side panels.
Screw the bottom panel into place from underneath to keep the surface smooth and safe for little hands. Adding a bead of glue here can prevent creaking sounds when the chest is in use.
Make sure there is no gap between the bottom and sides; this avoids dirt collecting inside and maintains the chest’s structural integrity.
Securing The Back Panel
The back panel adds crucial stability to your toy chest. Align it carefully with the edges of the frame before attaching.
Use screws spaced evenly along the edges to hold the back panel firmly in place. Don’t forget to pre-drill holes to avoid splitting the wood.
Have you thought about sanding the back panel’s edges after installation? This simple step can prevent scratches and make the chest safer to handle.
Building And Attaching The Lid
Building and attaching the lid is an important part of creating a wooden toy chest. The lid should fit well and open smoothly. It needs to be safe for children to use. This section explains how to build the lid, attach hinges, and add safety features to protect little fingers.
Constructing The Lid
Start by cutting a wooden board to the size of the chest opening. Use smooth, sanded wood to avoid splinters. Reinforce the lid with support beams underneath to keep it strong. Attach the beams with wood glue and screws for extra strength. Check that the lid is flat and fits snugly over the chest.
Installing Hinges
Choose sturdy hinges that can hold the weight of the lid. Position the hinges evenly along the back edge of the lid and chest. Mark screw holes carefully before drilling pilot holes to prevent wood from splitting. Use screws that match the hinge size. Test the lid by opening and closing it several times to ensure smooth movement.
Adding Safety Features
- Install soft-close hinges or lid supports to prevent slamming.
- Add a finger guard to stop small hands from getting pinched.
- Use rounded edges on the lid to reduce injury risk.
- Check all screws are tight and secure for safe use.
These safety touches make the toy chest safer and more child-friendly. They help avoid accidents and keep playtime fun.

Credit: www.ana-white.com
Sanding And Finishing
Sanding and finishing your wooden toy chest is where your project truly comes to life. This stage not only enhances the beauty of the wood but also ensures the toy chest is safe and durable for everyday use. Paying attention to detail here will make your toy chest stand out and last for years.
Smoothing Surfaces
Start by sanding all surfaces with medium-grit sandpaper to remove any rough spots and splinters. Move to finer grit for a smooth, even finish that feels pleasant to the touch, especially important for a child’s toy chest.
Don’t rush this step. Sanding too quickly can leave uneven patches. Take your time and check frequently by running your hand over the surface. Have you noticed how a well-sanded chest feels almost like silk? That’s what you want.
Applying Paint Or Stain
Choose a child-safe paint or stain that complements your room’s decor. Paint will give you a bright, solid color, while stain shows off the wood grain beautifully. Remember to test the color on a scrap piece or an unseen part of the chest first.
Apply thin, even coats with a brush or cloth, letting each layer dry completely before adding the next. This builds up a rich, even finish without drips or blotches. How might the color choice affect the toy chest’s appeal over time?
Sealing For Durability
Seal your toy chest with a clear, non-toxic polyurethane or varnish to protect it from scratches and spills. This step is crucial because kids’ toys and hands can be rough on furniture.
Apply multiple thin coats, sanding lightly between each for the best adhesion and smoothness. Your toy chest will not only look polished but also withstand the wear and tear of playtime. What kind of finish would make you feel confident handing this toy chest over to a child?
Adding Final Touches
Adding final touches brings your wooden toy chest to life. These small details improve both look and function. They make the chest more user-friendly and attractive. Focus on simple steps that add charm and ease of use.
Attaching Handles
Handles help carry the chest easily. Choose handles that fit the size and weight of the chest. Metal or wooden handles work well. Attach them with strong screws or bolts for safety.
- Measure handle placement carefully
- Mark spots for screws
- Pre-drill holes to avoid splitting wood
- Tighten screws firmly
Good handles make moving the chest smooth and safe for kids.
Decorative Elements
Decorations add personality to the chest. Use simple shapes, stencils, or stickers. Paint fun patterns or favorite characters. Choose colors that match the room’s theme.
- Use child-safe paint and materials
- Keep decorations smooth to avoid splinters
- Seal painted areas with clear varnish
- Let all layers dry completely
Decorative touches make the chest inviting and unique.
Personalizing Your Chest
Personal touches make the toy chest special. Add the child’s name using paint or wood letters. Attach small plaques or engrave initials. Include favorite colors or themes for a personal feel.
- Use stencils for neat lettering
- Choose durable materials for name tags
- Place personalization where it is visible
- Protect personalized areas with finish
Personalized chests create a sense of ownership and pride.
Maintenance Tips
Keeping your wooden toy chest in great shape takes a bit of attention. Regular maintenance not only preserves its look but also ensures it remains safe for kids. Let’s look at simple ways you can care for your chest to enjoy it for years.
Cleaning And Care
Dust your toy chest often using a soft cloth to avoid scratches. For sticky spots, dampen the cloth slightly with water and mild soap—never soak the wood.
Consider using natural oils like lemon or linseed oil to nourish the wood and keep it from drying out. Have you noticed how a little oil can bring out the wood’s rich color?
Repairing Minor Damages
Small scratches and dents happen easily, but they’re easy to fix. Use a wood filler or wax sticks that match the chest’s color to cover imperfections.
If the hinges or handles get loose, tighten them gently with a screwdriver. It’s surprising how a loose hinge can make a chest less safe for children.
Extending The Chest’s Life
Place the chest away from direct sunlight and heating vents to prevent warping and fading. Think about the room’s layout—could shifting the chest improve its lifespan?
Apply a clear sealant every couple of years to protect the wood from spills and wear. What small step can you take today to make your wooden toy chest last even longer?
Frequently Asked Questions
What Materials Are Needed To Build A Wooden Toy Chest?
To build a wooden toy chest, you need plywood or solid wood, wood screws, wood glue, sandpaper, paint or stain, and hinges. Basic tools like a saw, drill, measuring tape, and screwdriver are also essential for accurate assembly and finishing.
How Long Does It Take To Build A Wooden Toy Chest?
Building a wooden toy chest usually takes 4 to 6 hours, depending on your skill level. This includes cutting, assembling, sanding, and painting or staining. Planning and preparation can reduce the overall time and improve the quality of the finished chest.
What Type Of Wood Is Best For A Toy Chest?
Pine, plywood, or hardwood like oak are best for toy chests. Pine is affordable and easy to work with. Hardwood offers durability, while plywood provides stability and cost-effectiveness. Choose wood that is smooth and safe for children.
How To Ensure Safety When Building A Toy Chest?
Use smooth, splinter-free wood and round all edges. Secure hinges and screws properly to avoid sharp points. Consider adding a soft-close lid to prevent finger pinching. Use non-toxic paints or finishes to ensure child safety.
Conclusion
Building a wooden toy chest is a fun and useful project. You can create a safe place for toys to stay tidy. Using simple tools and steps makes it easy to follow. Personal touches can make the chest unique and special.
This project helps improve woodworking skills bit by bit. Enjoy the process and the final result. A handmade toy chest brings joy to any room. Start building today and see your work come to life.




