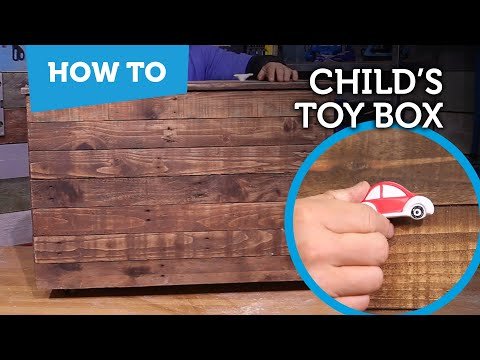
Looking for a fun and rewarding project that adds charm to your home? Building a wooden toy box is easier than you think—and it’s a great way to keep your child’s toys organized and your space tidy.
Imagine creating a sturdy, beautiful storage box with your own hands, tailored exactly to your needs. You’ll discover simple steps, helpful tips, and practical advice that make the process smooth and enjoyable. Ready to turn raw wood into a lasting treasure?
Let’s get started!
Choosing The Right Wood
Choosing wood that is sturdy and smooth ensures safety and durability for the toy box. Pine and cedar work well because they are easy to cut and have a nice finish. Avoid soft or splintery wood to keep the box child-friendly.
Choosing the right wood is crucial for crafting a sturdy toy box. Wood type affects durability, appearance, and safety. Understanding different wood types helps make informed choices.Types Of Wood For Toy Boxes
Several wood types work well for toy boxes. Each has unique features. – Pine: Lightweight and easy to handle. It’s affordable with a natural look. – Birch: Offers strength and smooth texture. Ideal for painting. – Oak: Known for its durability. Provides a classic, robust appearance. – Maple: Resistant to wear. Perfect for long-lasting projects. Choose wood based on desired finish and budget.Wood Quality And Safety
Quality wood ensures the toy box lasts. Avoid warped or cracked pieces. – Check for Knots: Ensure knots are minimal to prevent weakening. – Smooth Surface: Look for wood with a smooth surface. It prevents splinters. – Non-Toxic: Ensure the wood is free from harmful chemicals. Safe for kids. Safe wood guarantees a hazard-free environment.Tools Needed For Cutting And Shaping
Proper tools make the job easier. Ensure tools are in good condition. – Saw: Used for cutting wood to size. Choose a saw that suits the wood type. – Sandpaper: Essential for smoothing edges. Prevents injuries from sharp corners. – Drill: Necessary for creating screw holes. Makes assembly easier. – Chisel: Useful for detailed shaping. Allows for creativity in design. With the right tools, creating a beautiful toy box becomes simpler.
Credit: www.ana-white.com
Preparing Your Workspace
Preparing your workspace is the foundation of a smooth and enjoyable project. A well-organized and safe area helps you focus on building your wooden toy box without distractions or hazards. Take the time to set up correctly, and you’ll save effort and avoid frustration down the line.
Setting Up A Safe Work Area
Your safety comes first. Choose a spacious spot with good lighting and ventilation. If you’re working indoors, open windows or use a fan to keep fresh air moving, especially when sanding or painting.
Clear the area of clutter and anything that could trip you up. Keep your workspace dry to avoid slipping. Don’t forget to wear safety gear like goggles, gloves, and a dust mask—these small steps protect you from injury and dust inhalation.
Have a fire extinguisher nearby if you’re using power tools that might spark. Think about how you’ll handle waste like sawdust and scraps—plan a place to collect and dispose of them safely.
Gathering Materials And Tools
Gather everything before you start building. Having all materials and tools at hand keeps your workflow smooth and helps you stay focused. Here’s a checklist that worked well for me:
- Wood panels (pine or plywood)
- Measuring tape and pencil
- Saw (hand saw or power saw)
- Screwdriver or drill
- Wood screws and nails
- Sandpaper or electric sander
- Wood glue
- Paint or wood finish (optional)
Checking your tools beforehand avoids surprises. Are your drill batteries charged? Is your saw blade sharp? What about clamps to hold pieces steady? These details can make or break your building experience.
Have you ever started a project only to realize halfway that you’re missing a crucial tool? That moment is frustrating. Avoid it by making a habit of preparing thoroughly—your future self will thank you.
Measuring And Cutting Wood Pieces
Measuring and cutting wood pieces accurately sets the foundation for your wooden toy box. It’s easy to underestimate this stage, but precise measurements and clean cuts make assembly smoother and the final product sturdier. Have you ever tried building something only to find parts don’t fit? That’s why getting this part right matters.
Accurate Measurements
Start by double-checking your design plan and writing down every measurement clearly. Use a reliable tape measure and mark your wood with a sharp pencil for clean lines. Remember, measure twice and cut once—this old advice saves more wood and frustration than you might think.
Consider the thickness of your wood when marking; it affects how pieces fit together. For example, if your side panels are 3/4 inch thick, adjust your base dimensions accordingly. Are you leaving space for hinges or a lid? Mark those spots carefully to avoid surprises during assembly.
Cutting Techniques For Beginners
If you’re new to cutting wood, start with a handsaw or a simple circular saw. Hold the wood firmly and follow your marked lines slowly to stay precise. Rushing a cut can cause splinters or uneven edges, which might ruin your toy box’s look and strength.
Practice on scrap wood before cutting your actual pieces. This helps you get comfortable with the tool and improves your control. A tip I learned the hard way: use painter’s tape along the cut line to reduce splintering and get cleaner edges.
Do you have a safe, flat surface to cut on? Setting up a proper workspace makes a huge difference in your cutting accuracy. Don’t forget safety gear—goggles and gloves protect you while keeping your focus sharp.
Assembling The Toy Box Frame
Assembling the toy box frame is where your project starts taking real shape. This step sets the foundation for a sturdy and functional toy box that will last. Paying attention to how the pieces fit together now saves you frustration later.
Joining The Sides
Begin by aligning the side panels carefully. Use clamps to hold them steady—this keeps your hands free and your joints tight.
Choose screws or nails that won’t split the wood. Pre-drilling holes can make the process smoother and prevent cracks.
Check the corners with a carpenter’s square to ensure they form perfect right angles. A crooked frame here means a wobbly box later.
Securing The Base And Lid
Once the sides are joined, it’s time to attach the base. Position the base inside the frame and secure it with screws from underneath to keep the surface smooth.
For the lid, consider adding hinges for easy opening and closing. It’s a small detail that makes a big difference in daily use.
Think about the weight of the lid; you don’t want it too heavy for a child to lift. Using lightweight wood or adding handles can help.
Sanding And Smoothing Surfaces
Sanding and smoothing surfaces is a key step in building a wooden toy box. It prepares the wood for finishing and ensures safe, smooth edges. Proper sanding helps remove rough spots, splinters, and marks from cutting or assembling.
Taking time to sand well improves the toy box’s look and feel. It also protects children from scratches or splinters while using the box. This section explains the tools needed and tips to achieve a smooth finish on your wooden toy box.
Tools For Sanding
- Sandpaper with various grits (start coarse, then fine)
- sanding block or sponge for even pressure
- Orbital or palm sander for faster work on larger areas
- Detail sanding tools for corners and small spaces
- Vacuum or brush to clear dust between sanding steps
Tips For A Smooth Finish
- Begin with coarse grit sandpaper (around 80-100 grit)
- Sand along the wood grain, not against it
- Use a sanding block for flat surfaces to avoid uneven sanding
- Switch to finer grits (150-220 grit) for a polished feel
- Pay special attention to edges and corners to remove sharpness
- Wipe away dust with a damp cloth before applying finish
- Repeat sanding after the first coat of finish for best results

Credit: jp.pinterest.com
Painting And Decorating
Painting and decorating your wooden toy box adds personality and charm. It also protects the wood from damage. Choosing the right paint and decoration style is important for safety and appearance. The right finish makes the toy box fun and durable. Let’s explore how to pick safe paints and creative decoration ideas.
Choosing Safe Paints
Use paints labeled non-toxic and child-safe. These paints do not contain harmful chemicals. Water-based paints are a good choice. They dry quickly and have less odor. Avoid spray paints and oil-based paints for toy boxes. They may release harmful fumes.
Check for certification marks like ASTM D-4236. This shows the paint meets safety standards. Also, pick paints with low or no VOC (volatile organic compounds). VOCs can cause health issues, especially in children.
Test the paint on a small wood piece first. Make sure it adheres well and looks smooth. Use a clear, safe sealant after painting. This adds extra protection and makes cleaning easier.
Creative Decoration Ideas
Decorate the toy box to match the child’s favorite themes or colors. Simple shapes like stars, hearts, or animals work well. Use stencils for neat and consistent designs. Stickers and decals can add fun details too.
Try these decoration tips:
- Paint stripes or polka dots for a playful look
- Add the child’s name with colorful letters
- Use sponges or brushes to create texture
- Attach wooden or foam shapes with glue
- Draw scenes like forests, oceans, or space
Keep designs bright but not overwhelming. Let the child help with painting or choosing colors. It makes the toy box even more special and unique.
Adding Finishing Touches
Adding finishing touches to your wooden toy box makes it both beautiful and practical. These final steps improve how the box looks and how safe it is for kids. Small details can change the whole project. Focus on easy ways to add handles and safety features.
Installing Handles Or Knobs
Choose handles or knobs that are easy for children to grip. Rounded shapes work best to avoid sharp edges. You can use metal, wood, or plastic options depending on the style you want.
- Measure and mark where the handles will go
- Pre-drill holes to prevent wood from splitting
- Screw the handles or knobs firmly into place
- Check that they turn or pull smoothly
Handles add convenience and a polished look to your toy box. Pick sizes that fit small hands comfortably.
Safety Features For Kids
Safety is key for any children’s furniture. Add features that protect little fingers and avoid accidents. Use child-safe finishes and smooth all surfaces with fine sandpaper.
- Install soft-close hinges to prevent slamming
- Cover sharp corners with corner guards or sand them down
- Use non-toxic paint or sealant safe for kids
- Check for any loose screws or splinters
These simple safety steps make your toy box a safe place for kids to play and store toys.

Credit: www.ana-white.com
Maintaining Your Wooden Toy Box
Maintaining your wooden toy box ensures it stays both beautiful and functional for years to come. A little regular care can prevent bigger problems and keep the wood looking fresh. Let’s look at simple ways to clean and repair your toy box to extend its life.
Cleaning Tips
Dust and dirt can build up quickly on wooden surfaces, so regular cleaning is key. Use a soft cloth slightly dampened with water to wipe down the toy box. Avoid soaking the wood to prevent warping or damage.
If you want to add a little shine, mix mild soap with water, but be sure to rinse the cloth well before wiping again. Dry the surface immediately with a dry towel to stop moisture from seeping in.
Have you noticed sticky spots or crayon marks? A small amount of baking soda on a damp cloth can gently remove stubborn stains without scratching the wood.
Repairing Minor Damages
Small scratches and dents happen, especially in a busy playroom. You don’t need to replace your toy box because of them.
For minor scratches, try rubbing a walnut or crayon in a matching color over the damaged area. This simple trick blends the scratch with the wood naturally.
If you find loose joints or small cracks, wood glue can fix these quickly. Apply a little glue, clamp the area if possible, and wipe off any excess before it dries.
Have you thought about sanding down rough spots? Light sanding followed by a fresh coat of finish can make the toy box look almost new again. Keeping repair supplies handy means you can fix issues as soon as you spot them.
Frequently Asked Questions
What Materials Are Needed To Build A Wooden Toy Box?
To build a wooden toy box, you need plywood or solid wood, wood screws, sandpaper, wood glue, paint or stain, and hinges. Basic woodworking tools like a saw, drill, measuring tape, and clamps are also essential for assembly and finishing.
How Long Does It Take To Build A Wooden Toy Box?
Building a wooden toy box typically takes 3 to 5 hours. This depends on your woodworking experience and the complexity of the design. Allow extra time for sanding, painting, or staining to achieve a smooth, durable finish.
What Are The Best Wood Types For Toy Boxes?
Pine, plywood, and hardwoods like oak or maple are ideal for toy boxes. Pine is affordable and easy to work with. Hardwood offers durability but costs more. Choose smooth, splinter-free wood to ensure child safety.
How Can I Make A Toy Box Safe For Children?
Ensure all edges are rounded or sanded smooth to prevent splinters. Use non-toxic paint or stain and secure hinges with safety stops to avoid pinched fingers. Avoid sharp hardware and choose sturdy construction methods for stability.
Conclusion
Building a wooden toy box is a fun and useful project. It saves money and adds charm to any room. You can customize the size and design as you like. Using simple tools makes the job easier. Taking time to sand and finish keeps the box safe and smooth.
This project teaches basic woodworking skills step by step. Kids will enjoy putting toys away in their new box. Try building one to enjoy a handy and personal storage solution. Simple, practical, and rewarding.




