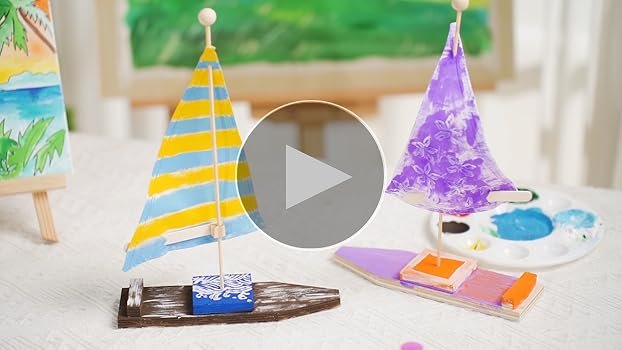
Have you ever wanted to create something special with your own hands? Building a toy wooden sailboat is a fun and rewarding project that anyone can enjoy.
Whether you’re a beginner or just looking for a new hobby, this guide will walk you through each simple step. By the end, you’ll have a beautiful sailboat that you made yourself—something you can be proud of or even share with friends and family.
Ready to start? Let’s dive in and bring your wooden sailboat to life!

Credit: www.tiktok.com
Materials And Tools
Gathering the right materials and tools is your first move toward building a toy wooden sailboat that looks great and sails well. The quality of what you use shapes not only the boat’s appearance but also how sturdy and functional it will be. Let’s break down what you need to have on hand before starting your project.
Essential Supplies
- Wood:Choose lightweight, easy-to-cut wood like balsa or basswood. These woods are perfect for small crafts and won’t weigh your sailboat down.
- Wood Glue:A strong, fast-drying wood glue keeps your pieces together firmly. Avoid general-purpose glues that may not hold well on wood.
- Sandpaper:Various grits (start with 120, finish with 220) help smooth the edges and surfaces for a polished look and safer handling.
- Paint or Wood Finish:Pick water-resistant paint or a clear varnish to protect your sailboat from moisture and add color or shine.
- Sail Material:Lightweight fabric, like cotton or nylon, works best. It should catch the wind easily without being too heavy.
- String or Thin Rope:Use this for rigging the sails and securing parts.
- Small Nails or Pins:Optional but helpful for reinforcing joints where glue alone isn’t enough.
Recommended Tools
- Craft Knife or Small Saw:Essential for cutting wood precisely. A sharp blade helps prevent splintering.
- Clamps:These hold pieces together while the glue dries, ensuring strong bonds without shifting parts.
- Ruler and Pencil:Accurate measurements and markings keep your cuts and assembly neat and consistent.
- Paintbrushes:A few small brushes let you apply paint or finish with control and detail.
- Awl or Pin Vise:Useful for making tiny holes in wood to thread string through or place pins.
- Tweezers:Handy for positioning small parts or handling delicate sail rigging.
Have you ever struggled with glue drying too fast or wood splitting while cutting? I found that using clamps and a sharp craft knife made all the difference in keeping my sailboat pieces perfect. Paying attention to your tools can save frustration and improve your final result.
Designing The Sailboat
Designing the sailboat is the first creative step in building your wooden toy. This stage shapes the look and feel of your project. A good design makes the building process smooth and enjoyable.
Choosing A Simple Design
Pick a design with basic shapes and few parts. Simple designs are easier to cut and assemble. They save time and reduce mistakes. Think about a small hull, one mast, and a basic sail. Avoid complex curves and tiny details. Simple designs still look great and float well.
Sketching The Blueprint
Draw your sailboat plan on paper before cutting wood. Use a pencil and ruler for straight lines. Show the side and top views to see the full shape. Mark the size of each part clearly. This helps measure and cut wood accurately. Keep the blueprint neat for easy reading during building.
Preparing The Wood
Preparing the wood is a crucial part of building your toy wooden sailboat. The quality and precision of your materials set the foundation for a sturdy, beautiful model. Taking the time to carefully choose and cut your wood can make all the difference between a project that lasts and one that falls apart too soon.
Selecting The Right Type Of Wood
Choosing the right wood affects both the look and durability of your sailboat. Softwoods like pine or cedar are easy to work with and lightweight, making them perfect for beginners. Hardwoods such as oak or maple offer strength but can be trickier to cut and shape.
Think about how your sailboat will be used. Will it float in water or just serve as decoration? For a boat that might get wet, cedar is a great option because it resists water damage. You want to avoid woods that splinter easily or absorb too much moisture.
Cutting The Pieces
Accurate cutting is key to fitting the parts together smoothly. Use a fine-toothed saw for clean edges, and take your time measuring twice before cutting once. Even small mistakes here can cause gaps or misalignment in your sailboat’s frame.
Secure your wood firmly before cutting to prevent slips. If you’re new to woodworking, try practicing cuts on scrap pieces first. This helps build confidence and reduces waste.
Credit: www.walmart.com
Constructing The Hull
Constructing the hull is the heart of building a toy wooden sailboat. This part forms the boat’s main body and must be sturdy and smooth. A well-made hull helps the sailboat float and sail well. Focus on shaping, fitting, and joining wood pieces accurately. This ensures strength and balance in your sailboat’s design.
Assembling The Base
Start by selecting flat wooden planks for the hull’s base. Cut the planks to match the boat’s length and width. Sand the edges to avoid splinters and create a smooth finish. Lay the planks side by side on a flat surface. Use wood glue along the edges to join them securely.
Clamp the planks to hold them tight while drying. Check for any gaps between planks and fill with wood filler if needed. Let the glue dry completely before moving to the next step. A solid base gives the hull stability and shape.
Securing The Structure
Add wooden ribs or frames across the base to support the hull’s shape. Position each rib evenly along the base. Attach ribs using wood glue and small nails for extra strength. Hammer nails carefully to avoid splitting the wood.
Reinforce the hull by adding thin wooden strips along the ribs. These strips help hold the hull’s curve and prevent warping. Sand the entire hull to smooth rough spots and prepare for painting or sealing. A secure hull structure ensures your sailboat lasts long and performs well.
Creating The Mast And Sails
Creating the mast and sails is an exciting part of building a toy wooden sailboat. The mast stands tall and holds the sails, which catch the wind to make the boat move. This section guides you through crafting a sturdy mast and attaching sails that look great and work well.
Building The Mast
Choose a straight wooden dowel for the mast. The length should be about twice the height of the boat’s hull. Sand the dowel smooth to avoid splinters. Cut the dowel to size using a small saw or strong scissors.
To secure the mast, drill a small hole in the center of the boat’s hull. The hole should fit the mast snugly. Insert the mast and glue it in place using wood glue. Hold it steady until the glue dries completely.
For extra strength, add a small wooden block inside the hull under the mast. This block supports the mast and keeps it upright during play.
Attaching The Sails
Use lightweight fabric or paper for the sails. Cut the material into triangles or rectangles, depending on your design. Reinforce the edges with tape or glue to prevent tearing.
Attach the sails to the mast with thread or thin string. Tie one end to the top of the mast and the other to the bottom or to a small wooden boom. Keep the sails taut but not too tight.
Use small holes punched in the sails for threading the string. This makes the sails secure and easy to adjust. Test the sails by gently blowing on them to see if they catch air.
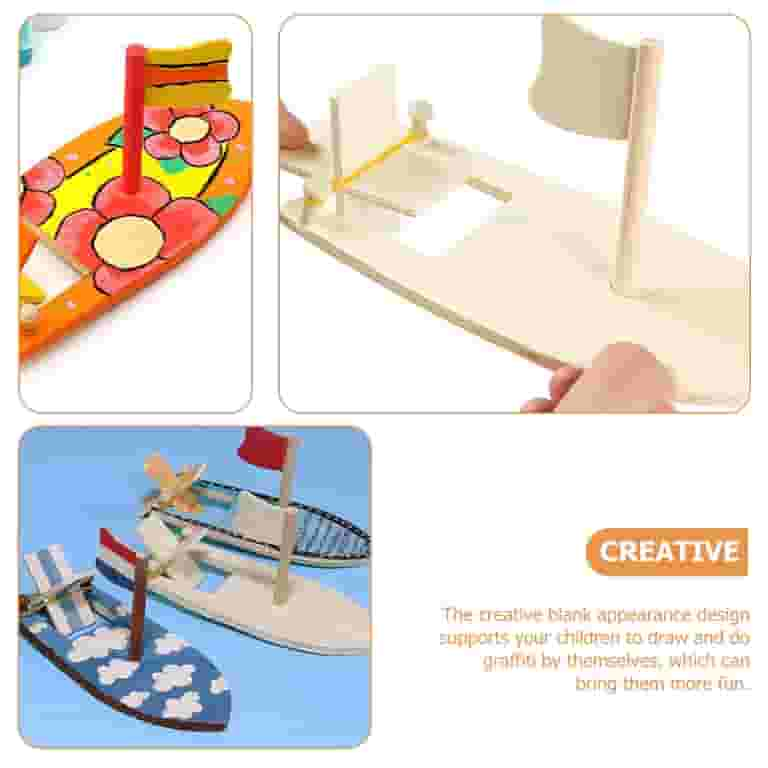
For decoration, paint or draw simple designs on the sails. This adds character and makes the toy sailboat unique.
Adding Finishing Touches
Adding finishing touches to your toy wooden sailboat is where your creation truly comes to life. This stage transforms a simple wooden frame into a charming, eye-catching piece. Paying close attention here not only enhances the look but also protects your work for years to come.
Sanding And Painting
Start by sanding every surface smoothly. Use fine-grit sandpaper to avoid rough spots that can catch on fingers or fabric. A smooth finish also helps paint stick better and look more vibrant.
Choose paint that is safe for wood and non-toxic, especially if the toy will be handled by children. Applying several thin coats of paint works better than one thick layer and prevents drips. Allow each coat to dry fully before adding the next.
Have you thought about using different colors for the hull, sails, and deck? This creates contrast and makes the boat more visually appealing. You might even use painter’s tape to create clean lines or patterns for a professional look.
Decorative Elements
Adding small details can make your sailboat unique. Consider attaching tiny flags, miniature ropes, or decals to mimic real sailboat features. These elements add personality and tell a story about your boat.
Try using natural materials like twine for rigging or small beads for portholes. These simple additions enhance texture and detail without complicating the build. How do you want your sailboat to stand out on a shelf or playtime?
Don’t forget about sealing your decorations with a clear varnish. This protects your paint and details from wear and tear. Plus, it adds a subtle shine that makes your sailboat look polished and ready to sail.
Testing The Sailboat
Testing your wooden toy sailboat is a crucial step to ensure it performs well and floats as expected. This phase helps you catch any design flaws and make necessary adjustments before the boat hits the water for good. Let’s look at how to check its stability and conduct a smooth trial run.
Ensuring Stability
Start by placing your sailboat on a flat surface to see if it sits evenly. If it tips or leans to one side, it means the weight distribution needs tweaking. Adjust the placement of the mast or add small weights inside the hull to balance it out.
Check the sail’s position as well. If the sail is too heavy or off-center, it can cause the boat to tip when in water. You want your boat to stay upright even in a gentle breeze, so test by gently blowing on the sail and watching how the boat reacts.
Trial Run In Water
Next, it’s time for the real test—placing your sailboat in water. Use a calm body of water like a bathtub or a small pond. Observe how the boat floats and moves with the wind or any water currents.
If the boat leans, takes on water, or sinks, don’t get discouraged. Adjust the hull’s waterproofing or rebalance the boat. Sometimes even a small tweak in the sail angle can improve its sailing ability dramatically.
How does your boat respond to different wind directions? Try tilting the sail to various angles and see if it catches wind effectively without losing balance. This simple experiment can teach you a lot about sailing dynamics and improve your design skills.
Troubleshooting Common Issues
Building a toy wooden sailboat can be fun and rewarding. Still, some common problems might appear during or after construction. Knowing how to fix these issues helps keep your boat seaworthy and enjoyable. This section covers simple fixes for common troubles that may arise.
Fixing Leaks
Leaks cause your sailboat to take on water and sink. Check all joints and seams for gaps or cracks. Use waterproof glue or wood filler to seal any openings. Sand the area smooth after it dries for a better seal. Applying a coat of marine varnish adds extra protection against water.
Test the boat in a small container of water to find leaks. Watch for bubbles or water entering inside. Mark these spots and repeat sealing until the boat stays dry. Regular checks keep your sailboat strong and leak-free.
Improving Balance
A poorly balanced sailboat may tip or lean to one side. Place the boat on a flat surface to observe how it rests. Add small weights inside the hull to counterbalance any tilt. Use clay or small metal pieces for easy adjustment.
Check the mast and sail position as well. Centering the mast helps keep the boat upright. Adjust the sail angle to catch wind evenly. Proper balance improves sailing performance and prevents capsizing.

Credit: www.amazon.com
Frequently Asked Questions
What Materials Are Needed To Build A Wooden Sailboat?
You need quality wood, sandpaper, wood glue, waterproof paint, nails, a small sail, and basic woodworking tools. Choosing lightweight, durable wood like pine or cedar ensures a sturdy toy sailboat.
How Do I Create A Stable Base For The Sailboat?
Shape the hull with a flat bottom and gently curved sides. This design enhances stability and balance in water. Sand edges smoothly to prevent tipping.
What Type Of Sail Works Best For A Toy Sailboat?
Use lightweight fabric or paper for the sail. It should be proportional to the boat’s size and securely attached to a wooden mast for proper wind catch.
How Can I Waterproof My Wooden Sailboat Effectively?
Apply several coats of waterproof paint or marine varnish. Let each coat dry completely to protect the wood from water damage and extend the toy’s lifespan.
Conclusion
Building a toy wooden sailboat is fun and rewarding. You can create a special toy with simple tools and wood. Each step brings you closer to a unique sailboat. Enjoy the process and learn new skills along the way. This project suits beginners and experienced crafters alike.
Your handmade sailboat will bring joy and spark imagination. Try different designs to make it truly yours. Keep practicing to improve your woodworking skills. Start building today and watch your toy sailboat come to life.




