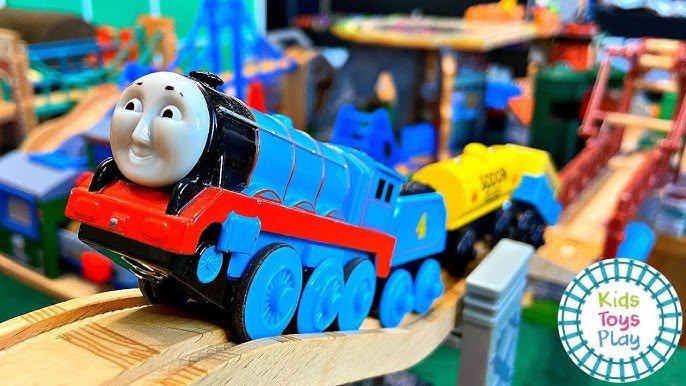
Have you ever dreamed of creating your own toy train? Imagine the joy of watching it chug along the tracks you built with your own hands.
Building a toy train is not just a fun project—it’s a chance to bring your creativity to life and enjoy a hands-on experience that anyone can do. Whether you’re a beginner or looking to improve your skills, this guide will walk you through each step clearly and simply.
Ready to make something amazing? Let’s get started and turn your ideas into a working toy train you’ll be proud of.
Choosing Materials
Choosing the right materials is a key step in building a toy train that is both durable and safe for children. The materials you select affect not only the look and feel of the toy but also its safety and longevity. Let’s look closely at the types of wood and safe paints and finishes that work best for your project.
Types Of Wood
Wood plays a crucial role in the quality of your toy train. Softwoods like pine are easy to cut and shape, making them ideal for beginners. However, they can dent or scratch easily, so consider hardwoods like maple or birch if you want a sturdier build.
Hardwoods are tougher but require sharper tools and more patience. Their tight grain gives a smooth finish and holds paint better. Have you noticed how some wooden toys last for years without signs of wear? That’s often because they use high-quality hardwood.
- Pine:Affordable and easy to work with, but less durable.
- Maple:Strong and smooth, excellent for fine details.
- Birch:Durable with a nice grain, perfect for painting.
- Alder:Soft hardwood, easy to sand and paint.
Safe Paints And Finishes
Your choice of paint and finish matters a lot for children’s toys. Look for non-toxic, water-based paints labeled as safe for toys or food contact. They dry quickly, have low odor, and do not contain harmful chemicals.
Finishes protect the wood and paint from chips and scratches. Natural oils like linseed or beeswax give a nice shine and keep the wood breathable. Avoid finishes with strong solvents or heavy chemicals—they can be harmful if ingested or inhaled.
- Water-based acrylic paints:Bright colors, safe and easy to clean.
- Milk paint:Non-toxic and gives a vintage look.
- Beeswax finish:Natural and food-safe, adds a soft sheen.
- Pure tung oil:Penetrates wood deeply for lasting protection.
Have you tested your paints and finishes on scrap wood before applying them to your toy train? This simple step can save you from surprises and ensure a beautiful, safe final product.

Credit: www.youtube.com
Designing Your Train
Designing your toy train sets the foundation for a great build. This stage helps you visualize and plan every part of your train. Careful design ensures your train looks good and works well. Keep your ideas clear and simple for easy building.
Sketching Plans
Start by drawing your train on paper. Sketch the engine, cars, and tracks. Use simple shapes like rectangles and circles. Focus on the overall look and key details. These rough sketches guide your building steps. Change your sketches as you get new ideas.
Selecting Scale And Dimensions
Choose the size of your train carefully. Scale means how big your train is compared to a real one. Pick a scale that fits your space and tools. Common scales like HO or N are easy to find parts for. Measure each train part to keep all pieces matching. Write down dimensions to avoid mistakes during building.
Tools Needed
Building a toy train requires specific tools to make the process smooth and enjoyable. Using the right tools helps create precise parts and ensures the train fits together well. Preparing these tools before starting saves time and prevents frustration. Below, find the essential tools and safety equipment needed for this project.
Essential Tools
- Measuring tape or ruler – for accurate measurements
- Small saw – to cut wood or plastic pieces
- Sandpaper – smooths rough edges
- Glue – holds parts together securely
- Paintbrushes and paint – for decoration
- Drill with small bits – to make holes
- Clamps – keep pieces steady while drying
- Screwdriver – for small screws if needed
- Wire cutters – if using metal parts or wiring
Safety Equipment
- Safety goggles – protect eyes from dust and debris
- Gloves – protect hands from sharp tools and glue
- Dust mask – prevents inhaling sawdust
- Apron or old clothes – keep clothing clean
- Well-lit workspace – reduces accidents and improves precision

Credit: m.youtube.com
Crafting Train Parts
Crafting the parts of a toy train is the heart of building this classic plaything. Each piece shapes the train’s look and function. The engine and carriages must fit well together. Careful crafting brings your toy train to life.
Creating The Engine
The engine is the most important part. Start with a solid base using wood or plastic. Cut it into a rectangle for the body. Add a cylinder shape on top for the boiler. Use small wheels that spin easily under the base.
Paint the engine bright colors to make it look fun. Attach small details like a chimney and windows. Use glue or small nails to hold parts firmly. Make sure the wheels turn smoothly for play.
Building The Carriages
Carriages connect to the engine and carry cargo or passengers. Use the same base material as the engine for uniformity. Cut rectangular shapes slightly smaller than the engine. Add small wheels that match the engine’s size.
Design carriages with open tops for cargo or closed boxes for passengers. Paint them in colors that match or complement the engine. Attach hooks or magnets to connect carriages to each other and the engine. Check that connections are strong but easy to detach.
Assembly Process
Building a toy train is a rewarding project that requires patience and attention to detail. The assembly process is where your vision takes shape, piece by piece. It’s essential to focus on how parts connect and the overall stability to ensure your train runs smoothly and looks great.
Connecting Parts
Start by organizing all your pieces and identifying how they fit together. Each component has a specific place—wheels, chassis, engine, and carriages must link precisely for proper function.
Use the instructions as a guide, but trust your judgment when something feels off. Sometimes, slight adjustments in alignment make a big difference in how parts fit.
Pay close attention to the connectors—slots, pegs, and screws. Tighten screws just enough to hold parts firmly without stripping the threads or cracking plastic.
Ensuring Stability
After assembling the parts, test the train’s stability by placing it on a flat surface. Does it sit evenly, or does it wobble? Stability affects both appearance and performance.
If you notice any imbalance, check the wheel alignment and tighten any loose joints. Adding small washers or spacers can help stabilize shaky sections.
Remember, a stable toy train resists wear and tear better and provides a smoother ride on tracks. How often have you seen a toy fall apart because a crucial connection was overlooked?
Credit: www.youtube.com
Painting And Decorating
Painting and decorating your toy train is where creativity truly comes alive. This stage transforms plain wood or plastic into a charming miniature locomotive with personality. The choices you make here will set the tone and style of your entire project.
Color Choices
Choosing the right colors can make your toy train stand out. Think about the mood you want to create—do you want a bright, playful look or something more vintage and classic? Bright reds, blues, and yellows often appeal to kids and create a cheerful vibe.
Consider using contrasting colors to highlight different parts of the train, like the wheels, body, and cabin. If you want a realistic look, study photos of old trains for color inspiration. Using a simple palette of two or three colors keeps the design clean and eye-catching.
Adding Details
Details make your toy train feel special and unique. You can use fine brushes or even markers to add small touches like windows, doors, or rivets. Details don’t have to be perfect; they just need to suggest the features of a real train.
Try adding stickers or small decals for logos or numbers. You can also glue tiny bits of fabric or paper to mimic curtains or signs. These little extras give your train character and invite closer inspection.
Have you thought about how your decorating choices tell a story? Each detail can reflect the train’s imagined history or purpose. What story do you want your train to tell?
Testing And Adjustments
Testing and adjustments are key steps in building a toy train. This phase ensures the train runs smoothly and safely. It helps spot any issues early before the final use. Careful testing improves performance and extends the train’s life.
Checking Functionality
Start by placing the train on the track. Observe if the wheels move without slipping or sticking. Listen for unusual noises like grinding or clicking. Check all parts for stability and proper fit. Test the train at different speeds to see how it reacts. Make sure the engine runs without overheating or stopping. Confirm the power supply connects well and delivers consistent power. Try running the train forward and backward to verify direction control.
Making Improvements
Identify any loose connections or parts that need tightening. Adjust wheel alignment to prevent derailment. Lubricate moving parts to reduce friction and noise. Replace worn or damaged components with new ones. Adjust the track layout if the train struggles on curves or inclines. Fine-tune the motor speed for smooth acceleration. Test again after each change to ensure progress. Keep notes of adjustments for future reference.
Creative Variations
Creative variations make building a toy train more fun and unique. They allow you to add personality and extra fun features. Experimenting with designs and special touches turns a simple model into a memorable creation.
Adding Special Features
Special features add excitement to your toy train. Think about lights that flash or small sound boxes that mimic train noises. Moving parts like spinning wheels or a smoke effect create a realistic feel. You can also attach tiny cargo or figures to make the train story more lively.
Personalizing Designs
Personalizing your train means making it truly yours. Paint it in favorite colors or add stickers of animals and shapes. Use different materials like wood, plastic, or metal for a unique look. Adding names or numbers makes the train stand out and feel special to the builder.
Frequently Asked Questions
What Materials Are Needed To Build A Toy Train?
You need wood or plastic, glue, paint, small wheels, and a motor if powered. Basic tools include a saw, sandpaper, and screwdriver.
How Do I Design A Simple Toy Train?
Start with a basic shape, draw each part separately, then cut and assemble. Use lightweight materials for easy handling and smooth movement.
Can I Make A Battery-powered Toy Train?
Yes, use a small electric motor and batteries. Connect wires carefully and secure components inside the train body for safety.
How Long Does It Take To Build A Toy Train?
Typically, it takes 3 to 5 hours depending on design complexity and skill level. Allow extra time for drying paint and glue.
Conclusion
Building a toy train can be fun and rewarding. Start with simple steps and take your time. Use safe materials and follow instructions carefully. Enjoy watching your creation come to life. Share your work with friends or family. Keep practicing to improve your skills.
Every train you build teaches you something new. Have fun and stay creative with each project.




