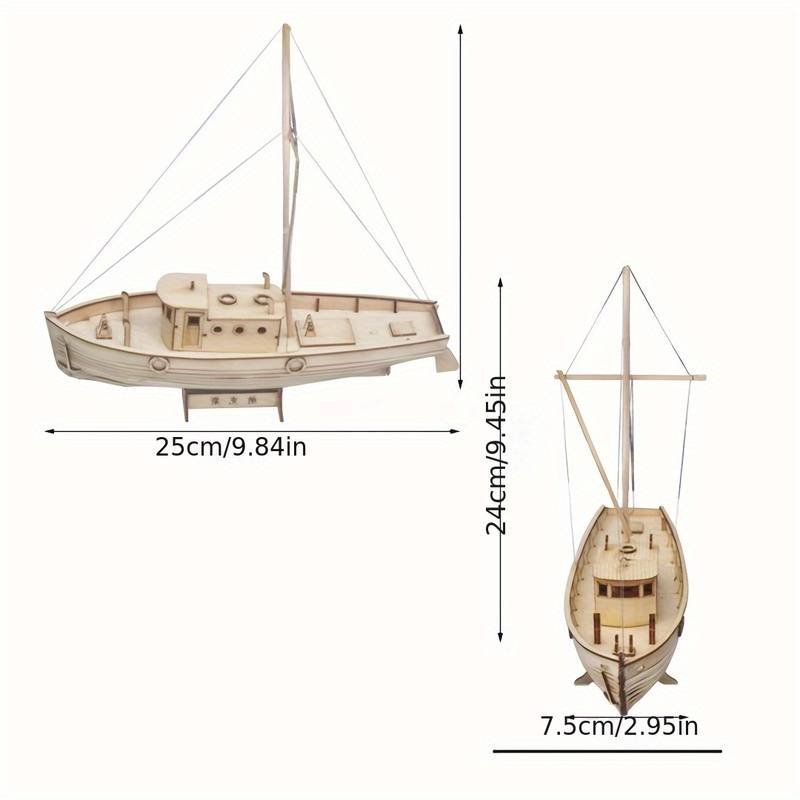
Have you ever wanted to create something simple, fun, and rewarding with your own hands? Building a toy sailboat is a perfect way to do just that.
Imagine watching your little boat glide across the water, made entirely by you. It’s easier than you think, and the sense of pride you’ll feel is unbeatable. In this guide, you’ll find clear steps, useful tips, and all the information you need to bring your toy sailboat to life.
Ready to start crafting something amazing? Let’s dive in!

Credit: crazeekidsart.com
Materials Needed
Gather wood, glue, paint, a small sail, and string for building your toy sailboat. Simple tools like scissors and a ruler help shape materials accurately. These basic items create a fun and sturdy boat to sail.
Building a toy sailboat can be a fun and rewarding project. The right materials are essential for a successful build. Let’s explore the materials you’ll need for creating your own toy sailboat.Wood And Tools
Choosing the right wood is crucial. Lightweight and durable woods like balsa or pine are ideal. These woods are easy to shape and work with. For tools, you’ll need a small saw or a craft knife. A sanding block is helpful for smoothing edges. A drill is useful for making holes for the mast.Sails And Rigging Supplies
Fabric is needed for the sails. Lightweight cotton or nylon works well. You’ll need string or thread for the rigging. Thin wire can be used for extra support. Small eyelets can help secure the rigging.Finishing Materials
Paint or varnish will protect the wood. It also adds color and style. Choose non-toxic paints for safety. Brushes are needed to apply paint or varnish. For a polished look, sand the surface before painting.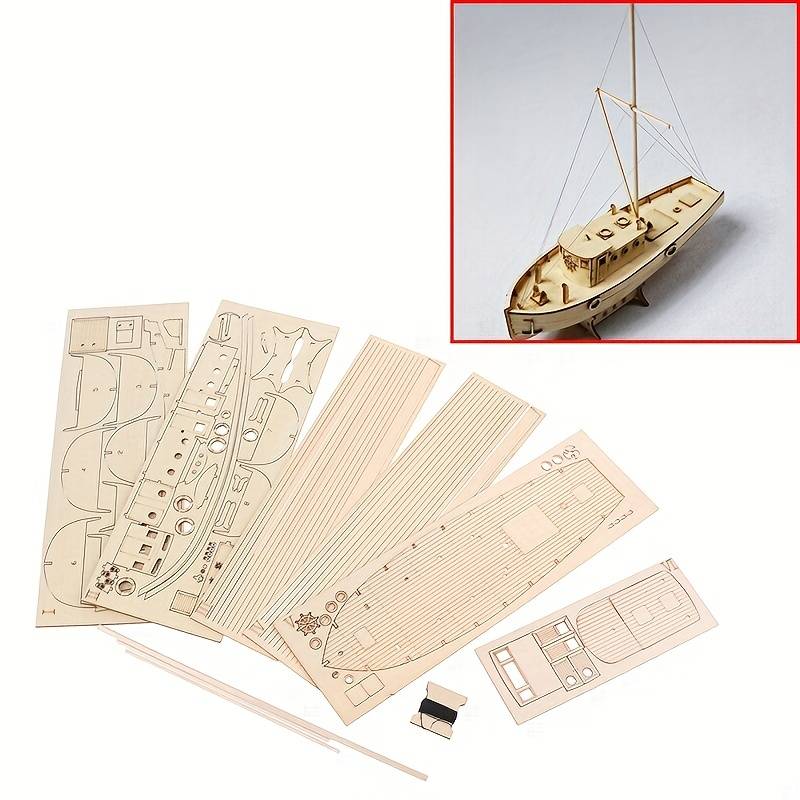
Credit: theraleighbeergarden.com
Designing Your Sailboat
Designing your toy sailboat is a fun and creative part of the project. It sets the foundation for a successful build. A well-thought design ensures your sailboat will float well and sail smoothly. This phase helps you decide how big and what shape your boat will take. Sketching a blueprint guides you through the assembly and makes building easier.
Choosing The Size And Shape
Think about where you want to sail your toy boat. Small ponds or bathtubs need smaller boats. Larger pools or lakes allow for bigger designs. The shape affects how fast and stable your sailboat will be.
- Long, narrow boats move faster but may tip easily.
- Wide, flat boats are stable but slower.
- Medium size offers a balance between speed and stability.
Choose a size you can handle easily. Keep the materials in mind. Light wood or foam works best for small boats. Larger boats need stronger materials to hold shape.
Sketching The Blueprint
Start with a simple drawing of your sailboat. Include the hull, mast, and sails. Use clear lines and labels. This blueprint will act as your guide.
Mark the measurements for each part. Use a ruler or measuring tape for accuracy. Double-check your numbers before cutting any material.
Consider the balance of your design. The mast should be centered for stability. The hull should be symmetrical to avoid tilting. Your sketch helps visualize the final look and function.
Cutting And Shaping The Hull
Cutting and shaping the hull is a key part of building a toy sailboat. This process defines the boat’s look and how well it floats. Careful work here ensures the hull is smooth and balanced. Use the right tools and take your time to get clean edges and curves.
Marking The Wood
Start by choosing a soft wood like balsa or pine. Use a pencil to draw the hull shape on the wood. Sketch the outline clearly on both sides for accuracy. Mark the centerline to keep symmetry. Double-check your measurements before cutting to avoid mistakes.
Using Saw And Sandpaper
Cut along the pencil lines with a fine saw. Take slow, steady strokes to keep control. After cutting, use coarse sandpaper to smooth rough edges. Shape the curves by sanding gently in one direction. Finish with fine sandpaper for a smooth surface ready to paint.
Constructing The Mast And Sails
Constructing the mast and sails is a critical part of building your toy sailboat. These components not only give your boat its classic look but also affect how it moves in water. Paying attention to the details here will make your sailboat both sturdy and functional.
Building The Mast
Start by selecting a straight, lightweight stick or dowel for your mast. The length depends on the size of your boat, but it should be about twice the height of the hull for balanced proportions.
Sand down any rough edges to avoid splinters and make it easier to attach the sails. You can paint or varnish the mast if you want to protect it from water damage.
Attach the mast securely to the hull using glue or small nails. Make sure it stands upright and is stable enough to hold the sails without bending. If you want extra support, add thin strings on either side to act as stays.
Preparing The Sails
Choose a fabric that is light but strong, like cotton or a thin canvas. Cut the sail into a simple triangle or rectangle shape that fits your mast and boat size.
Reinforce the edges of the sail by folding them over and gluing or sewing a small hem. This prevents fraying and adds durability.
Use small holes or loops at the corners to attach the sail to the mast and boom with thread, string, or tiny hooks. Experiment with how tight or loose you make the sails to see how it affects your boat’s movement.
Have you tried changing the angle of the sails while testing your boat? It can dramatically affect speed and direction, making the construction phase even more exciting.
Assembling The Sailboat
Assembling your toy sailboat is where your project truly comes to life. This phase requires a steady hand and some patience, but the satisfaction of seeing your creation take shape is worth every moment. You’ll focus on attaching the mast securely and then adding the sails and rigging that give your sailboat its character and function.
Attaching The Mast To The Hull
Start by preparing the hull surface where the mast will be fixed. Make sure this area is smooth and clean to ensure a strong bond. If you’re using glue, a small dab applied carefully can hold the mast firmly in place.
Consider using a small wooden dowel or a sturdy stick for the mast. Insert it into a pre-drilled hole in the hull, ensuring it stands straight. If you don’t have a drill, you can gently create a hole with a sharp tool, but be careful not to crack the hull.
Ask yourself: Is the mast perfectly vertical? This matters because even a slight tilt can affect how your sailboat moves in the water. Use a small level or simply eyeball it against a straight edge for the best result.
Adding Sails And Rigging
Once the mast is secure, it’s time to add the sails. Cut your sail material—cloth, paper, or thin plastic—into the right shape based on your design. Triangular sails are easier for beginners and work well for small toy boats.
Attach the sails to the mast using thread, thin string, or even small staples, depending on your materials. Make sure the sails are taut but not too tight, allowing them to catch the wind naturally.
Next, add the rigging—the lines that hold the sails in place. Use thin string and tie it from the top of the mast to the edges of the hull. This adds stability and realism to your sailboat.
Think about how the rigging affects the sail’s movement. Can you adjust the tightness to change the sail’s angle? Experimenting with this can teach you how real sailboats catch the wind.
Painting And Finishing Touches
Painting and finishing touches bring your toy sailboat to life. They protect the wood and highlight its shape. A bright, smooth finish makes the boat look ready to sail the waves. Careful painting and sealing keep your sailboat safe from water and wear.
Choosing Paint Colors
Select colors that reflect your style and the boat’s character. Bright colors like red, blue, or yellow make the sailboat stand out. Soft pastels give a gentle, classic look. You can also mix colors for unique designs.
- Use non-toxic, water-based paints for safety.
- Pick paints that dry quickly to save time.
- Test colors on a scrap piece of wood first.
Plan your color scheme before painting. Consider the hull, sails, and deck separately. Contrast can make details pop. Keep it simple for a clean, neat finish.
Applying Protective Coating
Protective coating seals the paint and wood from moisture. It adds shine and makes the sailboat last longer. Use clear varnish or polyurethane for the best results.
- Choose a water-resistant finish suitable for wood.
- Apply thin, even layers with a soft brush.
- Allow each coat to dry fully before adding another.
- Lightly sand between coats for smoothness.
Finish with at least two coats to ensure good protection. This step is key to keeping your toy sailboat looking great over time.
Testing Your Toy Sailboat
Testing your toy sailboat is an exciting part of the building process. This is where you see if your design floats well and sails smoothly. Careful testing helps you spot issues early and make your sailboat perform its best on the water.
Water Trials
Take your sailboat to a calm body of water like a pond or a bathtub. Gently place it on the water’s surface and watch how it floats. Does it tilt to one side or sit evenly? Does the sail catch the wind properly?
Try pushing it lightly to see how it glides. Notice if it moves straight or veers off course. If you have a fan, use it to simulate wind and observe how your sailboat responds. This hands-on testing gives you real feedback about your design.
Adjusting For Balance And Stability
If your sailboat tips or leans, it needs better balance. Add small weights, like washers or clay, inside the hull to even out the tilt. Place the weight low and centered to improve stability without weighing down the boat too much.
Check the mast and sail setup too. Is the sail too large or angled poorly? Adjusting the sail’s position or size can prevent the boat from tipping over. Think about how changes affect both balance and the ability to catch wind effectively.
Have you noticed your sailboat spins in circles? This usually means the rudder or keel needs tweaking. Small shifts can make a big difference in steering. Testing and adjusting repeatedly helps you create a sailboat that not only floats but sails confidently.

Credit: www.amazon.com
Tips For Customizing Your Sailboat
Customizing your toy sailboat lets you make it truly yours. It’s more than just building; it’s about adding personality and improving how it sails. Small changes can make a big difference in both looks and performance.
Adding Decorative Elements
Think about using paint to give your sailboat a splash of color. Bright colors not only look great but can also make your boat easier to spot on the water.
Try adding stickers or small decals that reflect your interests, like flags or nautical symbols. You can even glue on tiny accessories like miniature life rings or anchors for extra charm.
Don’t forget about the sail itself; you can use fabric markers or sew on patterns to make it unique. Have you ever tried using glow-in-the-dark paint? It creates a fun effect when sailing at dusk.
Enhancing Performance Features
Adjusting the keel or adding weight to the hull can improve your sailboat’s stability. Have you noticed how some boats tilt too much? Balancing the weight helps prevent tipping over.
Experiment with different sail shapes or materials. Using lighter fabric can catch the wind better, making your boat faster. You might want to test a few designs to see which works best in your local breeze.
Fine-tune the rudder for smoother steering. A well-aligned rudder responds quickly and keeps your boat on course without extra effort. What small tweaks can you make to control your boat more precisely?
Frequently Asked Questions
What Materials Do I Need To Build A Toy Sailboat?
You need lightweight wood or plastic, a small sail, glue, paint, and a base for stability. These materials are easy to handle and safe for beginners.
How Do I Make The Sail For A Toy Sailboat?
Use fabric, paper, or plastic for the sail. Cut it in a triangular shape, then attach it to a mast using glue or tape.
What Is The Best Size For A Toy Sailboat?
A toy sailboat should be around 8 to 12 inches long. This size balances stability and ease of handling for children.
How Can I Make My Toy Sailboat Float Better?
Ensure the hull is sealed and watertight. Use lightweight materials and balance the sailboat evenly to improve buoyancy and stability.
Conclusion
Building a toy sailboat is fun and rewarding. You can use simple materials at home. Each step helps you learn and create. Take your time and enjoy the process. Testing your sailboat on water brings joy. Share your creation with friends or family.
Keep experimenting with designs and sails. Small boats can teach big lessons. This project sparks creativity and hands-on skills. Start building today and watch your boat sail!




