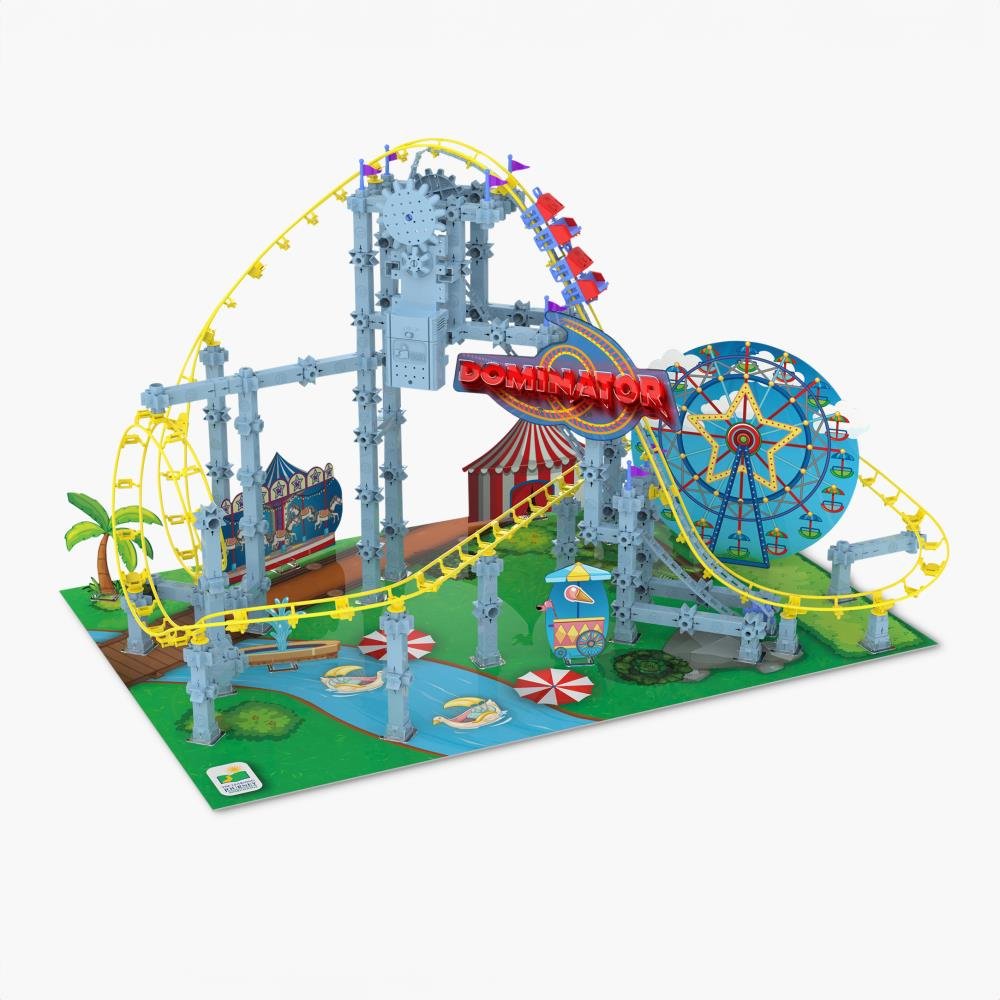
Have you ever dreamed of creating your very own roller coaster? Building a toy roller coaster is not only fun but also a great way to learn how things work.
Imagine watching your little coaster zoom down the tracks you built with your own hands. In this guide, you’ll discover simple steps to turn everyday materials into an exciting mini ride. Ready to bring your creativity to life and impress everyone around you?
Keep reading, and let’s get started!
Materials And Tools
Gather basic materials like wooden sticks, glue, and small balls for the coaster car. Simple tools such as scissors and a ruler will help in cutting and measuring. These essentials make building the toy roller coaster easy and fun.
Building a toy roller coaster is a fun and rewarding project that invites creativity and hands-on learning. Before diving into the assembly, understanding the materials and tools required is crucial. This section will guide you through selecting the right materials and essential tools needed to ensure your roller coaster is sturdy and exciting.Choosing The Right Materials
Selecting the right materials can make or break your toy roller coaster. Opt for lightweight yet durable options like plastic tracks and metal connectors. These ensure longevity and smooth rides. Consider using flexible materials for curves and loops to maintain the thrill factor. Foam or rubber can be excellent choices for padding, reducing friction and noise. Don’t forget about the base. A solid foundation, perhaps made from wood or sturdy plastic, will keep your roller coaster stable. Have you thought about adding decorative elements? Colorful stickers or paint can bring your coaster to life.Essential Tools Needed
Having the right tools will make the building process more efficient and enjoyable. A set of small screwdrivers is essential for securing parts. They help in precise tightening without damaging the delicate components. You’ll also need a measuring tape. This ensures your track pieces fit perfectly, avoiding misalignments that could disrupt the ride. A glue gun can be your best friend for attaching decorative elements or securing loose ends. It’s quick and effective, providing a strong hold. Finally, consider a small drill for creating holes if needed. This can be particularly handy when customizing your design. What additional tools do you think might enhance your building experience?
Credit: www.tiktok.com
Designing Your Roller Coaster
Designing your toy roller coaster is an exciting part of the building process. This stage helps turn your ideas into a clear plan. Good design ensures the coaster will work well and look fun. Keep your design simple but creative.
Planning The Track Layout
Start by thinking about the shape of your track. Decide where the hills and curves will go. Balance steep drops with gentle slopes for smooth rides. Consider the length of the track to fit your space. Think about how the coaster will start and stop safely.
- Choose a start point with a strong lift or push.
- Plan hills to create speed and excitement.
- Add curves to make the ride interesting.
- Include flat sections for stability.
- End with a safe stopping area.
Sketching Your Design
Draw your roller coaster on paper or use a simple app. Use clear lines to show the track path. Mark the high and low points. Note where supports will be placed. Sketching helps find problems before building.
- Use arrows to show the direction of the ride.
- Label each section with its purpose.
- Keep the drawing simple and easy to read.
- Review and adjust the sketch as needed.
Building The Track
Building the track is a key part of creating a toy roller coaster. The track guides the cars and makes the ride fun and smooth. It needs careful cutting, shaping, and assembling for the best results.
Using the right tools and materials makes the process easier. Wood, plastic, or metal can work well for the track pieces. Each piece must fit together tightly to keep the cars on track.
Cutting And Shaping The Track Pieces
Start by measuring each piece of the track carefully. Mark the spots where cuts are needed. Use a saw or scissors depending on the material. Cut slowly to keep the edges clean and smooth.
Shape the track curves gently to allow smooth car movement. Sand any rough edges to avoid snags. Curves can be made using templates or freehand, but keep them even.
- Measure twice before cutting once
- Use a fine-toothed saw for wood or plastic
- Sand all edges for smoothness
- Create gentle curves for better car flow
Assembling The Track Sections
Arrange the cut pieces on a flat surface first. Check that each section fits well with the next. Use glue, screws, or clips to join the parts firmly. Avoid gaps or loose joints that can stop the cars.
Add supports under the track to keep it stable. Use small blocks or stands to hold the track at the right height. Test the track by running a car along it to find any problem spots.
- Dry fit pieces before gluing or screwing
- Secure joints firmly to prevent wobbling
- Use supports to keep the track steady
- Test the track for smooth car travel
Constructing The Supports
Constructing the supports is a key part of building a toy roller coaster. The supports hold the track in place and keep the whole structure steady. Strong, well-built supports stop the coaster from wobbling or falling apart during play. This section explains how to create stable supports and attach them properly to the track. Follow these steps to build a safe and solid foundation for your roller coaster.
Creating Stable Support Structures
Start by choosing sturdy materials for the supports. Wood, plastic, or thick cardboard works well. Cut the supports to different lengths to match the track height.
- Make sure each piece stands firm on flat surfaces.
- Use a wide base to prevent tipping.
- Test the stability by pressing gently on each support.
Group supports in pairs or triplets for extra strength. Attach them with glue or tape. Avoid using flimsy materials that bend easily.
Attaching Supports To Track
Place the supports under the track at regular intervals. This keeps the track level and prevents sagging. Align each support under the track’s strongest points.
- Use glue or small clamps to fix the supports to the track.
- Check that the track stays smooth and even after attachment.
- Allow glue to dry fully before testing the coaster.
Adjust the supports if the track tilts or moves. Secure all connections tightly for a safe ride. Proper attachment makes the coaster reliable and fun to use.
Making The Roller Coaster Cars
Making the roller coaster cars is one of the most exciting parts of your toy roller coaster project. These cars are the main attraction—they carry the action and bring your design to life. Focusing on their design and functionality ensures your coaster runs smoothly and looks great.
Designing The Cars
Start by deciding the size and shape of your cars. They should fit comfortably on the track without wobbling or getting stuck. Think about the materials you want to use—lightweight wood, plastic, or even recycled cardboard can work well.
Consider adding small details like seats or safety bars to make your cars more realistic. Don’t forget the wheels—they need to align perfectly with your track rails. Would a wider base help keep the cars stable during sharp turns?
Building And Testing The Cars
Once you have your design, cut out the parts carefully and assemble the cars. Use glue or small screws depending on your materials. Make sure the wheels spin freely and the car moves smoothly along a flat surface before placing it on the track.
Test each car multiple times to spot any issues like tipping or friction. Adjust the wheel alignment or add weight to improve balance if needed. Remember, a well-balanced car can make the difference between a thrilling ride and a frustrating stop.
Adding Safety Features
Adding safety features is important for a toy roller coaster. Safety keeps the toy fun and prevents accidents. Small parts must not fall off or cause injury. The track should guide the cars smoothly without sudden stops.
Focus on making every part secure and smooth. This helps the roller coaster work well and last longer. Attention to safety makes the toy safe for children of all ages.
Ensuring Smooth Track Transitions
Smooth transitions between track pieces help cars move easily. Sharp angles or gaps can cause cars to stop or fall.
- Check each joint for gaps or uneven edges.
- Use sandpaper to smooth rough areas.
- Align track pieces carefully to avoid bumps.
- Test the car on the track before fixing parts permanently.
Smooth tracks keep the ride exciting and safe.
Securing Loose Parts
Loose parts can cause the toy to break or the car to derail.
- Use glue or tape to hold small pieces firmly.
- Double-check screws and fasteners for tightness.
- Replace any broken or weak parts immediately.
- Make sure decorations do not block the track.
Secure parts improve durability and prevent accidents.
Testing And Troubleshooting
Testing and troubleshooting are crucial parts of building your toy roller coaster. This phase shows how well your design works and highlights areas that need fixing. You’ll save frustration later by catching problems early.
Running Initial Tests
Start by giving your roller coaster a gentle test run. Use a small ball or toy car to see if it moves smoothly along the track. Watch closely for any spots where it slows down or stops unexpectedly.
Try different release points to check how the speed changes. Does the ball make it through loops and turns without falling off? Testing on a flat surface can reveal if the coaster needs better support or alignment.
Don’t rush this step. Even a small wobble or uneven track can cause big problems later. Take notes on where the ball hesitates or derails, so you know exactly where to focus your fixes.
Fixing Common Issues
If the ball gets stuck, check the track connections first. Loose or misaligned pieces are often the culprits. Tighten any joints and adjust angles slightly to smooth the path.
Sometimes the coaster loses momentum on flat or uphill parts. Try adding a slight incline or reduce friction by sanding rough edges. Using a lighter ball can also help increase speed.
For problems with loops or sharp turns, make sure the track is sturdy and curves are tight but not too sharp. Adding extra supports under these sections often prevents sagging or collapse.
- Check for gaps between track pieces that could stop the ball.
- Ensure the starting point gives the ball enough push to complete the course.
- Adjust track height to create smooth transitions.
Have you ever noticed how small tweaks can make a big difference? Don’t hesitate to experiment with different fixes until your coaster runs perfectly. Each test run teaches you something new about your design’s strengths and weaknesses.

Credit: www.amazon.com
Customizing Your Roller Coaster
Customizing your toy roller coaster brings your creation to life. It turns a simple track into a unique playset that reflects your style. Personal touches make the experience more fun and engaging for everyone.
Small changes can create big effects. Colors, shapes, and extra details add personality. This section guides you through easy ways to make your roller coaster stand out.
Painting And Decorating
Choose bright colors to make your coaster eye-catching. Use acrylic paint for smooth, lasting coverage. Let each layer dry before adding more paint.
Try different patterns like stripes or dots. Use stickers or decals to add fun designs. Protect your paint with a clear sealant to avoid chips.
- Paint cars in different colors for variety
- Decorate the track supports with glitter or markers
- Add themed details like stars, flames, or animals
Adding Extra Features
Extra features make your roller coaster more exciting. Small additions can improve play and create new challenges.
Consider adding tunnels or bridges for variety. Use foam or cardboard to build these shapes easily. Attach small flags or signs to the track for a theme.
- Install tiny lights to brighten the ride
- Create a launch pad with rubber bands for speed
- Add sound effects with simple bells or chimes

Credit: www.tiktok.com
Frequently Asked Questions
What Materials Are Needed To Build A Toy Roller Coaster?
To build a toy roller coaster, you’ll need lightweight materials like cardboard, wooden sticks, glue, and small balls or marbles. These materials help create tracks and supports that are sturdy yet easy to assemble. Using recyclable items can also make the project eco-friendly and budget-friendly.
How Do You Design A Safe Toy Roller Coaster Track?
Design a safe track by ensuring smooth curves and stable supports. Avoid sharp turns or steep drops that might cause the ball to derail. Test each section before final assembly to guarantee smooth movement and adjust the track for better balance and safety.
What Tools Help In Constructing A Toy Roller Coaster?
Basic tools like scissors, craft knives, rulers, and glue guns are essential. These tools help in cutting, measuring, and assembling materials precisely. Using clamps or tape can assist in holding parts together while the glue dries for a stronger build.
Can I Use Household Items To Build A Roller Coaster?
Yes, many household items like paper towel rolls, straws, and cardboard boxes work well. These items are easy to modify and provide flexibility in designing tracks and supports. Using household objects makes the project affordable and accessible for all ages.
Conclusion
Building a toy roller coaster is fun and rewarding. It teaches basic physics and sparks creativity. You can use simple materials found at home. Test and adjust the design to make it work better. Watching the coaster move brings great joy.
Share your creation with friends or family. Keep trying new ideas to improve your coaster. This project offers a great way to learn and play. Give it a try—you might be surprised by what you build!




