Have you ever wanted to create your very own toy robot? Imagine holding a small machine that you built with your own hands—one that moves, lights up, and maybe even talks.
Building a toy robot isn’t just fun; it can spark your creativity and boost your problem-solving skills. In this guide, you’ll discover simple steps and tips to turn basic parts into a working robot. Whether you’re a beginner or just looking for a new project, this article will help you bring your idea to life.
Ready to make something amazing? Let’s dive in!

Credit: www.youtube.com
Gathering Materials
Gathering the right materials is the foundation of building a toy robot that works well and looks great. Without the proper parts, your project can become frustrating or even impossible to complete. Let’s break down what you need to collect before you start assembling.
Essential Electronic Components
Start by gathering the basic electronic parts like a small motor, batteries, and wires. These components bring your robot to life by enabling movement and power.
- Motor:Choose a lightweight DC motor for smooth motion.
- Batteries:AA or AAA batteries are easy to source and replace.
- Wires:Thin insulated wires work best for connecting parts.
Have you checked if the motor’s voltage matches the battery power? This prevents damage and ensures your robot runs efficiently.
Structural Materials
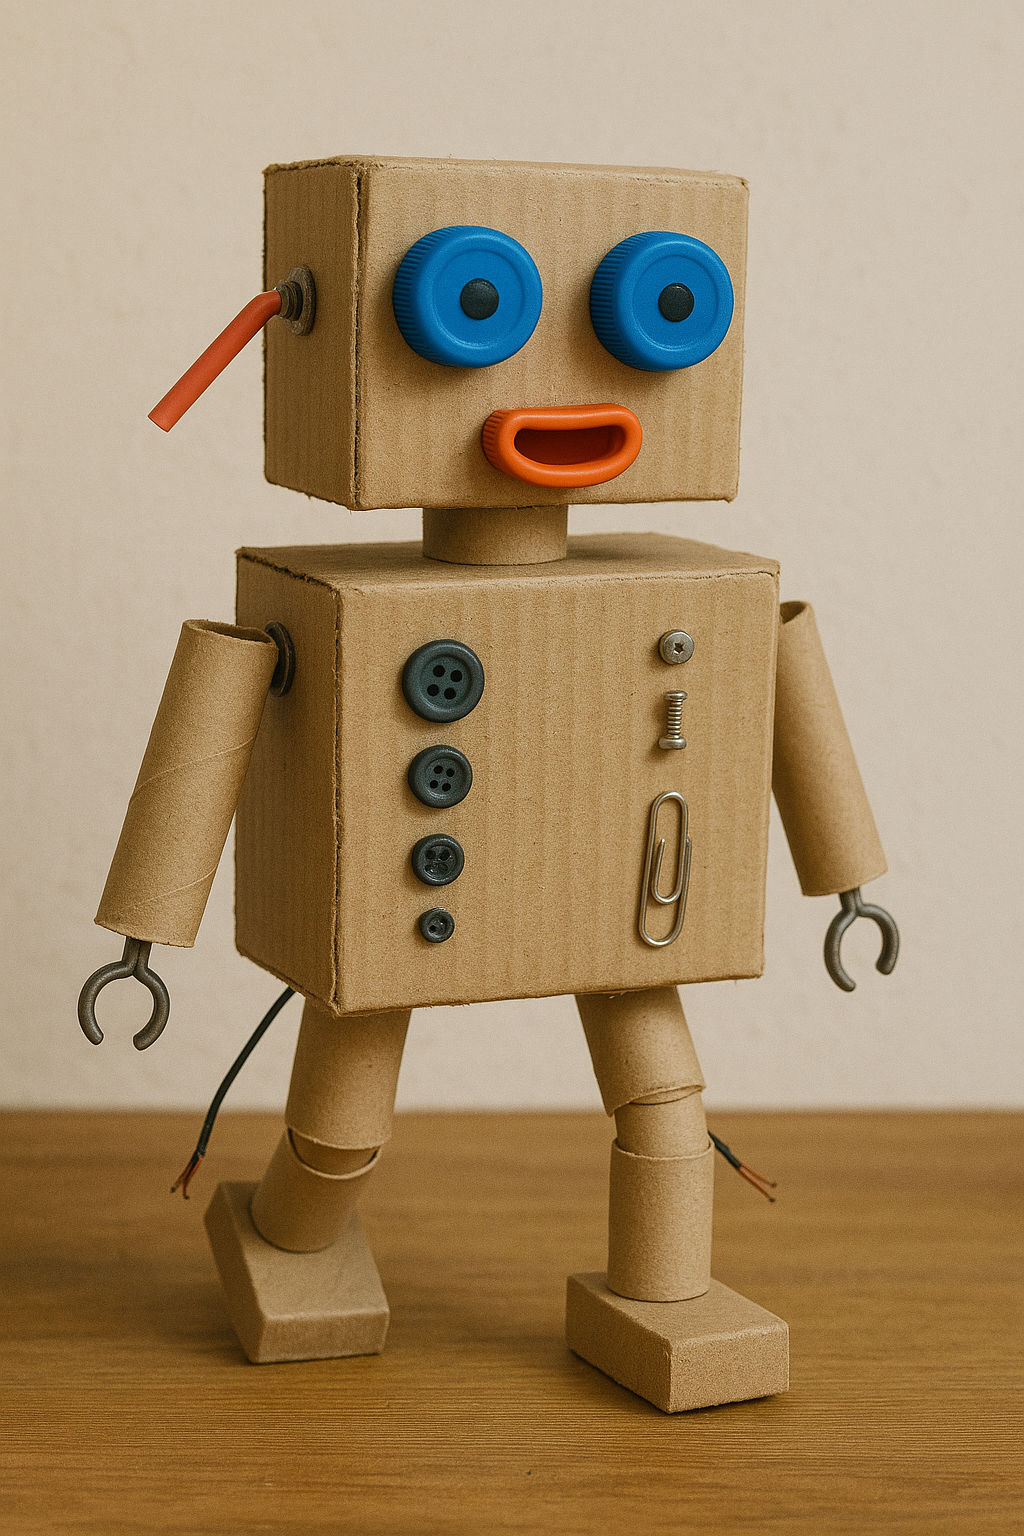
The body of your robot needs to be sturdy but easy to shape. Materials like cardboard, plastic sheets, or lightweight wood are excellent choices.
- Cardboard:Ideal for beginners due to its flexibility and availability.
- Plastic sheets:Offer durability and a sleek look.
- Wood:Provides strength but may require more tools to work with.
Think about how the material’s weight will affect your robot’s balance and movement. Will it be top-heavy or stable?
Tools And Accessories
Having the right tools makes assembly smoother and safer. Gather simple items that help you cut, shape, and connect parts.
- Scissors or craft knife:For precise cutting of materials.
- Glue or tape:To hold parts together securely.
- Screwdriver or small pliers:Useful for tightening small screws or bending wires.
Do you have a workspace that keeps your materials organized? A clutter-free area helps you focus and avoid losing small parts.

Credit: www.youtube.com
Designing The Robot
Designing your toy robot is where your creativity truly takes shape. This phase sets the foundation for how your robot will look and function. Taking time here saves frustration later, so approach it with both imagination and practicality.
Choosing A Concept
Start by deciding what type of robot you want to build. Will it be a humanoid, a vehicle, or something entirely unique? Think about what excites you most—do you want your robot to perform simple tasks, or just look cool?
Consider the robot’s purpose. If it’s meant to move, you’ll need wheels or legs. If it’s for display, focus on details like shape and color. Ask yourself: what problem or idea do I want this robot to solve or express?
Try listing a few concepts on paper. Pick the one that feels most fun and doable with your skills and materials. This focus will guide all your design choices.
Sketching The Design
Once you have a concept, put it on paper with rough sketches. Don’t worry about perfection—these drawings are for exploring shapes and features. You can make several quick sketches to compare different ideas.
Focus on key parts like the body, head, arms, and wheels. Visualize how each part connects and moves. Including measurements helps later when building.
Use simple tools like pencils, rulers, and graph paper. If you prefer digital tools, basic drawing apps work fine too. Sketching lets you spot potential problems early and refine your vision.
Assembling The Body
Assembling the body is a key part of building your toy robot. This stage shapes the robot’s structure and prepares it for movement. A solid body frame ensures your robot stands strong and works well.
Constructing The Frame
Start by choosing lightweight but sturdy materials. Common choices include plastic sheets, metal strips, or wooden boards. Cut these materials into the required shapes and sizes. Use screws or glue to join pieces tightly. Make sure the frame is balanced to avoid tipping over. Leave space for motors and wiring inside the frame. Check for sharp edges and smooth them out for safety. A well-built frame forms the robot’s skeleton.
Attaching The Wheels
Select wheels that fit your robot’s size and weight. Attach wheel axles firmly to the frame’s base. Use nuts or clips to hold wheels in place but allow smooth rotation. Test each wheel to ensure it spins freely. Align wheels straight to help the robot move forward easily. Consider using rubber wheels for better grip on surfaces. Proper wheel attachment gives your robot good mobility and control.
Installing Electronics
Installing the electronics in your toy robot is where the magic begins. This phase turns your mechanical framework into a functional machine capable of sensing, moving, and reacting. Getting the electronics right not only ensures your robot works smoothly but also makes troubleshooting easier later on.
Selecting The Microcontroller
Your choice of microcontroller sets the foundation for your robot’s brain. Popular options include the Arduino Uno, Raspberry Pi Pico, and ESP32, each offering different levels of complexity and features.
Think about what your robot needs to do. If you want simple movements and sensor readings, Arduino is straightforward and beginner-friendly. For more advanced tasks like image processing or Wi-Fi connectivity, ESP32 or Raspberry Pi might be better.
Consider factors like available pins, processing power, and programming environment. If you’re new to coding, Arduino’s large community and abundant tutorials can save you hours of frustration.
Wiring The Components
Wiring can seem daunting, but careful planning makes it manageable. Start by laying out all your components—motors, sensors, LEDs, and the microcontroller—on a breadboard or prototype board.
Use color-coded wires to keep track of power, ground, and signal connections. This simple practice can prevent many common wiring mistakes.
Remember to connect all grounds together to create a common reference point; missing this can cause erratic behavior. Double-check your connections against your circuit diagram before powering up.
- Use jumper wires for easy adjustments during testing
- Keep wires short to reduce electrical noise
- Label wires if your setup gets complex
Have you ever powered your circuit only to find it didn’t respond? Most often, it’s a loose connection or swapped wires. A methodical approach to wiring saves time and keeps your robot running smoothly.
Programming The Robot
Programming the robot brings it to life. It controls how the robot moves and reacts. Writing simple code helps the robot perform tasks. Start with basic instructions and build up to complex actions. This section guides you through coding and testing your toy robot.
Coding Basic Movements
Begin by writing commands for simple movements. These include moving forward, backward, turning left, and right. Use clear, easy-to-understand code blocks or commands. For example, tell the robot to move forward for two seconds.
Use these common commands:
- Move forward
- Move backward
- Turn left
- Turn right
- Stop
Combine commands to create smooth movements. Adjust speed and duration to control motion better. Test each command separately to confirm it works well.
Testing And Debugging
Testing checks if the robot behaves as expected. Run the code and watch the robot’s actions. Notice any errors, like wrong turns or stops. Debugging fixes these mistakes.
Follow these tips for effective debugging:
- Test one command at a time
- Use print statements to track code flow
- Check connections and sensors
- Update code based on test results
- Repeat tests after changes
Keep the code simple. Small changes make it easier to find bugs. Test often to improve the robot’s performance step by step.
Adding Features
Adding features to your toy robot can transform it from a simple build into an interactive companion. These enhancements make your robot more responsive and visually appealing. Let’s look at practical ways to bring your creation to life.
Incorporating Sensors
Sensors give your toy robot the ability to sense its environment. You can add touch sensors that make the robot react when pressed. For example, connect a simple bump sensor so your robot stops or changes direction when it hits an object.
Light sensors allow the robot to follow or avoid light sources. This adds a fun challenge—your robot can chase a flashlight or steer clear of bright lamps. You can even use distance sensors to help your robot detect how close it is to obstacles.
Have you thought about how your robot could respond to sound? Adding a microphone sensor can enable voice commands or reactions to claps. Sensors open up many possibilities to make your robot feel alive.
Enhancing With Lights
Lights are an easy way to boost your robot’s personality. LEDs can be programmed to blink, change colors, or stay steady, matching different actions. For example, green lights could show the robot is moving forward, while red lights signal a stop or error.
You can place lights in the eyes or body to mimic emotions or status. Flashing lights create excitement and draw attention to your robot’s movements. Adding simple light patterns is a small step that makes a big difference in engagement.
Think about how light effects could communicate with you. Could your robot flash when it senses a nearby obstacle or change colors when it’s low on power? Playing with lights lets you create a more interactive and fun experience.
Final Adjustments
After assembling your toy robot, the final adjustments can make all the difference between a good build and a great one. This stage focuses on refining the robot’s performance and ensuring durability. Taking the time to carefully tweak movements and secure every part will enhance your robot’s overall functionality and lifespan.
Fine-tuning Movements
Test each joint and motor to see how smoothly they operate. If your robot’s arm moves too fast or jerks, adjust the speed settings or tighten the gears slightly. Sometimes, a small change in tension on the servo motor can make the motion much more natural.
Pay attention to any irregular or uneven movement. Does the robot wobble when it walks or turn sluggishly? These issues often come from misaligned components or uneven weight distribution. Balancing the parts or repositioning the motors can solve these problems.
Have you noticed any delays or jerks in response? Try running the control program again and watch for lag. Adjusting the code or calibrating the sensors can improve responsiveness and precision.
Securing Loose Parts
Loose screws or connectors can cause your robot to malfunction unexpectedly. Go over each joint and part, and tighten any that feel loose. Using thread-locking glue on screws can prevent them from vibrating loose over time.
Check wiring carefully to ensure none of the cables are hanging or at risk of snagging. Use zip ties or small clips to keep wires neatly bundled and out of moving parts. This simple step can save you from frustrating disconnections during operation.
Have you ever seen a part fall off right in the middle of a demonstration? Make sure all panels and covers snap or screw securely into place. Double-checking these details will give you confidence that your robot is ready for action.
Credit: obotz.ca
Safety Tips
Building a toy robot can be exciting and educational, but it also involves working with small parts and electrical components that require careful handling. Prioritizing safety protects you from injuries and ensures your project is a fun experience. Let’s look at some key safety tips to keep in mind while you create your robot.
Wear Protective Gear
Always wear safety glasses to protect your eyes from tiny flying parts or solder splashes. If you are using tools like soldering irons, gloves can prevent burns. Don’t forget to work in a well-ventilated area to avoid inhaling any fumes.
Handle Tools Carefully
Sharp tools like wire cutters and hobby knives can cause cuts if you’re not careful. Keep your fingers away from the cutting path and store tools safely when not in use. Are you aware of how much force is safe to apply on small parts? Testing on scrap materials can help you avoid accidents.
Manage Electrical Components Safely
Check batteries and wires for damage before use to prevent shorts or shocks. Never connect power sources while assembling circuits; double-check your connections first. Remember, even low voltage can be harmful if mishandled, so treat all electrical parts with respect.
Organize Your Workspace
Keep your workspace tidy to avoid losing small components and reduce the risk of accidents. Use containers for screws, resistors, and other tiny parts to avoid spills. Have a dedicated spot for tools to quickly find what you need and stay focused.
Supervise Young Builders
If children are involved, supervise their work closely. Teach them how to use tools safely and explain the risks of certain components. Could this be a great chance to develop responsibility and focus while having fun?
Resources For Further Learning
Diving deeper into building toy robots means tapping into the right resources. These materials and platforms can guide you through complex concepts or spark new ideas. Whether you’re a beginner or looking to refine your skills, the right resources make a big difference in your learning journey.
Books And Manuals
Books often provide a structured and detailed approach to building toy robots. Titles like “Make: Electronics”by Charles Platt or “Robot Building for Beginners”by David Cook are excellent starting points. They include clear diagrams and step-by-step instructions that you can follow at your own pace.
Do you prefer learning by reading and practicing? These manuals help you master both the theory and hands-on skills without feeling overwhelmed.
Online Tutorials And Video Courses
Watching someone else build a robot can clarify tricky steps and inspire your creativity. Platforms like YouTube, Coursera, and Udemy offer countless tutorials, from soldering basics to programming microcontrollers.
Try searching for specific projects that match your skill level. Seeing the process in action often answers questions before you even think to ask them.
Community Forums And Maker Groups
Joining online forums like Reddit’s r/robotics or local maker spaces connects you with people who share your passion. You can ask questions, share your progress, and get feedback from experienced builders.
Have you noticed how much faster you learn when you discuss challenges with others? These communities often share tips that aren’t found in books or videos.
Component Suppliers And Kits
Using kits from trusted suppliers can simplify your first builds. Companies like Adafruit, SparkFun, and LEGO Mindstorms provide parts and instructions tailored for beginners and advanced users alike.
Getting the right parts on hand can prevent frustration and keep your project moving forward. What parts do you think are essential for your next robot?
Frequently Asked Questions
What Materials Are Needed To Build A Toy Robot?
To build a toy robot, you need basic materials like motors, batteries, wires, sensors, and a microcontroller. You also need tools such as a soldering iron, screwdriver, and glue. Choosing lightweight and durable materials ensures your robot functions well and lasts longer.
How Do I Program A Toy Robot Easily?
Programming a toy robot involves using simple coding platforms like Arduino or Scratch. Start with basic commands to control motors and sensors. Many beginner-friendly tutorials online guide you step-by-step. Keep your code short and test frequently for best results.
Can Beginners Build A Toy Robot At Home?
Yes, beginners can build a toy robot at home using affordable kits and online guides. Start with simple models that include clear instructions. Practice basic electronics and coding skills. Building gradually improves your confidence and knowledge.
How Long Does It Take To Build A Toy Robot?
Building a toy robot usually takes a few hours to several days. The time depends on the robot’s complexity and your experience level. Simple robots with basic functions are quicker to assemble and program than advanced models.
Conclusion
Building a toy robot can be fun and rewarding. You learn how parts fit and work together. Taking small steps helps you avoid mistakes. Each piece adds to your robot’s function. Enjoy the process of creating something with your hands.
Keep practicing to improve your skills. Soon, you can build even better robots. Remember, patience and curiosity lead to success. Start today and see what you can make!