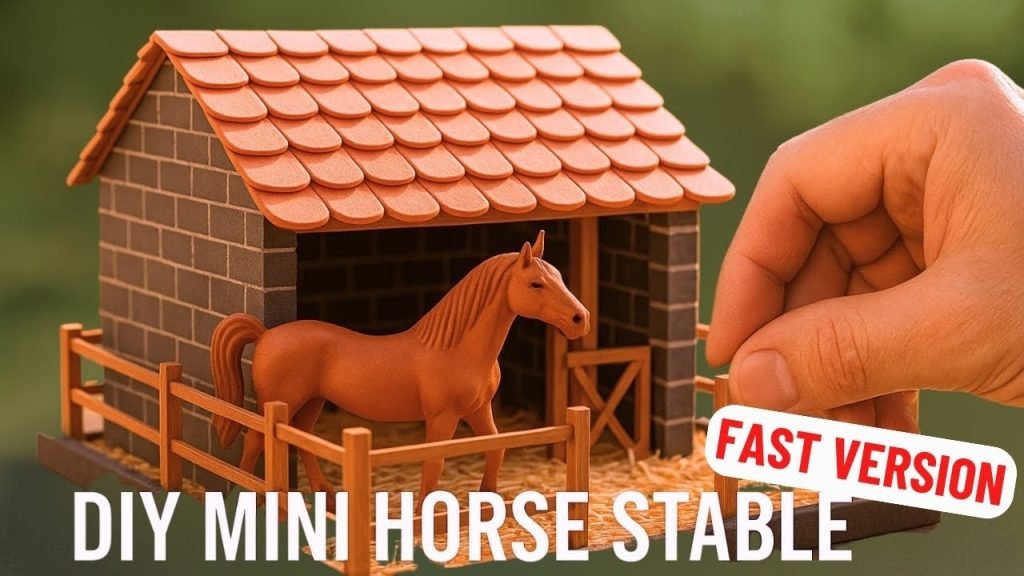
Have you ever wanted to create a special place for your toy horses that feels just like a real stable? Building a toy horse stable is a fun and creative project that brings your playtime to life.
Imagine your horses having their own cozy shelter, complete with stalls and fences you made yourself. In this guide, you’ll discover simple steps and clever tips to build a sturdy, beautiful stable that you’ll be proud of. Ready to turn your ideas into a charming home for your toy horses?
Let’s get started!

Credit: www.tiktok.com
Materials Needed
Creating a toy horse stable can be a delightful project. The materials you choose will shape the final look and feel. Let’s explore the essential supplies and optional decorations.
Basic Supplies
- Wooden or cardboard panels for walls and roof
- Glue or nails for assembly
- Paints for coloring the stable
- Sandpaper to smooth edges
- Measuring tape for precise dimensions
- Scissors or a small saw for cutting
These items are foundational for building the structure. Choose sturdy materials for durability. Tools like glue and nails are key for putting it all together.
Optional Decorations
- Miniature hay bales for realism
- Tiny horse figures to populate the stable
- Stickers or decals for added detail
- LED lights for a magical touch
- Fabric pieces for curtains or blankets
- Small fences to create paddocks
Decorations bring life to the stable. They add charm and personality. Create an inviting space for your toy horses.
Choosing The Location
Choosing the right location for your toy horse stable is crucial. It affects how your stable looks, how long it lasts, and how much fun you have playing with it. Think about where it will be easiest to access and keep clean, and where it fits best in your space.
Indoor Vs Outdoor
Deciding between an indoor or outdoor location depends on your available space and how you plan to use the stable. Indoor spots protect your stable from weather, dust, and dirt, keeping your toys in great shape. However, outdoor locations can offer more space and a natural setting that feels like a real farm.
Have you considered how weather changes might affect your toy stable if left outside? A covered patio or garage can offer a middle ground, combining protection with outdoor space. This choice impacts not only the stable’s durability but also your daily enjoyment.
Space Requirements
Your toy horse stable needs enough room to stand, move around, and store all the accessories. Measure the space carefully before you start building. Too tight, and you’ll struggle to play comfortably; too large, and it might feel empty or out of place.
Think about how many horses you want to house and any extra features like fences or feeding areas. Creating a simple floor plan on paper can help visualize the space needed. What’s your ideal size that balances playability with fitting well into your home or yard?
Designing The Stable
Designing the stable is the first step in building a toy horse stable. A good design makes the stable look real and fun to play with. It also keeps the stable strong and safe for the toy horses. Planning the shape, size, and details helps create a stable that feels just right.
Think about how many horses the stable will hold. Think about space for each horse. Think about where to put the doors and windows. These small choices make a big difference in the final look and use of the stable.
Simple Layouts
Start with a clear and simple layout. A rectangle or square shape works best for beginners. Divide the space into small sections for each horse. Leave room for a walkway so the horses can move freely. Keep the design easy to build and use.
Use a paper or digital sketch to plan the layout. Mark where each part will go. This helps avoid mistakes when building. Simple layouts save time and effort. They also allow more space for decorating.
Adding Doors And Windows
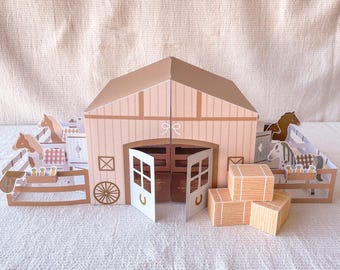
Doors and windows add charm and realism to the stable. Place doors at the front or sides for easy access. Make doors big enough for the toy horses to fit through.
Windows bring light into the stable. Use small rectangles or arches for window shapes. Cut out windows carefully to avoid rough edges. Consider adding shutters or frames with small wood pieces. These details make the stable look cozy and inviting.
Credit: www.etsy.com
Step-by-step Construction
Building a toy horse stable can be a fun and rewarding project. Breaking it down into clear steps makes the process easier. Follow these simple instructions to create a sturdy and charming stable.
Building The Frame
Start by cutting wood pieces to form the base and walls. Use lightweight wood for easy handling. Join the pieces using nails or screws. Make sure the frame is square and stable. Reinforce corners with small brackets for strength. The frame should be strong enough to hold the roof and walls.
Adding Walls And Roof
Attach wooden panels or thin plywood to the frame for walls. Cut a door opening for the horse to enter. Use hinges if you want a working door. For the roof, cut two equal pieces to form a triangle shape. Attach the roof pieces firmly on top of the frame. Check that the roof is secure and weather-resistant.
Painting And Finishing Touches
Sand all surfaces smoothly to avoid splinters. Paint the stable with child-safe colors. Choose earthy or bright tones for a playful look. Add details like windows, trims, or a nameplate. Use waterproof paint to protect the wood. Let the paint dry completely before using the stable.
Safety Tips For Kids
Building a toy horse stable is a fun project for kids. Safety must be a top priority. Kids should know how to avoid accidents and injuries during the build. Clear safety rules make the activity enjoyable and worry-free.
Using Tools Safely
Teach kids to handle tools carefully. Always use age-appropriate tools made for children. Show them how to hold tools firmly and use them correctly.
- Wear safety goggles to protect eyes.
- Keep fingers away from sharp edges.
- Use a stable surface for cutting or hammering.
- Store tools safely after use.
Remind kids to focus on their work and avoid distractions. Stop using tools if feeling tired or rushed.
Supervision Guidelines
Adult supervision is essential at all times. Adults can guide kids and prevent risky actions. Stay close to offer help or advice quickly.
- Check tools and materials before starting.
- Set clear rules about what is allowed.
- Encourage kids to speak up if unsure or hurt.
- Keep the workspace clean and free of hazards.
Supervision creates a safe space for learning and fun. It builds confidence in kids while keeping them protected.
Creative Play Ideas
Creative play makes building a toy horse stable more fun and meaningful. It sparks imagination and helps children learn. Using toys in different ways brings stories and adventures to life. These play ideas encourage kids to think, explore, and enjoy their stable.
Storytelling With Toy Horses
Children can create exciting stories about their toy horses. They imagine where the horses live, what they eat, and their daily adventures. This play helps develop language skills and creativity.
Try these ideas for storytelling:
- Give each horse a name and personality.
- Create simple storylines like a race or a day at the farm.
- Use different voices for each horse to make stories lively.
- Draw maps or scenes to set the story’s place.
Stable Role-playing Games
Role-playing turns the toy stable into a real place. Kids act as stable owners, caretakers, or riders. This type of play teaches responsibility and teamwork.
Try these role-play ideas:
- Set up feeding times and grooming sessions.
- Create a schedule for horse exercise or rest.
- Invite friends to join as visitors or helpers.
- Use everyday objects as props for stable tasks.

Credit: www.facebook.com
Frequently Asked Questions
What Materials Are Best For Building A Toy Horse Stable?
Wood is the best material for durability and ease of customization. Use non-toxic paint and safe adhesives to keep it child-friendly. Cardboard can work for a quick project but is less durable. Choose materials based on your budget and desired stable size.
How Do I Design A Toy Horse Stable For Kids?
Design a stable with simple shapes and easy access doors. Include stalls, feeding areas, and storage for accessories. Keep dimensions child-friendly for easy play and cleaning. Bright colors and realistic details enhance engagement and learning.
What Tools Do I Need To Build A Toy Horse Stable?
Basic tools include a saw, hammer, nails, and measuring tape. Sandpaper smooths edges for safety. Paintbrushes and non-toxic paint add finishing touches. For complex designs, a drill and clamps may be helpful. Ensure all tools are child-safe if kids assist.
How Can I Make A Toy Horse Stable More Realistic?
Add features like hay bales, water troughs, and fencing. Use textured paint or stickers to mimic wood grain. Incorporate miniature haynets and tack for authenticity. Adding removable doors and windows improves playability and realism.
Conclusion
Building a toy horse stable can be fun and simple. Start with a clear plan and basic materials. Take your time and enjoy each step. Your stable will bring joy and creativity to playtime. Kids will love having a special place for their toy horses.
Keep the design safe and sturdy for long use. Small details make the stable look real and exciting. Try adding colors or decorations to personalize it. This project is perfect for family time or solo crafting. Have fun building and watching your stable come alive!




