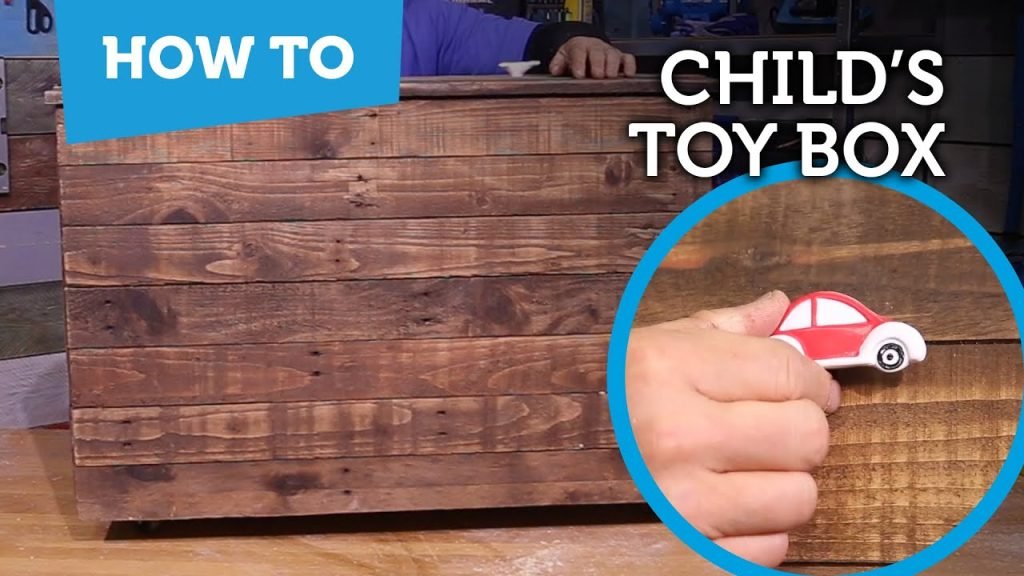
Are you tired of toys scattered all over your floor? Imagine having a sturdy, beautiful wooden toy chest that not only keeps your space tidy but also adds charm to your room.
Building your own toy chest might sound tricky, but with the right steps, you can create something special that fits your style and needs perfectly. In this guide, you’ll discover simple, clear instructions that anyone can follow—even if you’ve never worked with wood before.
Ready to turn clutter into order and craft a piece you’ll be proud of? Let’s get started!
Materials And Tools Needed
Wood boards, screws, nails, and wood glue form the basic materials for building a sturdy toy chest. Essential tools include a saw, drill, measuring tape, and sandpaper to ensure smooth edges and proper assembly.
Building a toy chest out of wood is not just a rewarding project but also a wonderful way to create something special for your kids or your inner child. However, before you start cutting and assembling, it’s essential to gather the right materials and tools. This ensures your project goes smoothly and your final product is both sturdy and beautiful.Selecting The Right Wood
Choosing the perfect wood is crucial for your toy chest. You want something durable yet easy to work with. Pine is often a popular choice due to its affordability and workability, making it ideal for beginners. Hardwoods like oak or maple are stronger, offering longevity and a rich appearance, but they can be more expensive and challenging to handle. Consider the finish you want. If you plan to paint the chest, cheaper wood might suffice. For a natural look, invest in quality hardwood.Essential Tools For The Project
Gathering the right tools can make all the difference in your woodworking experience. A saw is mandatory for cutting wood to size; a circular saw is versatile, while a table saw offers precision. A good drill is also essential, helping you assemble the pieces with screws and ensuring a tight fit. Don’t forget a tape measure to ensure accuracy and square for perfect angles. Sandpaper or a sander will be your best friend for smoothing edges and surfaces. This ensures your toy chest is safe for little hands and looks polished.Additional Supplies
Beyond wood and tools, there are a few extra supplies you’ll need. Screws or nails are critical for holding everything together; make sure they’re suitable for the wood type you’ve chosen. Wood glue can provide extra stability, especially for joints. Consider hinges for the lid, ensuring easy access and safety for little fingers. Lastly, think about the finish. Whether you opt for paint or varnish, ensure it’s non-toxic and safe for children. Are there any other materials or tools you think might enhance your project? Share your thoughts and let’s make this toy chest the best it can be!
Credit: www.ana-white.com
Planning Your Toy Chest
Planning your toy chest is the foundation of a successful woodworking project. Taking time to think through the size, design, and measurements will save you headaches later. It also ensures the chest fits perfectly in your space and meets your child’s needs.
Choosing The Size And Design
Start by considering where you want to place the toy chest. Will it fit under a window, beside a bed, or in a playroom corner? Measure the available space carefully, and think about how much storage you actually need.
Next, think about the design style. Do you want something simple and modern or a chest with decorative details? Remember, a bulky design might look nice but can take up too much room or be hard for kids to open.
Creating A Simple Sketch
Sketching your toy chest helps turn your ideas into a clear plan. Use pencil and paper to draw the basic shape and add details like the lid, handles, or hinges.
Don’t worry about making a perfect drawing. The goal is to visualize your project and spot any potential issues. You can even include notes about materials or colors to keep your vision consistent.
Measuring And Marking Wood
Once your sketch is ready, it’s time to work with the wood. Use a tape measure to mark exact lengths on each piece according to your design.
Mark lines clearly with a pencil and a square to ensure straight cuts. Double-check every measurement before cutting—this step can save you from wasting wood or making pieces that don’t fit together properly.
Cutting The Wood Pieces
Cutting the wood pieces is a key step in building a sturdy toy chest. Accurate cuts ensure all parts fit together well. Use a tape measure and pencil to mark your wood. Double-check your measurements before cutting. Safety goggles and gloves protect your eyes and hands during this process.
Cutting Side Panels
Start with the side panels, which form the chest’s walls. Measure the height and width carefully. Use a saw to cut along the pencil lines slowly. Keep the saw steady for straight edges. Both side panels must be the same size for balance.
Cutting The Base And Lid
The base holds the toys, and the lid covers them. Measure the length and width to match the side panels. Cut the base from a thicker wood piece for strength. Cut the lid slightly larger for easy opening. Smooth cuts help the lid fit perfectly.
Sanding The Edges
After cutting, sand all edges to avoid splinters. Use medium-grit sandpaper first, then fine-grit for smoothness. Sand both sides of each piece carefully. Rounded edges make the chest safer for kids. Clean the dust before assembling the chest.

Credit: www.ana-white.com
Assembling The Chest
Assembling the chest is where your project really starts to take shape. This phase requires precision and patience to ensure all parts fit snugly and securely. Each connection point strengthens the chest, so take your time and check your work as you go.
Joining The Side Panels
Begin by aligning the side panels carefully. Use clamps to hold them steady while you drill pilot holes to prevent the wood from splitting. Screwing the panels together firmly creates a strong frame that will support the entire chest.
Consider adding wood glue along the edges before screwing for extra durability. This simple step makes a noticeable difference in how sturdy the chest feels. Have you noticed how glue can often outlast screws alone in woodworking?
Attaching The Base
The base supports all the weight of the toys, so it needs to be secure. Position the base inside the frame, ensuring it fits flush with the sides. Use screws and glue for a tight bond, focusing on the corners where stress is highest.
Double-check that the base is level before fully tightening the screws. A crooked base can cause wobbling or uneven wear, affecting the chest’s lifespan. What tools do you have on hand to help you keep everything perfectly aligned?
Securing The Lid
The lid is the final piece that completes your toy chest. Attach it using sturdy hinges that allow smooth opening and closing. Pre-drill holes to avoid splitting, and test the lid’s movement frequently during installation.
Adding a soft-close hinge or a safety lid support can prevent accidental slams, making it safer for children. Think about how often the lid will be used and choose hardware that can handle frequent use without loosening over time.
Adding Finishing Touches
Adding finishing touches is essential to make your wooden toy chest safe and beautiful. These final steps protect the wood and give it a polished look. A smooth surface and a nice finish also make the chest more enjoyable for children to use.
Sanding For Smoothness
Use fine-grit sandpaper to smooth all surfaces. Sand edges and corners carefully to avoid sharp spots. Smooth wood prevents splinters and makes painting easier. Wipe off dust with a clean, dry cloth before moving on.
Painting Or Staining
Choose non-toxic paint or stain safe for children. Paint adds color and style, while stain shows the wood’s natural beauty. Apply thin, even coats for best results. Let each coat dry completely before applying the next one.
Installing Handles Or Knobs
Select handles or knobs that fit the chest size. Attach them securely to avoid loosening over time. Handles make opening and closing easier for kids. Use screws that do not stick out to keep it safe.
Safety Tips And Maintenance
Building a wooden toy chest is rewarding, but safety and care remain crucial. A well-maintained chest keeps children safe and prolongs its life. Follow these tips to ensure your toy chest is both safe and durable.
Ensuring Child-friendly Design
Choose smooth wood to avoid splinters. Sand all edges carefully for a gentle finish. Use non-toxic paint or varnish safe for kids. Install soft-close hinges to prevent finger pinches. Avoid small parts that could detach and pose choking risks. Make sure the chest lid stays open securely to stop accidental slams.
Regular Cleaning And Upkeep
Clean the toy chest often with a damp cloth. Avoid harsh chemicals that can damage wood or paint. Check for dust or dirt inside and outside the chest. Keep the chest in a dry place to prevent mold or warping. Wipe spills immediately to protect the wood surface. Regular cleaning keeps the chest looking good and safe.
Repairing Minor Damages
Inspect the toy chest for scratches, cracks, or loose parts. Fill small cracks with wood filler and sand smooth after drying. Tighten any loose screws or hinges to keep the chest sturdy. Replace worn-out hardware to maintain safety. Fixing small issues early stops bigger problems later.

Credit: www.reddit.com
Frequently Asked Questions
What Wood Is Best For Building A Toy Chest?
Pine and plywood are ideal for toy chests. Pine is affordable and easy to work with. Plywood provides strength and smooth surfaces. Both woods are safe and durable for kids’ use.
How Do I Ensure Toy Chest Safety?
Sand all edges to avoid splinters. Use child-safe, non-toxic finishes. Add a soft-close hinge to prevent finger pinching. Ensure the chest has ventilation to avoid mold and odors.
What Tools Do I Need To Build A Toy Chest?
You’ll need a saw, drill, measuring tape, screwdriver, and clamps. Sandpaper or an electric sander is essential for smooth finishes. Also, have wood glue and screws handy for assembly.
How Can I Customize A Wooden Toy Chest?
Paint with bright, non-toxic colors or fun patterns. Add stencils or decals for personalization. Attach handles or wheels for easy moving. Customize the interior with dividers or cushions for added function.
Conclusion
Building a wooden toy chest is a fun and useful project. It keeps toys organized and your space neat. You only need basic tools and simple steps to start. Personalize the chest with paint or decorations for a special touch.
This project brings joy and helps kids learn responsibility. Try building one and enjoy the process and results. A sturdy toy chest can last for many years. It’s a smart addition to any home with children. Give it a go and see the difference it makes!




