Have you ever thought about creating a fun, hands-on project that brings joy and sparks creativity? Building a toy car wash is a perfect way to do just that.
Imagine your toy cars rolling through a mini wash, complete with spinning brushes and water sprays—all made by you. This project isn’t just entertaining; it’s a chance to learn, experiment, and impress friends and family. Ready to dive in? Let’s explore simple steps that will help you build your very own toy car wash from start to finish.
Materials Needed
Gather basic craft supplies like cardboard, glue, paint, and small plastic pieces. Simple tools such as scissors and markers help shape and decorate the toy car wash. These materials keep the project fun and easy to build.
Creating a toy car wash can be an exciting and creative project for both kids and adults. The first step is gathering the materials you’ll need. With the right supplies, you can build a fun and functional toy car wash that will keep your little ones entertained for hours. Below is a list of essential materials, along with some optional decorative items to enhance your car wash’s appeal.Basic Supplies
- Cardboard Boxes:These will form the structure of your car wash. You can use different sizes to create various sections like the entrance and exit.
- Scissors and Tape:Essential for cutting and securing parts of your car wash together. Make sure you have sturdy tape for a firm hold.
- Plastic Wrap or Clear Cellophane:Use this for the windows of the car wash. It gives a realistic look and allows you to see the toy cars inside.
- Markers or Paints:These are for coloring and adding details to the cardboard boxes, making your car wash more visually appealing.
- Small Brushes or Sponges:These will act as the washing mechanism. Attach them inside the car wash where they can gently scrub the toy cars.
- Water Bottle Sprayer:A small spray bottle can serve as the water source, simulating the washing process.
Optional Decorative Items
- Colored Paper or Stickers:Use these to decorate the exterior of your car wash. You can create signs, logos, or fun patterns.
- LED Lights:Adding small LED lights can make your car wash sparkle and stand out. They are especially fun for evening play.
- Miniature Figures:Place little figurines around the car wash to simulate workers or customers, adding an interactive element.
- Artificial Plants:Small fake plants can be placed around to give a more realistic and welcoming environment.
- Custom License Plates:Create mini license plates for the toy cars using paper or stickers for personalization.
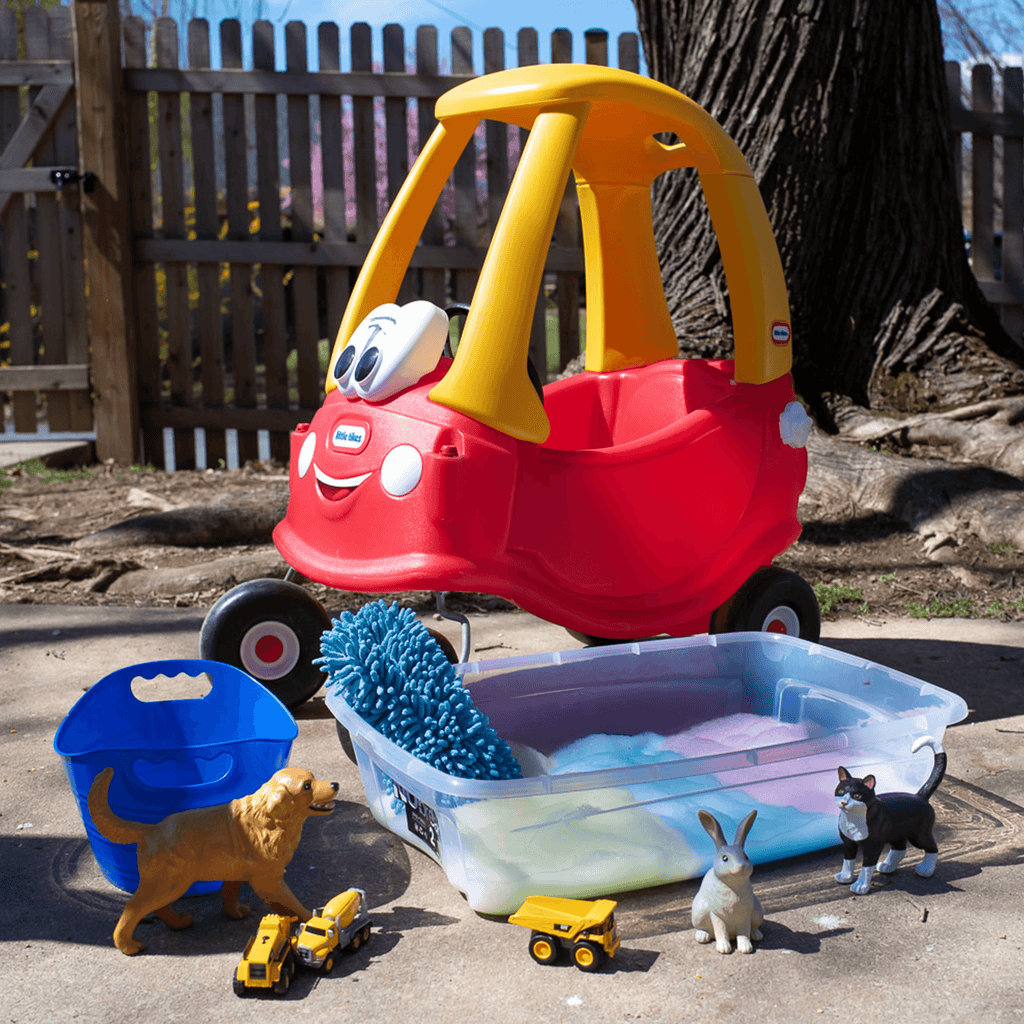
Credit: tenlittle.com
Preparing The Base
Preparing the base is a key part of building a toy car wash. A solid base keeps the structure steady and safe for play. It also helps the toy last longer. Focus on creating a flat and strong foundation to support all parts of the car wash.
Choosing A Surface
Select a surface that is flat and smooth. This makes building easier and the toy more stable. Wood, plastic, or a sturdy cardboard sheet work well. Avoid soft or uneven surfaces like carpet or grass. These surfaces can cause the car wash to tip over or break.
Consider the size of your toy car wash. Pick a surface large enough to fit all parts comfortably. The surface should also be easy to clean in case of water spills or paint stains.
Setting Up The Foundation
Start by placing the chosen surface on a stable table or floor area. Make sure it won’t move during play. Use tape or glue to fix the edges if needed.
Check the surface for any bumps or rough spots. Sand or smooth these areas to prevent damage to the toy. You can add extra support underneath with small blocks or foam if the base feels weak.
This step ensures your toy car wash stands firm and stays safe during use.
Constructing The Wash Area
Constructing the wash area is the heart of your toy car wash project. This section gives your toy cars a place to get clean and adds fun and realism to the play. Creating a sturdy and attractive wash area invites kids to imagine real car wash action. Focus on a solid frame and lively wash brushes that spin or sway. Use simple materials that are easy to work with and safe for children. Let’s dive into building the frame and adding the wash brushes for a complete wash experience.
Building The Frame
Start by choosing strong materials like wood or thick cardboard. Cut pieces to create a rectangular base and upright sides. Secure the parts with glue or small nails for stability. Make sure the frame is wide enough for toy cars to pass through easily. Add crossbars at the top to hold the brushes later. Paint the frame with bright colors to make it eye-catching. Let the paint dry fully before moving on. This frame will hold everything together and support the wash brushes.
Adding Wash Brushes
Choose soft materials such as sponge strips or foam rolls for the brushes. Cut them into equal lengths to fit inside the frame. Attach the brushes to wooden dowels or sticks so they can spin or move. Fix the dowels horizontally across the top crossbars. Use glue or tape to hold the brushes in place but allow some movement. Arrange the brushes close enough to touch the car sides but not block the path. Add different colors or stripes to make the brushes look fun and realistic. These brushes bring life to your toy car wash and make playtime more exciting.

Credit: www.instagram.com
Installing Water Features
Installing water features makes your toy car wash more fun and realistic. Water adds motion and sound, capturing kids’ attention. It brings the playset to life with splashes and sprays. A few simple tools and parts create a smooth water flow. Safety and ease are key during installation. Let’s explore how to add water effects easily and effectively.
Simple Water Pump Options
Choose a small, quiet water pump to move water gently. Battery-operated pumps work well and are safe for kids. Look for pumps designed for fountains or aquariums. These pumps are easy to install and maintain. Connect the pump to a water reservoir or container. A flexible tube guides water to the wash area. Secure all connections to avoid leaks. Test the pump before final setup to ensure smooth flow.
Creating Splash Effects
Splash effects add excitement and realism to the car wash. Use small spray nozzles or perforated tubes to create water sprays. Position nozzles above the car path for a splash sensation. A shallow tray collects water to prevent spills. Consider adding foam strips to mimic soap suds. Use waterproof materials to protect parts from water damage. Adjust water pressure to avoid strong sprays that could soak surroundings. Splash effects keep playtime lively and engaging.
Decorating The Car Wash
Decorating the toy car wash is where your creativity really shines. This step transforms a simple structure into a fun, inviting play space that kids will love. The right decorations add personality and make the car wash feel more realistic and exciting.
Painting And Stickers
Choose bright, cheerful colors for the car wash walls and roof. Reds, blues, and yellows grab attention and create a playful vibe. Use non-toxic, washable paint so you can refresh the colors as needed.
Stickers are an easy way to add detail without much effort. Find car-themed stickers or decals of bubbles and water drops to enhance the washing effect. You can also cut shapes from colored paper and glue them on for a unique touch.
Adding Signage
Signs give your toy car wash a professional look. Create a bold sign with the name of the car wash and place it above the entrance. Use thick markers or print letters from your computer for neatness.
Don’t forget smaller signs like “Start Here” or “Exit” to guide playtime. These little details make the experience more interactive and fun. Have you thought about adding prices or promotional offers to spark imaginative role play?
Testing And Play
Testing and playing with your toy car wash is where all your hard work truly pays off. This stage is not just about seeing if it works but also about making sure it’s safe and fun. You’ll find that small tweaks can make a big difference in the overall experience.
Ensuring Functionality
Start by running a few toy cars through the wash to check every part moves smoothly. Watch the brushes spin, the water spray, and the conveyor belt in action. If anything sticks or slows down, look for loose parts or obstructions and adjust accordingly.
Try different car sizes to see how well your wash adapts. Does the water reach all sides? Are the drying fans blowing air evenly? Testing with a variety of toys helps you spot overlooked issues before kids start playing.
Safe Play Tips
Safety should be your top priority. Make sure all edges are smooth and there are no small pieces that could come loose and pose a choking hazard. If you use water, ensure it doesn’t create slippery areas around the play zone.
Keep electrical components, if any, well protected from moisture. Explain to children how to play gently to avoid breaking parts or hurting themselves. Do you have a designated spot for storage to keep the toy clean and intact after each use?
Maintenance And Upgrades
Maintaining and upgrading your toy car wash keeps it fun and functional for a long time. Regular care prevents wear and tear, while thoughtful improvements can make the play experience even better. Let’s look at simple ways to keep your toy car wash in top shape and how you can add new features as you go.
Cleaning The Toy Car Wash
Dirt and water buildup can clog your toy car wash quickly. Clean it regularly by wiping down surfaces with a damp cloth and mild soap. Avoid harsh chemicals that might damage plastic parts.
Remove small parts like brushes and sponges for a thorough rinse. Let everything dry completely before putting it back together to prevent mold growth. Have you noticed how a clean toy works smoother and feels more inviting to use?
Enhancing Features Over Time
Start with simple upgrades such as adding LED lights or a small water pump to simulate real car wash action. These additions make the toy more interactive and exciting.
Consider adding sound effects or a timer to create a sense of realism. You can also customize the design with stickers or paint to give it a unique look. What new feature would your child enjoy the most?

Credit: themindfultoddler.com
Frequently Asked Questions
What Materials Do I Need To Build A Toy Car Wash?
You need cardboard, sponges, plastic bottles, glue, and paint. These materials are affordable and easy to find. They help create the structure and cleaning components of the toy car wash. Using recycled items adds an eco-friendly touch.
How Long Does It Take To Build A Toy Car Wash?
Building a toy car wash usually takes 1 to 2 hours. Time depends on the design complexity and drying time for glue or paint. Planning your steps can speed up the process and improve the final result.
Can Kids Safely Build A Toy Car Wash?
Yes, kids can build a toy car wash with adult supervision. Use child-safe tools and non-toxic materials. This activity promotes creativity, fine motor skills, and fun learning. Ensure safety by guiding children through each step carefully.
How To Make The Toy Car Wash More Realistic?
Add moving parts like spinning brushes using small motors or manual cranks. Use water-safe sponges and paint to mimic soap and water effects. Detailing with stickers or markers enhances the look. These features increase play value and realism.
Conclusion
Building a toy car wash can be fun and simple. It helps kids learn while they play. Use easy materials you find at home. Take your time and enjoy the process. Your child will love watching their cars get clean.
This project also sparks creativity and imagination. Keep trying different ideas to improve your car wash. It’s a great way to spend time together. Start today and see the joy it brings!