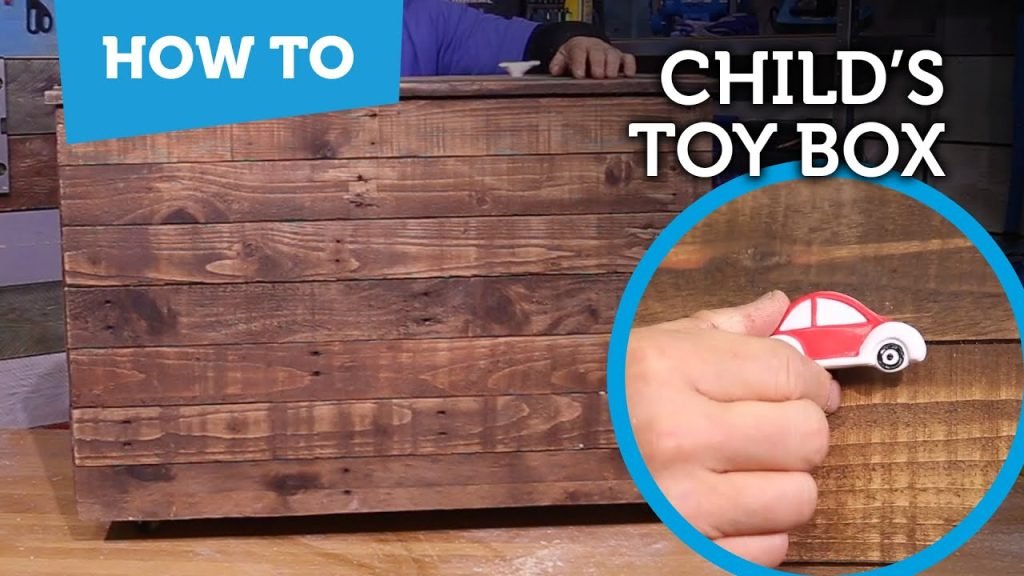
Are you tired of toys scattered all over your floor? Imagine having a sturdy, beautiful wooden toy box that keeps your child’s playroom neat and organized.
Building your own toy box out of wood is easier than you think, and you’ll get the satisfaction of creating something useful with your own hands. In this guide, you’ll discover simple steps, handy tips, and the best materials to make a toy box that lasts for years.
Ready to turn clutter into calm? Let’s get started!

Credit: www.ana-white.com
Materials Needed
Building a toy box from wood needs specific materials. Choosing the right wood and tools is key. This ensures the toy box is sturdy and safe for kids. Gather all materials before starting. This makes the process smooth and easy.
Wood Selection
Pick wood that is strong and safe for children. Softwoods like pine are easy to work with and budget-friendly. Hardwood options like oak or maple last longer but cost more. Avoid treated wood. It can be harmful to kids. Choose wood with a smooth finish or sand it well. This prevents splinters and rough edges.
Tools And Equipment
Having the right tools helps build the toy box quickly and accurately. Basic tools include:
- Saw (hand saw or power saw)
- Measuring tape
- Hammer or drill
- Screwdriver
- Sandpaper or electric sander
- Wood glue
- Clamps to hold pieces together
Safety gear like goggles and gloves protects you during work. Keep all tools clean and in good condition for best results.

Credit: www.ana-white.com
Design Planning
Design planning is the first and most important step in building a wooden toy box. It helps create a clear idea of the size and shape. Careful planning avoids mistakes and saves time and materials. A good plan makes the building process smoother and the final product stronger and more useful.
Choosing Dimensions
Choose dimensions based on the space where the toy box will go. Think about the room size and the kids’ age. The box must be large enough to hold toys but small enough to fit the room. Consider height, width, and depth carefully.
A common size is around 24 inches wide, 18 inches deep, and 18 inches tall. Adjust sizes to fit your needs. Make sure the lid is easy to open and close. Also, leave enough room for handles or decorations if wanted.
Sketching The Design
Draw a simple sketch to see how the toy box will look. Sketching helps visualize the shape and parts clearly. Include all sides and the lid in the drawing. Label measurements on each part.
Use a pencil and paper or a drawing app. Make notes on materials and tools needed. This step helps find problems before cutting wood. It also helps explain the project to helpers or family.
Cutting The Wood
Cutting the wood is a crucial step in building your toy box. It sets the foundation for a sturdy, well-fitting structure. Accurate cuts ensure all pieces come together smoothly, making assembly easier and the final product more durable.
Safety Precautions
Before you start cutting, protect yourself with safety gear. Always wear safety goggles to shield your eyes from wood chips and dust. Use ear protection if your saw is noisy, and gloves to keep your hands safe.
Secure your wood firmly with clamps to prevent slipping. A stable work surface reduces the risk of accidents. Never rush your cuts—take your time and keep your fingers clear of the blade.
Measuring And Marking
Precise measurements are key to a professional-looking toy box. Use a tape measure and a straight edge to mark your wood clearly. Double-check each measurement before cutting to avoid costly mistakes.
Mark your cut lines with a pencil or chalk. Consider using a square tool to ensure your lines are perfectly straight and at the correct angles. Have you ever measured twice and still ended up with uneven pieces? Careful marking can save you from that frustration.
Assembly Process
The assembly process is a key part of building a wooden toy box. It turns separate wood pieces into a sturdy box. Careful joining and securing ensure the box lasts long and looks neat.
Joining Pieces
Start by aligning the wood pieces carefully. Edges must match perfectly for a clean fit. Use clamps to hold the pieces tightly together. Check the corners to make sure they are square. This step prevents gaps and keeps the box strong.
Securing With Screws
Choose screws that fit the wood thickness. Pre-drill holes to avoid splitting the wood. Drive screws slowly, keeping them straight. Countersink screws slightly below the surface for a smooth finish. Tighten screws firmly, but not too much to avoid damage.
Finishing Touches
The finishing touches bring your wooden toy box to life. They protect the wood and give it a smooth, lovely look. Paying attention to these final steps makes your toy box safe and durable. It also makes the box feel nice to touch and easy to clean. Let’s dive into the key finishing steps.
Sanding Surfaces
Sanding smooths the wood and removes rough spots. Use fine-grit sandpaper for a gentle finish. Sand all edges and corners carefully to avoid splinters. Wipe off the dust with a clean cloth after sanding. This step prepares the wood for paint or varnish.
Applying Paint Or Varnish
Paint adds color and personality to your toy box. Choose non-toxic paint safe for children. Apply thin, even coats with a brush or roller. Let each coat dry before adding the next. Varnish protects the wood’s natural look and strength. Use clear varnish for a simple, classic finish. Seal every part of the box to keep it safe from spills and scratches.
Adding Functional Features
Adding functional features to your wooden toy box improves its usability and safety. These features help the box open and close smoothly. They also make moving the box easier for children and adults alike. Focus on installing hinges and adding handles to enhance the box’s function and style.
Installing Hinges
Choose strong hinges to support the toy box lid. Attach them evenly along the back edge for balance. Use screws that fit the hinge holes tightly. Drill pilot holes to avoid splitting the wood. Test the lid’s movement to ensure it opens smoothly. Soft-close hinges add safety by preventing sudden slams.
Adding Handles
Select handles that match the toy box size and style. Position them on the sides or front for easy grip. Mark the screw holes precisely before drilling. Use screws that hold the handles firmly in place. Rounded or wooden handles feel comfortable for small hands. Handles help carry or move the toy box effortlessly.
Safety And Maintenance
Building a wooden toy box is fun, but safety and maintenance matter most. A safe toy box keeps children protected. Proper care helps the box last longer. This section covers key tips for both safety and upkeep.
Child Safety Tips
- Use smooth wood to avoid splinters.
- Sand all edges and corners well.
- Choose non-toxic paint or finish.
- Install soft-close hinges to prevent finger pinching.
- Avoid heavy lids that could trap fingers.
- Check for loose nails or screws regularly.
- Make sure the toy box is stable and won’t tip over.
Long-term Care
- Clean the toy box with a damp cloth regularly.
- Reapply wood finish every year to protect the surface.
- Store the box in a dry place to prevent warping.
- Fix cracks or chips quickly to avoid further damage.
- Check hinges and screws periodically and tighten if needed.
- Avoid placing heavy objects on top to keep its shape.

Credit: www.ana-white.com
Frequently Asked Questions
What Materials Are Needed To Build A Wooden Toy Box?
You need plywood or solid wood, screws, wood glue, sandpaper, paint or varnish, hinges, and handles. These materials ensure durability and a smooth finish for your toy box.
How Do I Ensure Safety In A Wooden Toy Box?
Use non-toxic paint and smooth all edges to prevent splinters. Also, add safety hinges to avoid pinched fingers when opening and closing the lid.
What Are The Basic Steps To Build A Toy Box?
Measure and cut wood panels, assemble the base and sides, attach the lid with hinges, sand smooth, and finish with paint or varnish. This process creates a sturdy and attractive toy box.
How Much Time Does It Take To Build A Toy Box?
Building a wooden toy box typically takes 3 to 5 hours. This includes cutting, assembling, sanding, and finishing, depending on your woodworking experience.
Conclusion
Building a wooden toy box is a fun and useful project. It keeps toys organized and the room tidy. You only need basic tools and simple steps. Choose the right wood and measure carefully. Sand the edges to make it safe for kids.
Paint or stain it to match your space. This project adds charm and function to any room. Give it a try and enjoy your handmade toy box. A small effort brings big satisfaction. Ready to start?




