
Have you ever wanted to create something fun, eco-friendly, and exciting with your own hands? Building a solar toy car is the perfect way to do just that.
Imagine watching your car zoom across the room powered only by sunlight—no batteries, no wires, just clean energy. In this guide, you’ll discover simple steps to make your very own solar-powered car, even if you’re new to building projects. Ready to turn sunlight into motion and impress your friends?
Let’s get started!

Credit: www.tiktok.com
Materials Needed
Gathering the right materials is the first crucial step to successfully build your solar toy car. Having everything prepared not only saves time but also ensures a smoother assembly process. You’ll find that each component plays a key role in making your car run efficiently on solar power.
Solar Panel
The solar panel is the heart of your toy car’s power system. Choose a small, lightweight panel that fits well on your car’s body. Panels rated between 2V to 6V usually provide enough energy for a toy car to move smoothly.
Think about where you’ll place the panel on the car to catch the most sunlight. Have you considered testing different panel sizes to see which one gives you the best speed and performance?
Toy Car Kit
A pre-made toy car kit can simplify your project by including essential parts like wheels, chassis, and axles. If you enjoy customization, look for kits with modular parts that allow easy modifications.
Some kits even come with instructions tailored for solar power setups, which can be a big help if you’re new to building models. What features matter most to you in a kit—durability, ease of assembly, or design?
Tools Required
Having the right tools makes building your solar toy car easier and more enjoyable. Basic tools include a small screwdriver, wire cutters, and tweezers for handling tiny parts.
You might also need electrical tape or a soldering iron if you want to create secure connections. Do you have a comfortable workspace with good lighting? It makes a big difference when working on detailed assembly.
Preparing The Work Area
Preparing the work area is essential before building a solar toy car. A clean, organized space helps you focus and work safely. It also prevents losing small parts during assembly. Setting up a proper workspace makes the project easier and more enjoyable.
Safety Tips
Keep your work area free from clutter. Remove any sharp objects or liquids. Use safety glasses to protect your eyes. Work in a well-lit space to see small parts clearly. Avoid loose clothing that might catch on tools or parts. Always handle tools carefully and store them safely after use.
Organizing Tools
Gather all tools and parts before starting. Use small containers or trays to keep screws and tiny pieces together. Arrange tools like screwdrivers, pliers, and wire cutters within easy reach. Label parts if needed to avoid confusion. A tidy workspace saves time and prevents frustration during building.
Assembling The Toy Car
Assembling the toy car is an exciting part of the project. This step brings all the parts together. It creates the basic structure of your solar toy car. Careful assembly ensures the car runs smoothly and lasts longer.
Attaching The Wheels
Start by placing the wheels on the axles. Make sure each wheel fits snugly. Check if the wheels can spin freely. Wheels should not be too tight or too loose. Proper wheel attachment helps the car move easily.
- Align the wheel holes with the axle ends.
- Push the wheels gently onto the axles.
- Test the wheels by spinning them with your fingers.
Securing The Axles
Next, fix the axles firmly to the car body. Axles hold the wheels and allow rotation. Use clips or glue to keep axles in place. Ensure axles stay straight and stable. Loose axles cause wobbling and reduce speed.
- Insert axles through the car frame holes.
- Attach small clips or fasteners to each axle end.
- Double-check axle alignment and tightness.
Installing The Solar Panel
Installing the solar panel is a key part of building your solar toy car. It captures sunlight and turns it into power. Correct installation helps the car run smoothly and efficiently. Pay close attention to wiring and panel placement for the best results.
Connecting Wires
Start by identifying the positive and negative wires on the solar panel. Use small connectors or solder wires carefully to avoid loose connections. Secure the wires so they do not move or touch each other. This prevents short circuits and power loss. Check that all connections are tight before moving on.
Positioning The Panel
Place the solar panel on a flat, stable spot on the car’s body. The panel should face the direction of the sun to get maximum light. Avoid shading from parts of the car or other objects. Use small screws or strong tape to keep the panel fixed. A well-positioned panel improves energy capture and car speed.
Testing The Solar Toy Car
Testing the solar toy car is an exciting part of building it. This step checks if your car runs smoothly and uses solar power well. Careful testing helps find and fix any problems before full use. It ensures your toy car performs as you expect under sunlight.
Checking Connections
Start by examining all the wires and parts. Make sure each wire is tightly connected. Loose wires can stop the car from working. Look for any broken or damaged pieces. Confirm the motor, solar panel, and battery links are secure.
Use a small tool to gently press connectors if needed. Avoid forcing wires to prevent damage. A steady connection allows power to flow properly. This step is key to a smooth-running solar car.
Sunlight Exposure
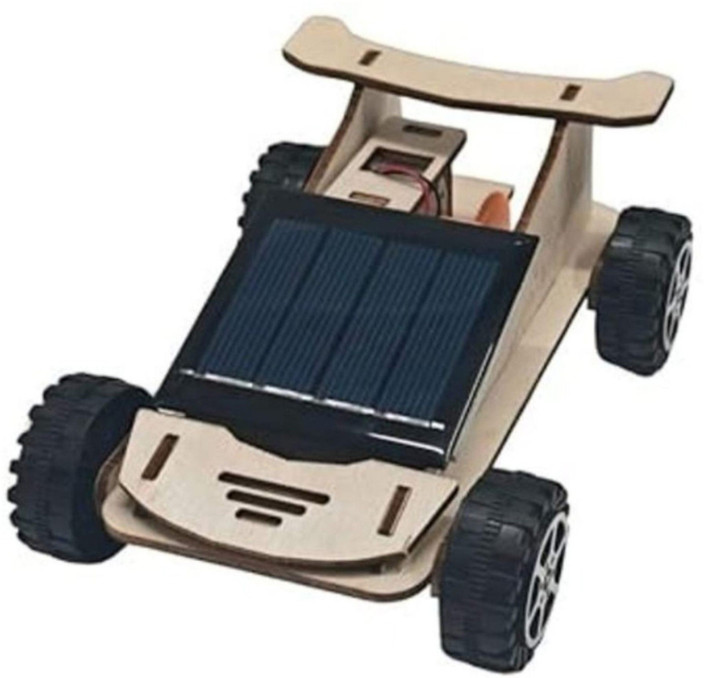
Place the solar car under bright sunlight. The solar panel needs direct sun to generate power. Indoor light or shade may not work well. Watch the car closely to see if it moves.
Try different angles to find the best sunlight spot. If the car does not move, check the panel again. Sometimes dust or dirt blocks the sunlight. Clean the panel gently to improve power capture.
Testing in sunlight confirms that your solar car uses energy correctly. It also helps you understand how sunlight affects car speed and motion.
Credit: www.flipkart.com
Troubleshooting Common Issues
Troubleshooting common issues in your solar toy car project can save you hours of frustration and get your car running smoothly faster. Identifying whether the problem lies in the electrical system or the mechanical parts helps you focus your efforts. Let’s break down these areas so you can diagnose and fix problems with confidence.
Electrical Problems
If your solar toy car isn’t moving, start by checking the electrical connections. Loose wires or poor contacts often cause power interruptions. Make sure all wires are firmly connected, especially between the solar panel, motor, and battery (if used).
Look for signs of damage like broken wires or corrosion on terminals. Even a small amount of dirt or rust can block electricity flow.
- Test the solar panel under direct sunlight to ensure it’s generating power. A multimeter can confirm voltage output.
- Check if the motor spins freely when powered directly with a battery. This isolates motor issues from wiring problems.
- Swap out any suspect wires or connectors with spares to rule out faulty parts.
Have you tried reversing the wire connections? Sometimes the motor only spins in one direction due to polarity. Flipping the wires might get your car moving forward.
Mechanical Adjustments
Sometimes the motor runs, but your car still doesn’t move. This usually points to mechanical issues like wheel alignment or friction problems.
Inspect the wheels and axles closely. Are the wheels spinning smoothly? Tight or misaligned axles can cause resistance that stops movement.
- Ensure wheels are securely attached but not too tight against the frame.
- Remove any debris caught in the wheels or axles that could block rotation.
- Check if the gear system (if any) meshes properly without skipping or jamming.
Sometimes a slight bend in the chassis or axle can cause rubbing. Try gently adjusting the parts until the wheels spin freely. Ask yourself: could a small tweak in alignment make a big difference here?
Enhancing The Design
Enhancing the design of your solar toy car is where creativity meets functionality. This stage lets you add personality to your project while improving how it runs. You can make your car stand out visually and boost its speed or efficiency with some smart tweaks.
Decorative Ideas
Think about what makes your car unique. You might want to paint it with bright colors or add stickers that reflect your style. Using lightweight materials like colored paper or thin plastic sheets can add flair without weighing down the car.
Adding small details like miniature flags or LED lights powered by the solar panel can make your car look more exciting. Have you tried customizing the wheels with different colors or patterns? These small touches can turn a simple toy into a conversation piece.
Performance Upgrades
To speed up your solar car, focus on reducing friction and improving power transfer. Lubricate the wheel axles with a drop of oil to help the wheels spin smoothly. You can also swap out the wheels for larger or more aerodynamic ones to increase speed.
Adjusting the angle of the solar panel can catch more sunlight and boost energy output. Have you experimented with adding a small gear system to increase torque? This can help your car climb small ramps or move more steadily on uneven surfaces.

Credit: vxb.com
Frequently Asked Questions
What Materials Are Needed To Build A Solar Toy Car?
You need a small solar panel, motor, wheels, chassis, wires, and basic tools. These parts are affordable and easy to find online or at hobby stores.
How Does A Solar Toy Car Work?
The solar panel converts sunlight into electricity. This electricity powers the motor, which turns the wheels, making the car move without batteries.
Can Children Safely Build A Solar Toy Car?
Yes, it’s safe and educational for children. Adult supervision is recommended for handling tools and wiring to ensure safety.
How Long Does It Take To Build A Solar Toy Car?
Building a solar toy car typically takes 1 to 2 hours. Time depends on age, experience, and complexity of the design.
Conclusion
Building a solar toy car teaches you about clean energy and simple machines. It’s fun and helps you learn by doing. You can see how sunlight turns into power. This project shows how small ideas can make a big difference.
Try building your own car and explore how it moves. Science becomes easy and exciting with hands-on work. Keep experimenting and enjoy learning about the world around you.




