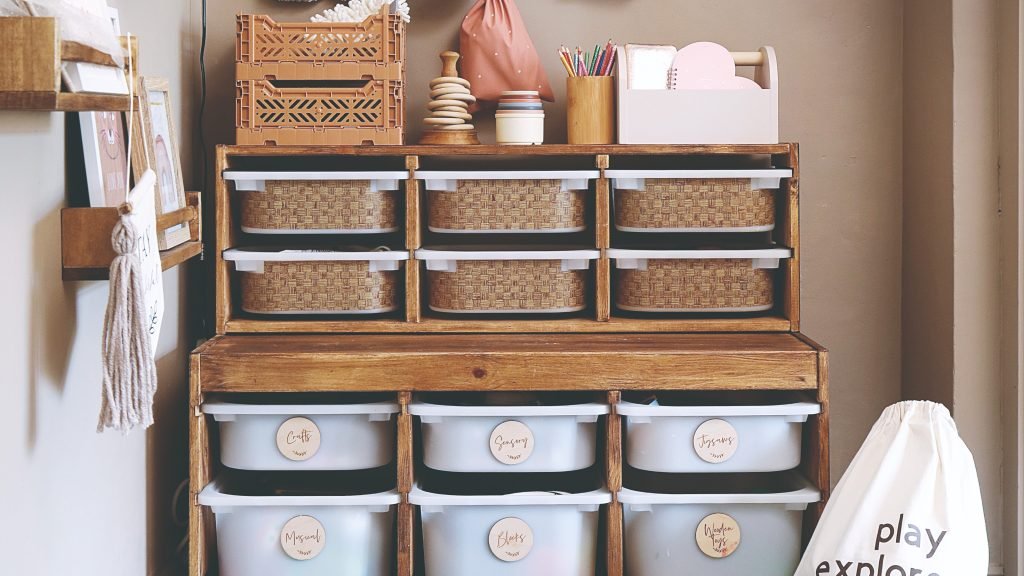
Are your kids’ toys scattered all over the place, making your home look messy and chaotic? You’re not alone.
Finding a simple, effective way to keep toys organized can feel overwhelming. But what if you could create your own toy organizer that fits perfectly in your space, matches your style, and keeps everything tidy? In this post, you’ll discover easy and fun DIY toy organizer ideas that anyone can make.
These ideas will help you take control of the clutter and bring calm back to your home. Keep reading—you’re about to transform your space and make toy cleanup a breeze!
Benefits Of Diy Toy Organizers
Creating your own toy organizer saves money and fits any space perfectly. It keeps toys tidy and easy to find, making clean-up faster and fun. DIY projects also add a personal touch to your child’s room.
Creating DIY toy organizers isn’t just a fun project; it’s a practical solution that can transform your living space. Imagine walking into a room where toys are neatly stored, easily accessible, and add to the room’s charm. This isn’t just about tidiness; it’s about enhancing your environment and making playtime more enjoyable for everyone. Here’s why DIY toy organizers are a game changer for your home.
Cost-effective Solution
Why spend a fortune on store-bought organizers when you can create your own at a fraction of the price? DIY projects allow you to repurpose materials you already have at home, like old boxes or unused furniture. You not only save money but also contribute to a sustainable lifestyle by recycling and reusing. What could you do with those extra dollars saved from DIY organizing?
Customization To Fit Your Space
Every home is unique, and so are its storage needs. DIY toy organizers give you the freedom to design storage solutions that perfectly fit your space, style, and needs. Whether it’s a small nook in the living room or a spacious playroom, you can tailor the size, color, and functionality to match your decor and the toys it will hold. Have you ever thought about how a custom fit could enhance the look of your home?
Encourages Creativity And Family Bonding
Making toy organizers is a creative process that can involve the entire family. Kids love to have a say in how their toys are stored, and it’s a great way to spend quality time together. Working on a DIY project teaches kids valuable skills like planning and following instructions, all while having fun. Could this be your next weekend project with the kids?
Promotes Organization Skills In Children
A well-organized play area teaches children the importance of tidiness. When toys have designated places, kids learn to put them back after playtime, developing habits that can translate into other areas of life. This simple act of organizing can enhance their responsibility and independence. How might this impact your child’s daily routine?
Boosts Room Aesthetics
A well-crafted toy organizer can be a charming addition to any room. Instead of clutter, you’ll have a stylish piece that adds character and functionality to the space. Choose colors and designs that complement your existing decor, transforming your home into a visually appealing haven. What kind of design would seamlessly blend into your living space? By embracing DIY toy organizer projects, you unlock a world of benefits that go beyond mere storage. You enhance your home, save money, and inspire creativity. So, what’s stopping you from starting your next DIY adventure today?
Materials You’ll Need
Gathering the right materials is the first step to building a toy organizer that truly fits your space and style. The choices you make here affect durability, appearance, and how easy the organizer is to use daily. Think about what you already have at home and what you might need to buy to keep costs down.
Basic Construction Materials
Wood is a popular choice for DIY organizers because it’s sturdy and easy to work with. Plywood sheets, pine boards, or reclaimed wood can all serve as the base for shelves and compartments. If you want something lighter or more colorful, consider sturdy cardboard or plastic storage bins to build compartments.
Fasteners And Adhesives
You’ll need screws, nails, or strong glue to hold your organizer together. Wood screws provide lasting strength, especially if you want your organizer to handle heavy toys. For quick projects, a high-quality wood glue or hot glue can save time and keep things neat.
Finishing Supplies
Paint, stain, or varnish not only enhance the look but also protect the material from wear and tear. Choose non-toxic options if your kids will be handling the organizer often. Sandpaper will smooth rough edges, making the final product safer and more pleasant to touch.
Tools For Assembly
Basic tools like a saw, hammer, screwdriver, and measuring tape will help you put your organizer together accurately. If you don’t own these, borrowing or renting can be a budget-friendly option. A drill can speed up the process, especially when working with wood.
Additional Organizing Accessories
Consider adding hooks, labels, or fabric bins to customize your organizer. Labels help kids learn where toys belong and can make cleanup easier. Hooks add storage for items like dress-up clothes or bags, increasing functionality without taking up shelf space.
Simple Storage Box Ideas
Simple storage boxes help keep toys neat and easy to find. They save space and make clean-up fast. These ideas use everyday materials and small budgets. Kids can join in decorating and sorting their toys. Choose options that fit your room style and needs.
Decorated Cardboard Boxes
Cardboard boxes are cheap and easy to find. Cover them with colorful paper or fabric for a fresh look. Use stickers or drawings to personalize each box. Label boxes with pictures or words for quick toy sorting. Stack boxes to save floor space. They are light and easy to move around.
Wooden Crate Organizers
Wooden crates add a rustic touch to any room. Sand and paint crates in bright colors to brighten the space. Arrange crates in stacks or side by side for different shapes. Add wheels for easy movement. Crates are strong and hold heavier toys. Open fronts make toys visible and easy to grab.
Recycled Plastic Containers
Plastic containers come in many sizes and shapes. Use clear containers to see what’s inside without opening. Add labels or colorful tape to identify toys. Containers with lids keep dust away and stack well. Wash and reuse containers from old food or storage. This option is waterproof and lasts long.
Wall-mounted Organizer Options
Wall-mounted toy organizers save valuable floor space and keep your child’s play area tidy. They make toys easily accessible and visible, encouraging kids to clean up on their own. If you want practical and stylish options, here are some ideas you can try at home.
Hanging Mesh Bags
Hanging mesh bags are lightweight and perfect for sorting small toys like action figures, blocks, or craft supplies. You can install hooks or a rod on the wall and hang multiple bags, making cleanup quick and simple.
These bags allow you to see the contents easily, so your child won’t have to dig around. Plus, they dry fast if any toys are damp or messy. Have you thought about grouping toys by type or color in different bags to speed up tidying?
Pegboard Storage
Pegboards give you a flexible way to organize toys and tools with hooks, baskets, or shelves that can be moved as needed. Mount a pegboard at your child’s height to make it easy for them to reach and put away items.
You can customize the setup with bins for art supplies or hang puzzles and games on pegs. What if you added labeled baskets to help your kids learn sorting and organization skills while playing?
Floating Shelves
Floating shelves are a sleek way to display toys and books without bulky furniture. Install several shelves at varying heights to accommodate different toy sizes and keep everything in clear view.
They can double as a display for favorite toys or collections, making cleanup feel less like a chore. Have you considered mixing open shelves with small bins or boxes to hide clutter and maintain a clean look?
Creative Use Of Furniture
Using furniture creatively can transform your play area without buying new storage pieces. It saves money and gives your space a unique, personal touch. You might be surprised how everyday furniture can become the perfect toy organizer with a little imagination.
Repurposed Bookshelves
Bookshelves are a simple way to organize toys by category or size. Remove some shelves or add baskets to fit larger items or keep smaller toys contained. You can even paint or decorate them to match your child’s room theme.
I once turned an old bookshelf into a colorful toy display. It made it easier for my kids to find their favorite toys and put them back. Have you thought about what old furniture you could give a new life?
Storage Benches
Storage benches are a great two-in-one solution. They provide seating and hidden storage space underneath for toys, games, or craft supplies. Place one near a playroom corner or by a window for a cozy nook that stays tidy.
Look for benches with removable lids or hinged tops for easy access. Adding cushions or pillows can make them more inviting. What spot in your home could benefit from extra seating and storage?
Under-bed Drawers
Under-bed drawers use often-wasted space efficiently. They’re perfect for storing toys that aren’t used daily, like puzzles or seasonal items. You can buy ready-made drawer units or repurpose old shallow boxes with wheels.
Try labeling each drawer to keep things organized and easy for kids to find. It’s a practical way to reduce clutter while keeping toys within reach. Could your child’s bed area become a secret toy stash?
Credit: www.tiktok.com
Labeling And Personalizing
Labeling and personalizing your DIY toy organizer makes a huge difference in keeping things tidy and fun. It’s not just about neatness; it helps kids find their favorite toys quickly and encourages them to put things back where they belong. Adding a personal touch also turns a simple organizer into something special that reflects your child’s personality and interests.
Chalkboard Labels
Chalkboard labels offer a flexible way to label toy bins or shelves. You can write the toy category with chalk and easily change it as your child’s collection grows or changes. This method keeps things fresh and adaptable without needing new labels every time.
Plus, chalkboard labels invite kids to join in. Letting them write or draw on the labels can make organizing feel like a fun activity instead of a chore. Have you tried adding a little doodle next to the label? It makes the space more inviting and personal.
Color-coding Systems
Color-coding is a simple way to sort toys by type, age group, or play area. Assigning a color to each category helps children visually identify where things belong. For example, use blue bins for building blocks, red for art supplies, and green for puzzles.
This system speeds up cleanup time and reduces arguments over where toys go. You can even match the colors with your room decor to keep the space looking cohesive. What colors would work best in your child’s playroom?
Custom Name Tags
Adding custom name tags to toy organizers makes the space truly unique. You can create tags using your child’s favorite colors, fonts, or themes like animals, superheroes, or princesses. This personal touch motivates kids to take ownership of their space.
Consider using laminated name tags or tags in small frames for durability and style. It’s a small detail that makes a big impact on how your child relates to their toys and their responsibility for keeping them organized. How might your child react to seeing their name on every toy box?
Safety Tips For Diy Organizers
Creating a DIY toy organizer is fun and helpful. Safety is the most important part of this project. A safe organizer keeps children away from harm and makes playtime stress-free. Simple safety checks can prevent accidents and injuries.
Use safe materials and tools. Avoid sharp edges or small parts that children can swallow. Always test the stability of the organizer before use. Secure heavy items to walls to stop tipping. Keep the organizer at a height that children can reach without climbing.
Choose Non-toxic Materials
Select paints, glues, and finishes that are labeled non-toxic. These products reduce the risk of poisoning. Avoid materials with strong odors or harmful chemicals. Natural wood and water-based paints are good choices.
Secure Heavy Items Properly
Attach tall or heavy organizers to the wall. Use brackets or anchors made for this purpose. This prevents the organizer from falling over. Check the security of these attachments regularly to keep children safe.
Avoid Sharp Edges And Small Parts
Sand down rough or sharp edges on wood or plastic. Cover corners with soft protectors if needed. Do not use small screws or buttons that can come loose easily. These parts can be choking hazards for young children.
Check For Stability And Balance
Place the organizer on a flat, stable surface. Test it by gently pushing it from different sides. If it wobbles or tips, add supports or adjust the base. Stability is key to prevent accidents during play.
Keep Organizers Accessible And Child-friendly
Set the organizer at a height that children can reach safely. Avoid designs that require climbing to get toys. Use wide, easy-to-open bins or drawers. This helps children access toys without risk.
Credit: www.familyhandyman.com
Maintenance And Organization Habits
Keeping your DIY toy organizer in top shape requires more than just building it; regular upkeep and smart habits play a big role. Maintenance and organization habits help your space stay neat and your kids find their favorite toys easily. These habits also teach your children responsibility and make cleanup less stressful for everyone.
Creating A Daily Cleanup Routine
Set aside a specific time each day for tidying up the toys. Even just 10 minutes can make a huge difference in keeping your space clutter-free. You might find that involving your kids in this routine turns cleanup into a fun and rewarding habit.
Ask yourself: How can you make daily cleanup feel less like a chore and more like a game? Maybe use a timer or create a reward chart to encourage consistency.
Labeling And Categorizing Toys
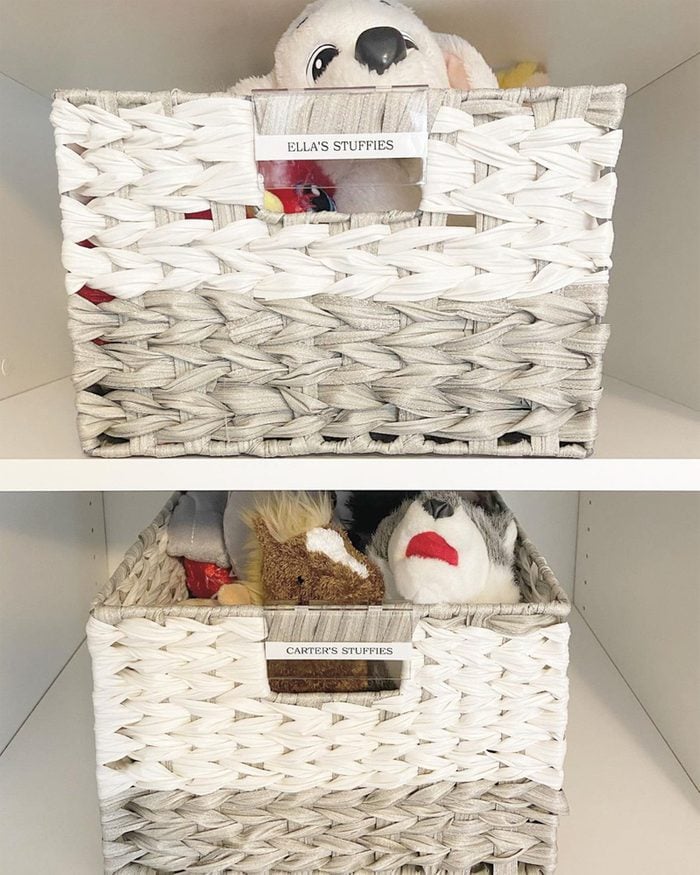
Labels help everyone know exactly where each toy belongs. Use simple words or pictures on bins and shelves so kids can easily identify their spots. This reduces mix-ups and makes putting toys away quicker.
Think about how clear labels can save you time and frustration. Could color-coding or adding pictures make a difference for younger children?
Regularly Sorting And Decluttering
Make it a habit to go through toys regularly and remove those that are broken or no longer played with. This keeps your organizer from becoming overcrowded and overwhelming. You might schedule sorting sessions every few months or before birthdays and holidays.
Consider asking: What criteria will you use to decide which toys to keep or donate? How can you involve your kids in this process to teach them about giving and sharing?
Credit: busytoddler.com
Frequently Asked Questions
What Are Easy Diy Toy Organizer Ideas For Small Spaces?
Use vertical shelves, hanging baskets, and stackable bins. These save space and keep toys accessible. Label each container for quick sorting and neatness.
How Can I Make A Toy Organizer With Recycled Materials?
Use old crates, cardboard boxes, or jars. Paint or decorate them for a personalized touch. This method is eco-friendly and budget-conscious.
What Tools Do I Need For Diy Toy Organizers?
Basic tools include a hammer, nails, screwdriver, glue, and measuring tape. Depending on the project, you might also need sandpaper and paint.
How Do Diy Toy Organizers Help With Kids’ Playtime?
Organizers keep toys tidy and easy to find. This reduces cleanup time and encourages children to play independently.
Conclusion
DIY toy organizers help keep play areas neat and fun. Simple projects save money and reduce clutter. Kids learn to clean up and stay organized. Use easy materials found at home or stores. Small steps create big changes in your space.
Try different ideas to find what works best. Enjoy the process and make it your own. Organizing toys can be quick and satisfying. Start today and see the difference it brings.




