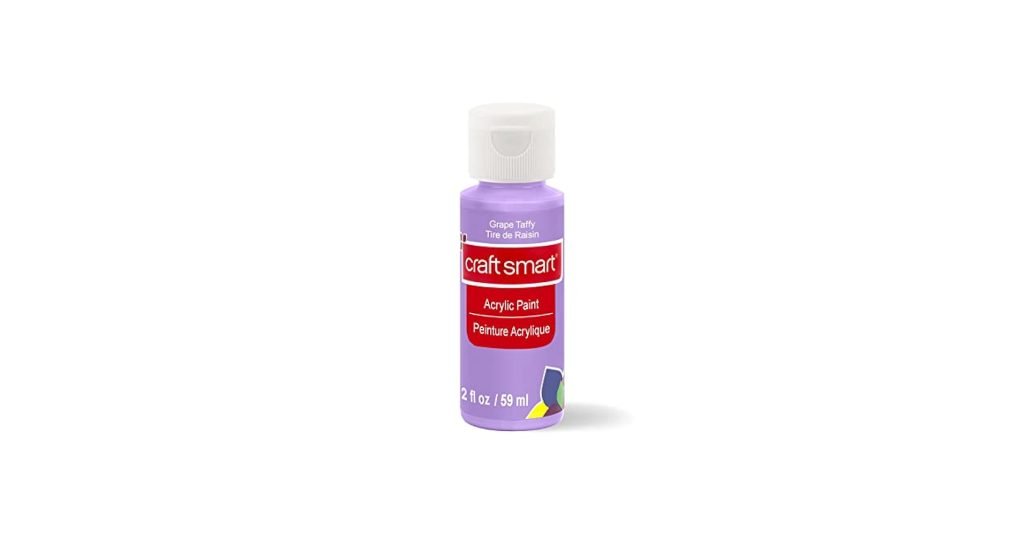
Are you wondering if Craft Smart acrylic paint is the right choice for your model kit? Choosing the perfect paint can make all the difference in how your model looks once finished.
You want colors that stick well, dry nicely, and bring out every detail of your hard work. You’ll discover whether Craft Smart acrylic paint meets those needs and how it performs on model kits. Keep reading to find out if this popular paint brand can help you achieve the results you’re aiming for.

Credit: www.reddit.com
Craft Smart Acrylic Paint Basics
Craft Smart acrylic paint works well on model kits, offering good coverage and vibrant colors. It dries quickly and sticks to plastic surfaces easily. This paint is a budget-friendly choice for hobbyists and beginners alike.
Craft Smart Acrylic Paint is a versatile choice for model kits. It’s known for its vibrant colors and smooth application. Understanding its basics helps in achieving desired results.Composition And Features
Craft Smart Acrylic Paint is water-based. It dries quickly and is easy to clean. It offers excellent coverage on various surfaces. Its formula includes pigments and a polymer binder. This makes it durable and long-lasting. It’s non-toxic, making it safe for indoor use.Color Range And Finishes
Craft Smart offers a wide color range. From bright hues to muted tones, there’s a shade for every project. It includes metallic and glitter finishes for added flair. Matte finishes provide a smooth, non-reflective look. Glossy finishes create a shiny, polished surface. These options allow for creativity and customization.Suitability For Model Kits
Choosing the right paint for model kits is important. Craft Smart acrylic paint is popular among hobbyists. It offers good color variety and is budget-friendly. But its suitability for model kits depends on key factors. These include how well it sticks to plastic and how it holds up over time. Understanding these points helps you decide if Craft Smart paint works for your project.
Adhesion To Plastic Surfaces
Craft Smart acrylic paint sticks fairly well to plastic surfaces. Model kits usually use polystyrene or ABS plastic. This paint bonds best after proper surface preparation. Light sanding and cleaning the plastic improve adhesion. Applying a primer also helps the paint grip better. Without these steps, the paint may peel or chip easily. Thin layers of paint dry faster and stick stronger. Overall, Craft Smart paint can work on plastic with good prep.
Durability And Flexibility
Durability is key for painted models that get handled. Craft Smart acrylic paint forms a flexible film after drying. This flexibility reduces cracking or flaking. The paint resists minor bumps and bends. However, it may not be as tough as specialized model paints. Sealing with a clear coat improves protection. It also enhances the paint’s resistance to wear. Regular touch-ups might be needed for long-term use. Craft Smart offers decent durability for casual model building.
Preparation Tips For Model Kits
Proper preparation is key for painting model kits with Craft Smart acrylic paint. It helps paint stick better and shows true colors. Taking time to clean and prime your model boosts the final look. Choosing the right brushes also affects paint application and detail work. These simple steps help achieve smooth and even paint layers.
Surface Cleaning And Priming
Start by cleaning the model to remove dust and oils. Use warm water and mild soap. Gently scrub with a soft brush or cloth. Rinse well and let it dry completely. This step ensures paint adheres evenly and lasts longer.
Next, apply a primer made for plastic models. Primer creates a smooth base and helps paint stick. Use thin, even coats and let it dry fully. Priming also highlights any surface flaws to fix before painting.
Choosing The Right Brushes
Select brushes with fine, synthetic bristles for acrylic paint. They hold paint well and keep their shape. Use small detail brushes for fine lines and larger flat brushes for broad areas. Keep brushes clean by rinsing in water often. This prevents paint buildup and ensures smooth strokes.
Application Techniques
Applying Craft Smart acrylic paint on model kits requires care and precision. Proper techniques ensure smooth finishes and vibrant colors. Use the right approach to bring out fine details and avoid paint clumps. Focus on layering, drying, and blending for the best results.
Thin Layers And Drying Times
Apply thin layers of paint instead of thick coats. Thin layers dry faster and reduce brush marks. Use a small brush or airbrush for better control. Let each layer dry fully before adding another. Drying times vary but usually take 15 to 30 minutes. Patience prevents smudging and uneven surfaces. Thin layers build depth and avoid losing model details.
Blending And Detailing
Blending colors creates smooth transitions on your model kit. Use a damp brush to gently mix wet paint areas. Work quickly before the paint dries for better blends. For details, use fine-tipped brushes or toothpicks. Highlight edges and small parts carefully. Detailing adds realism and sharpness to your model. Practice steady hand movements for clean lines and accents.
Common Challenges
Using Craft Smart acrylic paint on model kits brings a few common challenges. These can affect the final look and durability of your painted model. Understanding these issues helps in getting better results and a smooth finish. Below are key challenges that hobbyists often face while using this paint.
Avoiding Brush Strokes And Clumps
Craft Smart acrylic paint can sometimes leave visible brush strokes on your model. Thick paint layers cause clumps that ruin the smooth surface. Thin the paint slightly with water for better flow. Use soft brushes and light strokes to reduce marks. Applying multiple thin coats is better than one thick coat.
Keep the brush clean during painting. Dry or old paint on the brush can create streaks. Let each layer dry fully before adding the next. This helps in building a smooth, even surface.
Preventing Paint Chipping
Paint chipping is common if the surface is not prepared well. Clean the model parts to remove dust or oils before painting. Use a primer to help the paint stick better. Craft Smart acrylic paint may chip if applied too thick or on a rough surface.
Allow the paint to dry completely before handling the model. Applying a clear sealant can protect the paint and reduce chipping. Be gentle with the model to keep the paint intact longer.

Credit: www.reddit.com
Sealing And Finishing
Sealing and finishing are crucial steps after applying Craft Smart acrylic paint on model kits. These processes protect the paint and enhance the model’s appearance. Proper sealing prevents paint from chipping or fading over time. Finishing also adds a professional touch, making your model stand out.
Choosing the right sealant depends on the desired finish and the model’s use. A good topcoat maintains the paint’s color and texture. Finishing touches can highlight details and give the model a polished look.
Topcoat Options
- Matte topcoats reduce shine and give a natural look.
- Satin topcoats offer a soft sheen, balancing shine and dullness.
- Glossy topcoats create a bright, shiny finish that highlights colors.
- Clear acrylic sprays are easy to apply and fast drying.
- Brush-on sealants allow more control but need careful application.
Enhancing Longevity
Sealing with a topcoat extends the paint’s life on your model. It protects against dust, moisture, and handling damage. Applying thin, even layers helps avoid drips and uneven surfaces.
Let each layer dry fully before adding another. Store your finished model in a cool, dry place to keep the finish fresh. Regular cleaning with a soft brush keeps dust off without harming the sealant.
Comparing Craft Smart With Other Acrylics
Choosing the right acrylic paint for your model kits can make a big difference in the final look and your painting experience. Craft Smart acrylic paint is often considered by hobbyists because of its affordability and availability. But how does it stack up against other acrylic paints designed specifically for models? Comparing Craft Smart with other acrylics helps you decide if it meets your needs or if another brand might be better suited for your projects.
Price Vs Performance
Craft Smart acrylic paint is significantly cheaper than many specialty model paints. You can often find a set of multiple colors at a fraction of the price of brands like Vallejo or Tamiya. This makes it attractive if you are just starting out or working on a tight budget.
However, lower price can mean compromises in paint quality. Craft Smart tends to have a thicker consistency, which may require more thinning to get smooth layers on small model surfaces. Some colors may not be as vibrant or opaque, needing multiple coats to achieve a solid finish.
Ask yourself: Is saving money worth spending extra time on prep and coats? If you want quick, high-quality results, investing in paints formulated for models might save you effort in the long run.
User Reviews And Feedback
Many hobbyists report mixed experiences with Craft Smart acrylics. Some praise its affordability and wide color range, saying it’s great for practice or test painting. Others mention challenges with drying time and brush strokes being more noticeable.
Compared to specialized model paints, Craft Smart is often seen as less durable. Users say it chips more easily if not sealed properly. Still, beginners find it a good entry point to explore techniques without breaking the bank.
- Positive: Easy to find in craft stores, budget-friendly, good for large areas
- Negative: Requires thinning, less vibrant, less durable on detailed parts
Think about your project needs. Would you prefer a paint that gives you more control and lasting results, or is a lower-cost option that’s okay to experiment with better for your style?

Credit: www.amazon.com
Expert Recommendations
Expert advice helps improve your model painting experience. Choosing the right paint and technique matters. It affects the final look and durability of your model. Experts share tips to use Craft Smart acrylic paint effectively. They also suggest when to pick other paint types for better results.
Best Practices For Model Painting
Clean the model surface before painting. Use mild soap and water to remove dust and oils. Let the model dry completely. Thin the Craft Smart acrylic paint with water for smooth application. Apply several thin coats rather than one thick coat. Allow each layer to dry fully between coats. Use fine brushes for small details and larger brushes for broad areas. Seal the paint with a clear matte or gloss finish to protect it. Work in a well-lit, ventilated space for better control and safety.
When To Choose Alternative Paints
Craft Smart acrylic paint works well for many models. But some projects need different paints. Choose enamel paints for a harder, more durable finish. Use oil-based paints for blending and shading effects. Avoid Craft Smart acrylic paint on models exposed to heat or water. Opt for specialty model paints for metal or plastic surfaces. Select paints designed for fine detail if your model is very small or intricate. Check paint compatibility with your model material to prevent damage.
Frequently Asked Questions
Can Craft Smart Acrylic Paint Be Used On Model Kits?
Yes, Craft Smart acrylic paint works well on model kits. It adheres smoothly and dries quickly, providing good coverage and vibrant colors.
Is Craft Smart Paint Safe For Plastic Model Surfaces?
Craft Smart acrylic paint is safe for plastic models. It does not damage or warp plastic and offers a durable, flexible finish.
How To Apply Craft Smart Paint On Model Kits Properly?
Apply Craft Smart paint in thin, even layers. Use a fine brush or airbrush and allow each layer to dry before adding another.
Can Craft Smart Acrylic Paint Be Mixed For Custom Colors?
Yes, you can mix Craft Smart acrylic paints to create custom colors. Mix small amounts for best control over color tones.
Conclusion
Craft Smart acrylic paint works well on model kits. It sticks nicely and dries fast. You can get good colors with little effort. The paint is easy to use for beginners. Just remember to apply thin layers for best results.
Clean brushes quickly to keep them in good shape. This paint offers a simple way to brighten your models. Try it out and see how it fits your project. Small steps bring big improvements. Enjoy painting your models with confidence and ease.




