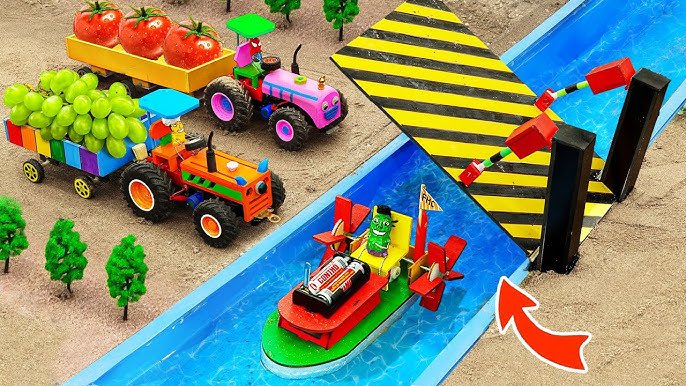
Have you ever wondered how engineers create strong bridges that hold up cars, trains, and people? What if you could build your own toy bridge right at home?
Building a toy bridge isn’t just fun—it helps you understand how real bridges work and challenges your creativity. In this guide, you’ll discover simple steps to make a sturdy, impressive toy bridge using everyday materials. Ready to impress your friends and learn something new?
Keep reading, and let’s get started!
Materials Needed
Gathering the right materials is key to building a sturdy toy bridge. The supplies should be easy to find and safe for children to use. Choosing simple items helps keep the project fun and stress-free. Below is a list of basic supplies needed and some optional decorative items to enhance the bridge.
List Of Basic Supplies
- Popsicle sticks or wooden craft sticks
- White glue or wood glue
- Scissors or a small craft knife (adult supervision needed)
- Ruler or measuring tape
- Pencil for marking measurements
- Rubber bands or clips to hold pieces together while drying
- Sandpaper to smooth rough edges
Optional Decorative Items
- Paints and brushes for coloring the bridge
- Stickers or decals for adding designs
- Colored markers for drawing details
- Small flags or paper cutouts for decoration
- Glitter or craft gems for sparkle
- String or yarn to mimic cables or ropes

Credit: www.youtube.com
Safety Tips
Building a toy bridge can be a fantastic hands-on activity, but safety should always come first. Ensuring a safe environment helps keep the experience fun and worry-free for everyone involved. Small precautions can prevent accidents and make the project smoother.
Child-friendly Tools
Using tools designed specifically for children makes a big difference. These tools are smaller, lighter, and often have rounded edges to reduce the risk of injury.
Look for plastic or wooden versions of hammers, screwdrivers, and saws that are easy for little hands to handle. This not only protects your child but also boosts their confidence as they work independently.
Have you noticed how kids focus better when they feel safe with their tools? Choosing the right ones encourages creativity without compromising safety.
Protective Gear
Protective gear is essential, even for small projects like building a toy bridge. Simple items such as safety goggles and gloves can shield eyes and hands from accidental scrapes or splinters.
Make sure the gear fits well. Ill-fitting gloves or goggles can be uncomfortable and cause distractions, which might lead to accidents.
Consider involving your child in picking out the gear. When they choose their safety equipment, they’re more likely to wear it consistently. What’s your go-to protective gear for craft projects?
Design Planning
Design planning is the first and most important step in building a toy bridge. It helps you organize ideas and avoid mistakes. A clear plan makes the building process faster and more fun.
Start by thinking about what type of bridge fits your needs. Then, make simple sketches to guide your work. Planning saves time and materials.
Choosing A Bridge Type
Pick a bridge type based on strength and style. Some common types include:
- Beam bridge – simple and easy to build
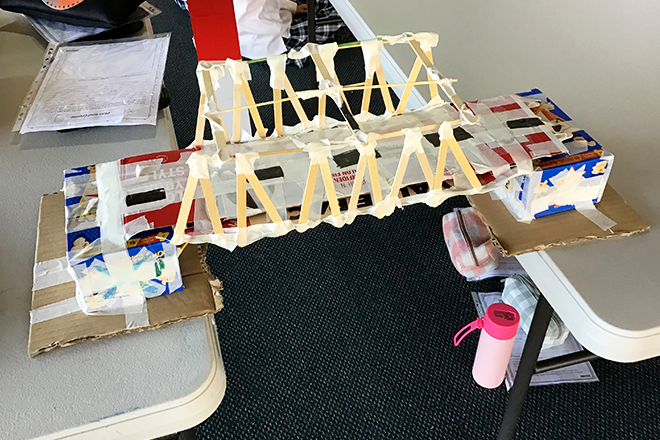
- Truss bridge – strong with triangular supports
- Arch bridge – curved shape that holds weight well
- Suspension bridge – uses cables for support
Think about the materials you have. Some bridges need more parts. Choose a design that fits your skills and supplies.
Simple Sketching Techniques
Draw a rough outline of your bridge on paper. Use basic shapes like lines, triangles, and rectangles. This helps you see the structure before building.
Label parts and note measurements. Keep sketches clear but simple. You don’t need perfect drawings. Just enough to guide your work.
Use a pencil to make changes easy. A good sketch saves time and reduces errors during construction.
Building The Foundation
Building the foundation is the first and most important part of making a toy bridge. A strong base keeps the bridge steady and safe. It holds up the entire structure and stops it from falling.
Focus on making the foundation solid before adding other parts. Use the right materials and connect them well. This creates a stable bridge that lasts longer and looks good.
Creating A Stable Base
Start with a flat surface to place your bridge. Use thick pieces of wood or strong blocks. These materials hold weight without bending or breaking.
Make the base wide enough to spread the weight evenly. A narrow base can tip over easily. Check that all parts touch the surface firmly to avoid wobbling.
Connecting Support Structures
Join the support parts tightly to the base. Use glue, tape, or small nails depending on your materials. Strong connections stop the bridge from shaking or falling.
Arrange supports in triangles or arches. These shapes spread weight well and add strength. Make sure each support touches the base and the bridge deck firmly.
Constructing The Bridge Deck
Constructing the bridge deck is a crucial part of building your toy bridge. This is the surface that will carry the weight and connect the two sides of the bridge. Getting it right means your bridge will not only look good but also stand strong and hold up under pressure.
Using Craft Materials
Choosing the right materials for your bridge deck can make a big difference. Thin wooden sticks, like popsicle sticks or craft sticks, are popular because they’re lightweight yet sturdy. You can also use cardboard, foam board, or even plastic sheets depending on what you have available.
Glue works best for attaching pieces together, but small nails or tape can add extra support. Remember, layering materials can add strength. For example, layering two pieces of cardboard glued together creates a much tougher deck than a single layer.
Ensuring Stability
Stability comes from how you arrange your materials. Laying sticks or strips parallel to the length of the bridge distributes weight evenly. Adding cross braces underneath can prevent the deck from bending or twisting.
Think about where the weight will be placed. Will your toy cars drive over the middle or the edges? Strengthen those areas by doubling up materials or adding extra support beams.
Have you tried testing your deck with small weights before finalizing it? This simple step can save you from surprises later. If it bends too much, add more supports or change your materials.
Adding Details
Adding details to your toy bridge transforms it from a simple structure into a captivating miniature masterpiece. These finishing touches can highlight your creativity and make your bridge stand out. Think about how small changes can bring your project to life and invite others to appreciate your effort.
Painting And Decorating
Painting your toy bridge lets you choose colors that match your vision. Use bright shades to make it eye-catching or natural tones to mimic real bridges. Try different techniques like sponging or stenciling to create interesting textures.
Adding small decorations can boost the overall look. Consider tiny flags, miniature traffic signs, or even faux plants along the edges. These little extras add personality and give your bridge a story.
Personalizing Your Bridge
Personal touches make your toy bridge truly yours. Add your name or initials with paint or stickers. You might also create a tiny plaque with the bridge’s “name” and the date you built it.
Think about what your bridge represents. Is it a connection between places, or a symbol of creativity? Include elements that reflect your hobbies or favorite colors. This makes the project more meaningful and fun to share with others.
Final Touches
Once you’ve assembled your toy bridge, the final touches determine how well it performs and how polished it looks. This stage isn’t just about aesthetics; it’s about making sure your bridge can handle the load and stay standing strong. Taking time here can turn a simple model into a sturdy, impressive structure you’ll be proud of.
Testing Strength
Start by gently placing small weights on your bridge, like coins or toy cars. Watch closely for any signs of bending or wobbling. If it holds steady, gradually increase the weight to test its limits without causing sudden damage.
Try pushing down lightly at different points—center, edges, and joints. This helps you find the weakest spots that need reinforcement. Have you noticed a particular area that flexes more than others? That’s where your attention is needed most.
Making Adjustments
After testing, reinforce the weak spots with extra materials, such as tape or small glue drops. Don’t just add strength blindly—focus on areas that showed strain during testing. Sometimes a tiny fix can prevent your entire bridge from collapsing.
Balance is key. If you add too much weight to one side, the bridge might tip or warp. Check symmetry and alignment carefully. Have you considered swapping out any parts for sturdier alternatives?
Finally, clean up any rough edges or excess glue. This not only improves appearance but also prevents small pieces from catching or breaking. Your bridge is now ready for display or more intense play!

Credit: www.youtube.com
Showcase Your Creation
After putting time and effort into building your toy bridge, it’s important to give it the spotlight it deserves. Showcasing your creation not only celebrates your hard work but also inspires others. Sharing your bridge can spark conversations and even new ideas for your next project.
Displaying The Bridge
Find a sturdy, well-lit spot to display your toy bridge. A shelf or tabletop near a window works great because natural light highlights details and colors.
Consider adding a small label or card describing your bridge’s design or the materials you used. This adds context and makes your display more engaging.
Have you thought about creating a mini-scene around the bridge? Adding toy cars, figures, or even a small water feature can bring your bridge to life and make it more eye-catching.
Sharing With Friends
Invite friends over to see your toy bridge in person or take clear photos to share online. People love seeing creative projects and will appreciate your craftsmanship.
Try explaining the building process or the challenges you faced. This makes the story behind the bridge more interesting and encourages others to try building their own.
Why not challenge friends or family to build their own bridges? Sharing your creation could turn into a fun group activity that fuels creativity and friendly competition.
Credit: spw.sa.edu.au
Frequently Asked Questions
What Materials Are Best For Building A Toy Bridge?
Wood, plastic, and cardboard are ideal materials for toy bridges. They are lightweight, easy to cut, and assemble. Choose materials based on your bridge design and durability needs. Using glue or tape helps secure parts firmly for stable construction.
How Do You Design A Strong Toy Bridge?
Focus on simple shapes like triangles for strength. Use supports evenly to distribute weight. Reinforce joints with glue or tape. Test the bridge with small weights before finalizing to ensure it holds well. A balanced design prevents collapse.
What Tools Are Needed To Build A Toy Bridge?
Basic tools include scissors, glue, tape, a ruler, and a pencil. These help measure, cut, and assemble materials precisely. For wooden bridges, add a small saw or craft knife. Always prioritize safety when handling tools.
How Can I Make My Toy Bridge More Realistic?
Add details like railings, paint, and textured surfaces. Use small model figures or vehicles to enhance realism. Research real bridges for design ideas. Painting and decorating improve visual appeal and learning experience.
Conclusion
Building a toy bridge can be fun and educational. You learn about balance, strength, and design. Simple materials work well for this project. Take your time and follow each step carefully. Test your bridge to see if it holds weight.
Fix any weak spots you find. This activity helps improve creativity and problem-solving skills. Enjoy the process and share your bridge with friends or family. Keep practicing to build even better bridges next time.




