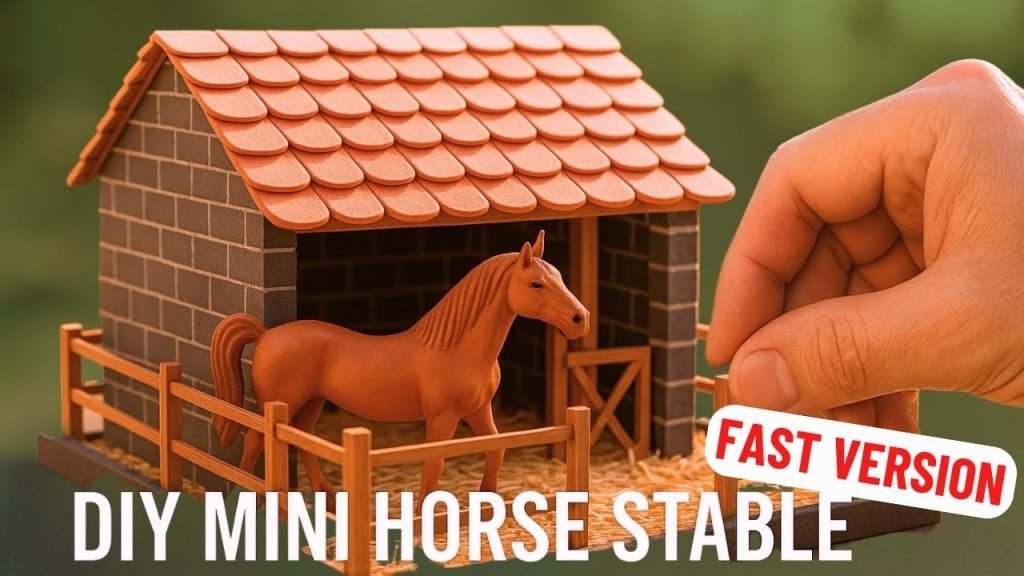
Are you looking for a fun and creative project that brings joy to your child or adds charm to your playroom? Building a toy horse barn is the perfect way to do just that.
Imagine creating a special place where your child’s toy horses can live, play, and feel at home. In this guide, you’ll discover simple steps and helpful tips to build a sturdy, beautiful toy horse barn that you and your child will love.
Ready to bring this playful idea to life? Let’s get started!

Credit: www.amazon.com
Materials Needed
Gather wood, nails, glue, paint, and small hinges for building the toy horse barn. Basic tools like a hammer and saw are also needed. Simple materials make the project easy and fun.
When building a toy horse barn, using the right materials is crucial. The quality of materials can affect the durability and appearance of your barn. Let’s explore the essential materials and tools you’ll need for this project.Basic Tools
To start, gather basic tools for cutting and assembling. You’ll need a saw for cutting wood pieces to size. A hammer and nails are essential for joining the wood. Use a screwdriver for any screws needed. Measuring tape ensures accurate dimensions. A pencil helps mark cuts and placements. Sandpaper smooths rough edges and surfaces.Wood And Supplies
Choose quality wood for the barn structure. Plywood is a great option for walls and roof. Select hardwood for stable and durable beams. You will need hinges for doors and windows. Paint or wood stain is ideal for finishing touches. Glue helps secure smaller parts. Don’t forget decorative elements like miniature fences and hay bales.Safety Gear
Safety gear is important when working with tools and materials. Wear goggles to protect your eyes from sawdust. Use gloves to shield your hands from splinters and sharp tools. Dust masks prevent inhalation of harmful particles. Ensure you have a first aid kit nearby for emergencies. Keep your workspace organized to avoid accidents.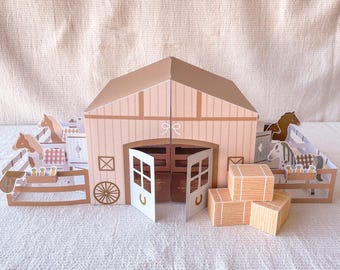
Credit: www.etsy.com
Planning Your Barn
Planning your toy horse barn is the first step to a fun project. Good planning saves time and avoids mistakes. Think about what you want your barn to look like and how big it should be. This helps make the building process smooth and enjoyable. Let’s explore the key points in planning your barn.
Choosing The Size
Decide how big your toy horse barn needs to be. Think about the number of horses or toys it will hold. A small barn fits a few horses, while a bigger barn holds more. Also, consider the space where you will keep the barn. Measure that space carefully. Choose a size that fits well and looks balanced.
Design Ideas
Pick a style for your barn. Some barns are simple and classic. Others have fancy roofs or windows. You can add doors that open or small fences. Use colors that match your toys or your room. Look at pictures of real barns for inspiration. Write down ideas you like best.
Drawing A Simple Sketch
Draw a basic sketch of your barn on paper. Include the shape, size, and main features. Mark where doors and windows will go. Use simple lines and shapes. This sketch will guide you while building. Keep it clear and easy to follow. It does not need to be perfect.
Cutting The Wood
Cutting the wood is a crucial step in building your toy horse barn. Precise cuts ensure that all parts fit together perfectly, giving your barn a sturdy and polished look. Before you start cutting, preparing your workspace and tools can save you time and frustration.
Measuring Accurately
Accurate measurements are the foundation of clean cuts. Use a reliable tape measure or ruler and mark your wood clearly with a pencil. Double-check every measurement before cutting—this small extra step can prevent costly mistakes.
Consider creating a simple cutting guide or jig to keep your saw steady. This helps maintain straight cuts, especially if you’re working with longer boards. Have you noticed how even a slight mismeasurement can throw off the entire project?
Safe Cutting Techniques
Safety should always be your top priority while cutting wood. Wear safety glasses to protect your eyes from sawdust and debris. Keep your fingers well away from the blade and use clamps to hold the wood firmly in place.
Choose the right saw for your cuts; a handsaw works well for small pieces, while a jigsaw or circular saw handles larger boards with ease. Take your time and cut slowly to maintain control—rushing increases the risk of accidents and uneven edges.
Assembling The Frame
Assembling the frame is the foundation of your toy horse barn. It shapes the entire structure and ensures stability. Start with a strong base, then build the walls carefully. Finally, add the roof to complete the frame. Each part must fit well to keep the barn sturdy and safe for play.
Building The Base
The base supports the entire barn. Use flat, smooth wood pieces for a solid foundation. Cut the wood to the exact size needed for the barn’s footprint. Join the pieces using wood glue and nails or screws for extra strength. Check that the base is level and square before moving on.
Constructing Walls
Walls give the barn its shape and height. Cut wall panels or planks to match your design. Attach the walls to the base using screws or nails. Make sure the corners are tight and the walls stand straight. Reinforce corners with small wooden blocks inside for better support.
Adding The Roof
The roof protects the barn and completes the frame. Choose lightweight wood pieces cut at angles for the roof sides. Secure the roof pieces on top of the walls with screws or nails. Leave a small gap for ventilation if desired. Sand rough edges to avoid splinters.
Painting And Decorating
Painting and decorating bring your toy horse barn to life. This step adds charm and personality to the structure. It also protects the wood and makes the barn more durable. Choose colors and designs that fit your style. Add details to make it unique. Finally, use a finish to protect your work.
Choosing Colors
Pick colors that match a real barn or your favorite style. Red is classic and bright. White looks clean and fresh. Brown or beige gives a natural wood look. Use bold colors for doors or windows to make them stand out. Think about the space where the barn will sit. Choose colors that fit well with that area.
Adding Details
Details make the barn special. Paint windows and doors carefully for a neat look. Add small touches like flowers, hay bales, or horseshoes. Use a fine brush for small parts. Stickers or stencils can help create patterns easily. Personal touches make the barn feel warm and real.
Protective Finishes
Use a clear finish to keep your paint safe. A water-based sealant works well and dries fast. It protects from scratches and water damage. Apply two or three thin coats for best results. Let each coat dry before the next. This step helps your barn last longer and look great.
Adding Fun Features
Adding fun features to your toy horse barn transforms it from simple to exciting. These extras boost playtime joy and spark creativity. Small details make the barn feel real and inviting. Focus on parts that encourage interaction and imagination.
Doors And Windows
Choose doors that open and close smoothly. Sliding or hinged doors work well. Windows let light in and add charm. Use clear plastic or mesh for a see-through effect. Paint window frames in bright colors for a lively look.
Stalls For Toy Horses
Create separate stalls to keep each toy horse safe. Use small wooden dividers or cardboard walls. Add nameplates for each stall to make it personal. Include feeding troughs or water buckets inside stalls. Make sure stalls are big enough for all horse sizes.
Play Accessories
Include accessories to enrich play. Add hay bales, saddles, and brushes. Small fences or jumps make play more fun. Use miniature barrels or feed bags for decoration. These items keep kids busy and encourage role play.
Safety Tips
Safety is key while building a toy horse barn. It protects kids and helps avoid accidents. Following simple safety tips creates a fun and secure environment. Pay attention to supervision, tool handling, and play habits.
Supervision
Always watch children during barn building. An adult should guide and help at all times. Keep small kids close to avoid hazards. Clear rules make supervision easier and safer.
Tool Handling
Use tools carefully to prevent injuries. Teach kids how to hold and use each tool. Store sharp tools out of children’s reach. Wear safety gear like gloves and goggles. Check tools before use for damage.
Safe Play Practices
Set clear boundaries for playing in the barn area. Avoid running or roughhousing near the barn. Keep the barn clean and free of sharp edges. Use non-toxic paint and materials for building. Encourage gentle handling of toy horses and accessories.

Credit: www.tiktok.com
Frequently Asked Questions
What Materials Are Needed To Build A Toy Horse Barn?
You need wood, nails, screws, paint, glue, and sandpaper. Also, gather tools like a saw, hammer, and drill. Choose safe, child-friendly materials for durability and safety.
How Long Does It Take To Build A Toy Horse Barn?
Building a toy horse barn typically takes 4 to 6 hours. Time varies depending on design complexity and your woodworking skills. Planning ahead speeds up the process.
Can Beginners Build A Toy Horse Barn Easily?
Yes, beginners can build a toy horse barn with simple plans. Start with basic designs and follow step-by-step instructions carefully. Patience and practice improve your skills.
How To Make A Toy Horse Barn Safe For Kids?
Use non-toxic paint and smooth all edges to avoid splinters. Ensure parts are securely attached to prevent choking hazards. Always supervise young children during play.
Conclusion
Building a toy horse barn is a fun and rewarding project. You get to use simple materials and tools. Taking your time helps create a sturdy barn. Kids will enjoy playing with a barn they helped build. It also teaches patience and creativity.
Small steps lead to great results. Keep your workspace clean and safe. Most importantly, enjoy the process and have fun! This project brings joy to both kids and adults. Try it and see how satisfying it feels.




