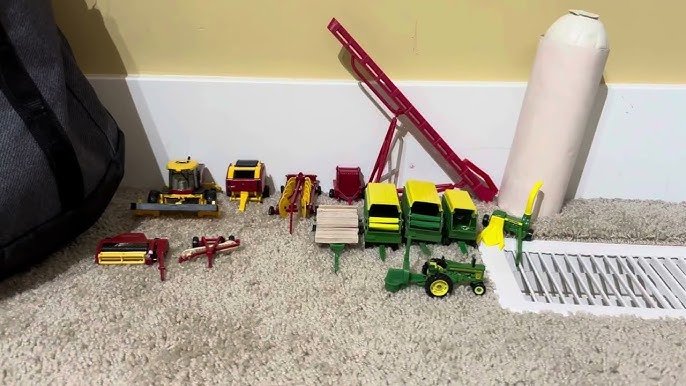
Are you looking to create a charming toy farm display that captures attention and sparks imagination? Whether it’s for a school project, a fun home decoration, or a unique gift, building your own toy farm can be both simple and exciting.
In this guide, you’ll discover easy steps to bring your miniature farm to life with tools and materials you probably already have. Get ready to make your toy animals, barns, and fields look so real, everyone will want to take a closer look! Keep reading, and you’ll learn how to turn your ideas into a display that stands out.

Credit: www.youtube.com
Choosing The Right Base
Choosing a sturdy base ensures your toy farm stays stable and looks neat. Wood or thick foam boards work well for a strong foundation. This helps keep all pieces in place and makes the display easy to move.
Choosing the right base is crucial for building a toy farm display. It sets the foundation for your entire setup. A sturdy and well-chosen base ensures stability and enhances the visual appeal. By selecting the proper base, you create a realistic and engaging environment for your farm figures.Selecting Materials
The material you choose for the base affects durability and aesthetics. Wood offers a natural look and is sturdy. Foam boards are lightweight and easy to cut. Plastic bases provide water resistance and are easy to clean. Consider the appearance and strength of each material.- Wood: Natural appearance, high durability, but can be heavy.
- Foam: Lightweight, easy to shape, but less durable.
- Plastic: Water-resistant, easy to clean, but less authentic look.
Determining Size
Deciding the size of your base depends on your space and imagination. Small spaces work well with compact bases. Larger areas allow for expansive displays. Measure your available space carefully. Think about the number of farm figures and accessories. A well-sized base accommodates your display without overcrowding.- Small base: Suitable for limited space, easy to manage.
- Medium base: Balance between size and space, versatile.
- Large base: Ideal for detailed displays, needs ample space.

Credit: www.tiktok.com
Planning Your Layout
Planning your layout is the foundation of a captivating toy farm display. It helps you visualize the space, organize your pieces, and create a story that draws attention. Taking time here saves frustration later and makes your display more enjoyable to build and share.
Sketching The Design
Start by grabbing a piece of paper or using a digital tool to sketch your toy farm layout. Draw the general shape of your display area, whether it’s a table, shelf, or floor space.
Mark where you want to place major items like barns, fences, and animals. Don’t worry about perfection—just get your ideas down so you can see how everything fits.
Sketching allows you to try different arrangements without moving heavy pieces around. It also helps you spot empty spots or crowded areas early on.
Arranging Key Elements
Think about the natural flow of a farm when arranging your key elements. Place the barn centrally or to one side, depending on your space, and position fields or pastures around it.
Keep paths clear for tractors or animals, and avoid clustering all the animals in one corner. Spreading them out creates a more realistic and engaging scene.
Don’t forget to add small details like water troughs, hay bales, or farm tools. These extras make your display feel alive and invite closer inspection.
Ask yourself: does your layout tell a story? Are there areas that encourage viewers to imagine daily farm life? Arranging your elements with intention makes your toy farm more than just a collection of toys.
Creating Terrain Features
Creating terrain features brings life to your toy farm display. It shapes the landscape and adds depth. The right terrain makes the scene look natural and fun. You can use simple materials to build hills, paths, and water features. These elements help tell a story and invite play.
Building Hills And Paths
Start by shaping hills with crumpled paper or foam. Cover them with green felt or artificial grass. Use glue to fix the covering tightly. For paths, cut narrow strips of brown paper or sandpaper. Arrange them winding through the hills. Add small stones or twigs to make paths look real. Hills give height and interest. Paths connect different parts of the farm.
Adding Water Features
Water features add calm and beauty to your display. Use shiny blue foil or plastic wrap to simulate water. Place it in low spots between hills. For streams, narrow strips of blue cellophane work well. Surround water edges with tiny stones or moss. You can also create ponds using shallow containers filled with clear resin or glue. These features make the farm feel alive and refreshing.
Adding Farm Structures
Adding farm structures brings life and realism to your toy farm display. These details create a cozy, working farm feel. Structures like barns, sheds, fences, and gates set the scene for animals and vehicles. Thoughtful placement helps tell a story and makes playtime more fun.
Placing Barns And Sheds
Barns and sheds are the heart of your farm. Place barns near the center or back of the display. This gives space for animals and equipment in front. Sheds can sit beside barns or near fields. Keep paths clear for toy tractors or animals to move easily. Use scale to choose barns and sheds that fit your farm size.
Incorporating Fences And Gates
Fences mark boundaries and keep animals safe. Arrange fences around fields or pastures to show where animals graze. Gates add access points and break fence lines naturally. Use small sections of fences to create pens or separate areas. Choose fence styles that match the farm theme, such as wooden or wire fences. Place gates where paths or roads meet fenced areas for easy entry and exit.
Selecting And Positioning Animals
Choosing and placing the animals on your toy farm display brings the scene to life. It’s not just about filling space but creating a believable farm environment that captures attention and sparks imagination.
Choosing Suitable Toy Animals
Start by picking animals that fit the type of farm you want to showcase. If your display is a classic dairy farm, cows, goats, and chickens are must-haves. For a more diverse farm, add pigs, horses, and even ducks.
Size matters here. Choose animals that are proportionate to your farm buildings and other elements. Mixing too many sizes can make the display look unbalanced or unrealistic.
Think about materials too. Plastic figures are durable and easy to clean, while wooden or cloth animals add a charming, handmade feel. Which style fits your vision best?
Arranging For Realism
Arrange animals in groups or pairs rather than scattered randomly. Animals often cluster naturally—hens near a coop, cows in a pasture, pigs by a pen. This small detail instantly boosts realism.
Consider animal behavior when positioning them. Place grazing animals facing grass patches or water troughs near drinking spots. This makes the scene feel active, not static.
Don’t forget to leave some open space to suggest movement areas or paths. Overcrowding can make the display look cluttered and less believable. How can you use space to tell a story in your farm scene?
Including Plants And Details
Including plants and small details in your toy farm display brings it to life. These elements add texture and depth, making the scene feel real and inviting. Paying attention to these tiny touches can transform a simple setup into a captivating miniature world.
Using Miniature Trees And Grass
Miniature trees instantly create a natural look for your toy farm. You can find small plastic or fabric trees at hobby stores, or even make your own using wire and green sponge material. Placing these trees strategically around your farm adds height and breaks up flat areas.
Grass mats or static grass fibers work well to cover the base and give your farm a lush, grassy feel. You might try mixing different shades of green to avoid a uniform look, which can feel artificial. Have you ever noticed how real fields have patches of different grass colors? Mimicking that variety helps your display feel authentic.
Adding Accessories
Accessories like fences, farm tools, and tiny animals fill your farm with life and story. Even small details like a wheelbarrow or a tractor parked near the barn catch the eye and spark imagination. Think about what daily farm life includes, and add those elements to your scene.
Consider the layout carefully so accessories don’t clutter the space but instead enhance the overall look. Try placing a scarecrow in a field or a water trough near the animals to create realistic focal points. How can you use these little objects to tell a story about your toy farm?
Final Touches And Maintenance
Adding the final touches and maintaining your toy farm display keeps it looking great for a long time. Small details make your farm more realistic and enjoyable. Regular care prevents damage and dust build-up.
Securing Pieces
Keep all parts stable to avoid falling or breaking. Use non-permanent adhesives like double-sided tape or reusable putty. Place heavier items at the bottom for better balance. Check connections regularly to ensure nothing is loose. Secure small items to prevent them from getting lost.
Cleaning And Storage Tips
Clean your display gently with a soft, dry cloth. Avoid water or harsh chemicals that can damage paint or materials. Use a small brush to remove dust from tiny spaces. Store your toy farm in a cool, dry place to prevent warping or mold. Cover the display with a cloth or plastic sheet to keep dust away when not in use.

Credit: www.facebook.com
Frequently Asked Questions
What Materials Are Needed To Build A Toy Farm Display?
You need basic craft supplies like cardboard, paint, glue, toy animals, and farm accessories. These materials help create a realistic and engaging farm display.
How Do I Create Realistic Farm Scenery For The Display?
Use green felt or paper for grass and cotton for clouds. Add miniature trees and fences to enhance realism and depth.
What Are The Best Toy Animals For A Farm Display?
Choose common farm animals like cows, pigs, sheep, chickens, and horses. These toys make your display authentic and educational.
How Can I Arrange The Toy Farm Layout Effectively?
Group animals by type and place buildings logically, like barns near animals. This arrangement creates a natural and visually appealing scene.
Conclusion
Building a toy farm display can be fun and rewarding. Start small and add details step by step. Use simple materials and let your creativity flow. Play with colors and different shapes to bring life. Remember, it’s about enjoying the process, not perfection.
Share your display with friends or family for extra joy. Keep experimenting and watch your farm grow with each try. A little effort makes a big difference in the end.




