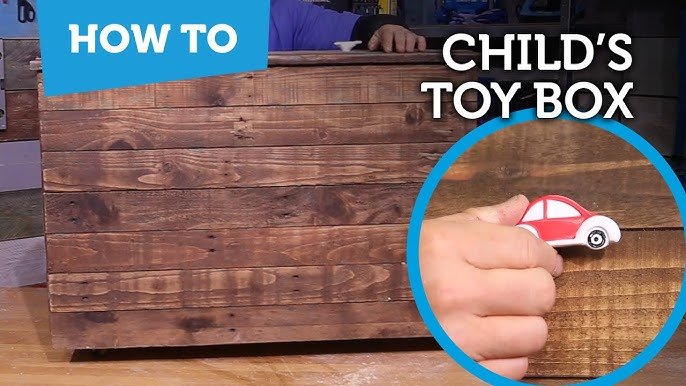
Are you tired of toys scattered all over your home? Imagine having a sturdy, custom toy box that keeps your kid’s favorite things organized and easy to find.
Building a toy box out of plywood is simpler than you think, and you don’t need to be a woodworking expert. In this guide, you’ll discover step-by-step how to create a durable and attractive storage solution that fits perfectly in your space.
Ready to turn clutter into calm? Let’s get started!

Credit: www.thisoldhouse.com
Materials And Tools Needed
Building a toy box from plywood can be a fun project. It requires careful planning and the right materials and tools. This section will guide you through the essentials needed for this DIY task.
Choosing The Right Plywood
Select quality plywood for durability. Choose a sheet that is 3/4-inch thick. This thickness offers strength and stability. Consider hardwood plywood for a smoother finish. It is more resistant to wear and tear. Check for any warping or defects before purchasing.
Essential Tools For The Project
Gather the necessary tools to ensure a smooth building process. You will need:
- A circular saw for cutting plywood.
- A drill with bits for making holes.
- A screwdriver to assemble the box.
- A measuring tape for accurate dimensions.
- Clamps to hold pieces together while assembling.
Having these tools ready will save time and effort.
Safety Gear To Use
Safety should be a priority during this project. Wear protective goggles to shield your eyes from sawdust. Use ear protection when operating loud tools. Gloves are essential to protect your hands from sharp edges. Ensure a clean workspace to prevent accidents.

Credit: www.ana-white.com
Planning Your Toy Box
Planning your toy box is the first and most important step. It helps you build a sturdy and useful box. Careful planning saves time and materials. It also makes sure the toy box fits your space and needs.
Deciding On Size And Design
Think about the space where the toy box will go. Measure the area to avoid buying too much plywood. Consider the toys you want to store. Bigger toys need a larger box.
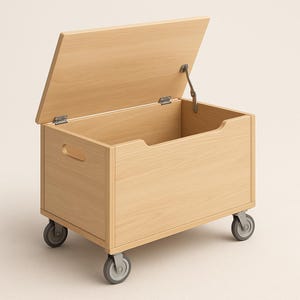
Choose a design that matches your room’s style. Simple designs are easier to build and look neat. Decide if you want a lid or open top. A lid keeps dust out but needs hinges.
Creating A Simple Sketch
Draw a rough sketch of your toy box on paper. Include all sides and the lid if you want one. Label each part with its size. This helps you visualize the project.
A sketch guides you through cutting and assembly. It also helps check if all parts fit well together. Use a pencil for easy changes.
Measuring And Marking
Measure your plywood sheets carefully before cutting. Use a tape measure and a straight edge. Mark all the parts on the plywood with a pencil.
Double-check your measurements to avoid mistakes. Clear markings make cutting easier and more accurate. Mark edges clearly for smooth assembly later.
Cutting The Plywood
Cutting plywood is a key step in building a sturdy toy box. Accurate cuts ensure the pieces fit well and look neat. Preparing the plywood and tools before cutting helps avoid mistakes. Careful handling keeps the edges smooth and safe for kids.
Techniques For Straight Cuts
Use a circular saw or table saw for straight cuts. Clamp a straight edge or guide rail to the plywood. This guide helps the saw follow a clear path. Cut slowly and steadily to avoid splintering the wood. Scoring the cut line with a utility knife before sawing reduces tear-out. Always wear safety goggles and a dust mask while cutting.
Tips For Accurate Measurements
Measure twice, cut once is a good rule to follow. Use a tape measure and mark the cut lines clearly with a pencil. Check the measurements at several points along the wood. Use a carpenter’s square to mark perfect right angles. Label each piece to avoid confusion during assembly. Keep your measuring tools clean and in good condition for accuracy.
Assembling The Box
Assembling the toy box is where your project starts to take shape. This phase demands precision and patience, as the box’s strength depends on how well you join the parts together. Paying close attention now will save you from wobbly edges and gaps later.
Joining The Sides
Begin by aligning the plywood side panels at right angles. Use clamps to hold them steady before you fasten. This keeps your hands free and ensures a tight fit.
Apply wood glue along the edges where the panels meet. This adds extra hold and helps seal any small gaps. Then, press the sides together firmly.
Check if the corners form perfect 90-degree angles using a carpenter’s square. If not, adjust the panels before the glue dries. Are your corners sharp and solid enough to handle rough play?
Securing The Bottom Panel
Once the sides are joined, slide or place the bottom panel into the frame. It should fit snugly within the edges without forcing it. A loose bottom means toys could fall through or the box might warp.
Apply glue around the edges where the bottom panel meets the sides. This creates a strong bond and prevents rattling. Consider using a few brad nails or small screws to hold it temporarily in place while the glue sets.
Check the panel for flatness. A warped bottom will affect the box’s stability. You want a solid base that can support your child’s treasures without bending or sagging.
Reinforcing With Screws Or Nails
Glue alone isn’t enough for a toy box that will see daily use. Reinforce each joint with screws or nails for lasting durability. Choose screws if you want a tighter hold and easier disassembly later.
Pre-drill small pilot holes to avoid splitting the plywood. Then, drive in screws that sit flush with the surface. Nails can work, but they may loosen over time, especially if the box gets knocked around.
- Use 1¼-inch screws for side joints.
- Space fasteners about 6 to 8 inches apart.
- Double-check that all corners remain square during fastening.
Have you noticed how much sturdier your box feels after adding screws? This step transforms it from a fragile frame to a reliable storage solution.
Adding The Lid
Adding the lid to your plywood toy box completes its look and function. The lid keeps toys inside and protects them from dust. Choose the right lid type for easy access and safety. Secure it well so it opens and closes smoothly. This section explains how to pick, attach, and adjust the lid.
Choosing Between Hinged Or Removable Lid
Decide if the lid stays attached or lifts off. Hinged lids are fixed with metal or wooden hinges. They open like a door, staying connected to the box. Removable lids lift off completely for full access. Choose hinged lids for convenience and safety. Pick removable lids for simplicity and easy cleaning. Think about your child’s age and how they use the box.
Attaching Hinges
Select strong, rust-proof hinges for long life. Position hinges evenly on the back edge of the box and lid. Mark screw holes with a pencil for accuracy. Pre-drill holes to avoid splitting the wood. Screw hinges tightly to keep the lid secure. Use screws that fit your plywood thickness. Attach two or three hinges for balanced support. Check that screws don’t stick out inside the box.
Ensuring Smooth Operation
Test the lid’s movement after attaching hinges. The lid should open without sticking or wobbling. Sand any rough edges on the lid or box. Add lubricant like wax or silicone spray on hinge joints. Check that the lid stays open without falling shut. Use a lid support or stay if needed for safety. Make sure the lid closes gently to avoid pinching fingers. Adjust screws if the lid is too tight or loose.
Sanding And Finishing
Sanding and finishing are the final touches that transform your plywood toy box from rough wood to a smooth, polished piece. These steps not only improve the look but also ensure safety by removing splinters and sharp edges. Taking your time here makes a big difference in the durability and feel of the finished product.
Sanding For Smooth Edges
Start with a medium-grit sandpaper (around 120 grit) to smooth out all surfaces and edges. Sand along the wood grain to avoid scratches that stand out later. Pay special attention to corners where kids might bump their hands—smooth edges prevent accidents.
After the initial sanding, switch to a finer grit (220 grit) for a silky finish. Running your hand over the surface will help you spot rough spots you missed. Have you ever felt a toy box edge that’s too sharp? That’s the kind of detail sanding fixes perfectly.
Painting Or Staining Options
Choosing between paint and stain depends on the look you want and how the toy box will be used. Paint offers vibrant colors and can cover imperfections, making it great for a playful, colorful design. Stain highlights the natural wood grain and feels more classic or rustic.
Use non-toxic, child-safe products to keep your toy box safe for kids. If you want to add a personal touch, try stencils or painter’s tape to create fun patterns. What colors or styles match your child’s room or personality?
Applying Protective Coating
A protective coating seals your work and protects the wood from scratches, moisture, and wear. Polyurethane or water-based varnish are popular choices that add durability without changing the color too much. Apply thin, even coats and allow each to dry fully before adding the next.
Don’t forget to lightly sand between coats with fine-grit sandpaper for a smooth finish. This step can seem tedious but makes the surface feel professional and long-lasting. How long do you want your toy box to look new? Protective coating is the key.
Personalizing Your Toy Box
Personalizing your toy box turns a simple storage solution into a cherished part of your child’s play area. It reflects their personality and makes clean-up time more inviting. Adding your own touches transforms the box from plain plywood into something special and meaningful.
Adding Decorative Elements
Start by painting the toy box in your child’s favorite colors. You can use stencils to add fun shapes, like stars or animals, which instantly brighten the look. Another idea is to attach colorful knobs or handles—these small details make a big difference and add a playful touch.
Consider using stickers or decals that your child loves, such as cartoon characters or nature themes. You can also glue on fabric patches or felt shapes for a soft, tactile effect. These decorations not only personalize the box but also inspire your child’s creativity every time they open it.
Labeling And Organizing Tips
Labels help keep the toy box tidy and make it easier for your child to find their favorite toys quickly. Use large, clear labels with both words and pictures—this helps younger kids who are still learning to read. For example, label sections as “Cars,” “Blocks,” or “Dolls” to create simple categories.
Try color-coding labels or using different colored bins inside the box to separate types of toys. This visual system encourages your child to put items back in the right spot without much fuss. Have you noticed how kids respond better to organizing when it’s fun and straightforward?
Credit: www.etsy.com
Frequently Asked Questions
What Plywood Thickness Is Best For A Toy Box?
Using 3/4 inch plywood offers the best balance of strength and weight for a durable toy box. It’s sturdy enough to hold heavy toys and safe for children. Thinner plywood may not support weight well, while thicker plywood adds unnecessary bulk.
How Do I Finish Plywood To Make It Child-safe?
Use non-toxic, water-based paint or clear sealant to finish plywood. These finishes protect the wood and ensure safety for children. Avoid finishes with strong odors or harmful chemicals. Sand edges smooth before applying any finish to prevent splinters.
What Tools Are Needed To Build A Plywood Toy Box?
You’ll need a saw, drill, screws, measuring tape, sandpaper, clamps, and a screwdriver. These tools help cut, assemble, and smooth the plywood pieces accurately and safely. Basic woodworking tools are sufficient for this project.
How Can I Add Storage Compartments Inside The Toy Box?
Install plywood dividers or small bins inside the box to create compartments. This keeps toys organized and easy to find. Dividers can be fixed or removable, depending on your design preference.
Conclusion
Building a toy box from plywood is simple and fun. You only need basic tools and materials. Follow the steps carefully, and take your time. A homemade toy box saves money and fits your space. It also gives a sense of pride.
Kids will love having a special place for toys. Try this project to enjoy crafting and organizing at once.




