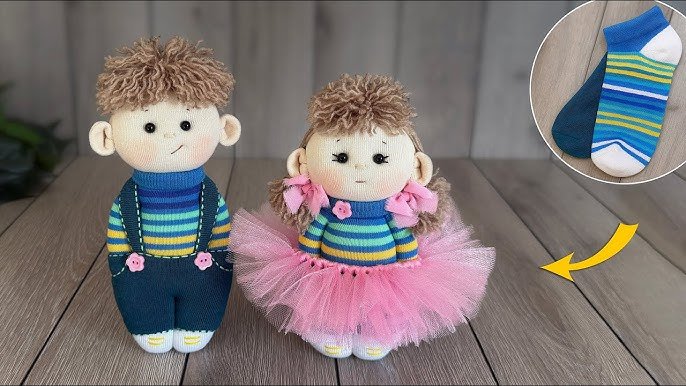
Have you ever wanted to create something special with your own hands? Making fabric dolls is a fun and rewarding way to bring your creativity to life.
Imagine holding a soft, handmade doll that you crafted yourself—each stitch filled with your personal touch. Whether you’re new to sewing or looking for a new project, this guide will show you simple steps to make beautiful fabric dolls. Keep reading, and you’ll discover how easy it can be to create a keepsake that’s truly one of a kind.
Your perfect fabric doll is just a few stitches away!

Credit: www.figandme.com
Materials Needed
Making fabric dolls is fun and creative. You need the right materials to start your project. Using good supplies helps your doll look great and last long.
Below are the main materials you will need. They include fabric choices, sewing tools, and stuffing options. Each part is important for a nice finished doll.
Choosing The Right Fabric
Pick fabrics that are soft and easy to sew. Cotton and felt are great for beginners. Avoid very slippery or thick fabrics. Light colors make it easy to add details.
- Cotton for smooth texture
- Felt for easy cutting and shaping
- Flannel for a soft feel
- Linen for a natural look
- Avoid stretchy or shiny fabrics
Essential Sewing Tools
| Tool | Use |
| Fabric scissors | Cut fabric pieces cleanly |
| Needles | Hand sewing or machine use |
| Thread | Match fabric color |
| Pins | Hold fabric while sewing |
| Measuring tape | Measure fabric and doll parts |
| Seam ripper | Fix mistakes easily |
Stuffing And Embellishments
Stuffing gives the doll its shape and softness. You can also add eyes, buttons, or ribbons to decorate your doll. Use safe materials if the doll is for children.
- Polyester fiberfill for soft stuffing
- Cotton batting for natural stuffing
- Plastic safety eyes or embroidered eyes
- Buttons and beads for decoration
- Ribbons and lace for clothes
Preparing The Pattern
Making fabric dolls starts with preparing the pattern carefully. This step helps you create a doll shape that looks neat and fits your design.
Focus on choosing the right doll design and then tracing and cutting the fabric accurately. These actions set the base for sewing and stuffing your doll.
Selecting Doll Designs
Pick a doll design that matches your skill level and the materials you have. Simple shapes are easier for beginners, while detailed designs need more care.
- Decide the doll size you want to make.
- Choose a design with clear shapes and lines.
- Consider the doll’s features like arms, legs, and head shape.
- Look for patterns that suit the fabric type you plan to use.
- Print or draw the pattern on paper for tracing.
Tracing And Cutting Fabric
Trace your paper pattern onto the fabric with care. Use a fabric marker or chalk so the lines are easy to follow when cutting.
| Material | Best Tools | Cutting Tips |
| Cotton fabric | Sharp fabric scissors | Cut slowly following the traced lines |
| Felt | Rotary cutter or scissors | Use a cutting mat for smooth edges |
| Linen | Sharp scissors or rotary cutter | Pin pattern firmly to avoid slipping |
Sewing The Doll Pieces
Sewing the fabric pieces is an important step in making fabric dolls. It joins the parts to create the doll’s shape.
You need to sew carefully to keep the doll strong and neat. Let’s look at stitching techniques and assembling the parts.
Stitching Techniques
Using the right stitching technique makes your doll last longer. It also helps keep the fabric smooth and even.
Common stitches for fabric dolls include running stitch, backstitch, and ladder stitch. Each stitch has a special use.
- Running stitch:Simple and quick, good for basic seams.
- Backstitch:Stronger and tighter, perfect for stress points.
- Ladder stitch:Invisible seam, used to close openings neatly.
Assembling The Parts
After sewing, you join the doll’s parts like arms, legs, and head. This gives the doll its shape and character.
Pin the pieces together before sewing. Check that edges match and seams line up well. This helps avoid mistakes.
- Sew the body parts first, leaving openings for stuffing.
- Attach limbs securely with small, tight stitches.
- Close all openings with ladder stitch for a clean look.
- Stuff the doll evenly to keep its shape firm but soft.

Credit: www.youtube.com
Stuffing And Shaping
Stuffing and shaping fabric dolls are important steps to make them soft and cute. The right stuffing helps the doll keep its form and feel nice to touch.
Shaping the doll after stuffing gives it a neat look. You can create smooth curves or sharp edges by adjusting the filling inside the fabric.
Choosing The Stuffing Material
Select stuffing that is soft but firm enough to hold shape. Cotton, polyester fiberfill, and wool are popular choices for fabric dolls.
Each material has different qualities. Choose one based on the feel and look you want for your doll.
- Cotton:Natural and soft, but may clump over time.
- Polyester fiberfill:Lightweight and easy to wash.
- Wool:Warm and firm, good for shaping.
- Fabric scraps:Eco-friendly option but less smooth.
Tips For Even Filling
Fill the doll little by little to avoid lumps. Use small amounts of stuffing and push it into corners carefully.
Check the shape often. Add more stuffing where the doll feels soft. Remove some if it looks too bulky.
- Use a pencil or stick to reach small areas.
- Stuff limbs and head firmly for good shape.
- Keep the body softer for a cuddly feel.
- Even filling helps the doll look smooth and neat.
Adding Facial Features
Facial features bring life to fabric dolls. They help give each doll its own personality. You can use many ways to add eyes, nose, and mouth.
Choosing the right method depends on your doll style and skill level. Embroidery, buttons, and beads are popular choices for faces.
Embroidery Basics
Embroidery is a simple way to add detailed facial features. Use colored threads to stitch eyes, nose, and mouth on your doll’s face.
Choose embroidery floss that matches your design. Use small stitches for smooth lines. Backstitch and satin stitch work well for faces.
- Use a sharp needle for easy stitching
- Start with simple shapes like circles and lines
- Practice on scrap fabric first
- Keep stitches small and even
- Secure thread ends inside the doll
Using Buttons And Beads
Buttons and beads add a fun, textured look to doll faces. They work great for eyes or decorative details. Pick small buttons or beads for best results.
Sew buttons and beads tightly so they stay secure. Use strong thread and knot well inside the doll. Mix bead colors for unique eye effects.
- Choose buttons with two or four holes
- Match bead size to doll scale
- Use embroidery thread for strength
- Sew buttons and beads firmly
- Arrange beads in patterns for eyebrows or freckles

Credit: www.pincutsewstudio.com
Creating Hair And Clothing
Fabric dolls are fun and easy to make. You can customize them with unique hair and clothing styles.
Learning to create hair and clothing for your dolls makes them special. Let’s explore some simple techniques.
Hair Styles With Yarn
Yarn is perfect for making doll hair. It is soft, colorful, and easy to handle.
- Choose yarn in different colors for a unique look.
- Cut yarn into equal lengths for even hair strands.
- Use a glue gun or sew the yarn to the doll’s head.
- Style the hair by braiding or tying it into ponytails.
Simple Doll Clothes
Making clothes for your doll can be simple. Use fabric scraps to create dresses and shirts.
| Clothing Item | Fabric Type |
| Dress | Cotton |
| Shirt | Linen |
| Pants | Denim |
For a custom touch, add buttons or ribbons to the clothes.
Finishing Touches
Creating fabric dolls is fun and rewarding. The finishing touches make your doll unique. Focus on securing loose threads and adding personal details.
These steps ensure your doll looks complete. They also help the doll last longer.
Securing Loose Threads
Loose threads can ruin your doll’s look. It’s important to secure them tightly. Use a needle and thread to sew any loose ends back into the fabric.
Trim the excess thread carefully. This prevents fraying and keeps the doll neat.
- Check all seams for loose threads
- Use a matching color of thread for repairs
- Double-knot the thread for extra security
Personalizing Your Doll
Personalizing your doll makes it special. Add unique features to match your style. You can sew on buttons for eyes or use fabric paint for details.
Think about accessories like hats or scarves. These additions make your doll one-of-a-kind.
- Choose fabrics that reflect personality
- Decorate with beads or ribbons
- Consider adding embroidered names or initials
Care And Maintenance
Fabric dolls need gentle care to keep them looking nice. Proper cleaning and repairs help dolls last longer.
Learning how to clean and fix your handmade dolls protects their beauty and value.
Cleaning Handmade Dolls
Clean fabric dolls carefully to avoid damage. Use mild soap and cold water for spot cleaning.
Do not soak the doll or use harsh chemicals. Let the doll air dry in a cool place.
- Use a soft cloth or brush to remove dust.
- Spot clean stains gently with mild soap.
- Avoid machine washing or drying.
- Keep dolls away from direct sunlight to prevent fading.
- Air dry dolls completely before storing.
Repair Tips
Fix small tears and loose parts quickly. This stops damage from getting worse.
Sew holes by hand with matching thread and small stitches. Replace missing buttons or eyes carefully.
- Use a needle and thread to close small holes.
- Match thread color to fabric for neat repairs.
- Secure loose limbs with strong stitches.
- Replace lost features like eyes or buttons safely.
- Check dolls regularly for signs of wear.
Frequently Asked Questions
What Materials Do I Need To Make Fabric Dolls?
You need fabric, thread, needles, stuffing, scissors, and markers. Optional items include buttons and ribbons for decoration. Choose soft, durable fabric for easy sewing and lasting dolls.
How Do I Sew Fabric Dolls By Hand?
Cut fabric pieces using a pattern. Sew edges with small, tight stitches. Leave a gap to stuff the doll before closing the seam. Hand sewing allows precise control and detailed designs.
Can Beginners Easily Make Fabric Dolls?
Yes, beginners can start with simple patterns and basic stitches. Practice cutting and sewing on scrap fabric first. Patience and attention to detail help create beautiful fabric dolls.
How Do I Stuff Fabric Dolls Properly?
Use polyester fiberfill or cotton stuffing. Fill the doll evenly to avoid lumps. Stuff firmly but not too tight to keep softness. Proper stuffing shapes the doll nicely.
Conclusion
Making fabric dolls is a fun and creative activity. It lets you use simple materials to create something special. Each doll you make can have its own style and charm. This craft helps improve your sewing skills step by step.
Plus, it’s a great way to relax and enjoy your free time. Try different fabrics and colors to make unique dolls. Share your creations with friends or keep them as gifts. Keep practicing, and your dolls will get better and better.
Enjoy the process and have fun crafting!




