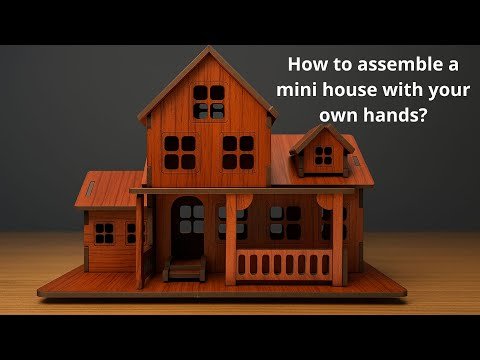
Are you ready to create something special with your own hands? Building a toy house out of wood is a fun and rewarding project that anyone can do.
Imagine giving your child a unique playhouse made by you, filled with charm and character. In this guide, you’ll discover simple steps and helpful tips to turn raw wood into a beautiful toy house. Whether you’re a beginner or have some experience, this project will spark your creativity and bring joy to your family.
Keep reading, and let’s start building something amazing together!
Materials And Tools Needed
Wood pieces, nails, hammer, saw, and sandpaper are essential for building a toy house. A pencil and measuring tape help create accurate cuts. Safety gear like gloves and goggles protect you during the project.
Building a toy house out of wood is a delightful project that combines creativity with craftsmanship. Before you start crafting the perfect miniature abode, gathering the right materials and tools is crucial. A well-prepared workspace sets the stage for your creativity to flow effortlessly. Let’s explore what you’ll need to bring your wooden toy house to life.Types Of Wood
Selecting the right type of wood is like choosing the perfect canvas for your masterpiece. Softwoods like pine and cedar are ideal for beginners due to their ease of cutting and affordability. These types of wood provide a smooth surface for painting and decorating. On the other hand, hardwoods such as oak or maple offer durability and a refined finish, making them perfect for intricate designs. Choose a wood type that suits your design vision and skill level.Essential Tools
Having the right tools at your disposal can make or break your woodworking experience. A reliable saw is indispensable for cutting wood to the desired size. Whether you opt for a handsaw or a powered jigsaw, precision is key. Sandpaper or a sanding block is essential to smooth out any rough edges, ensuring that your toy house is safe for little hands. Don’t forget the trusty hammer and nails for sturdy assembly, along with a good quality wood glue for finer detailing.Safety Gear
Your safety should be your top priority. Equip yourself with protective gear to prevent accidents and injuries. Safety goggles shield your eyes from wood chips and dust, while gloves protect your hands during cutting and assembly. If you’re using power tools, consider using ear protection to guard against noise. Think about how much more enjoyable your project will be when you work with peace of mind. As you gather your materials and tools, imagine the joy and satisfaction of seeing your toy house come to life, piece by piece. Is there a particular wood type you’re excited to work with, or a tool you’ve always wanted to try? Dive into this project with enthusiasm, knowing that each step brings you closer to a tangible creation that you can be proud of.
Credit: www.youtube.com
Designing Your Toy House
Designing your toy house is the first exciting step. It sets the plan and shape for your project. A good design makes building easier and more fun.
Choosing A Style
Pick a style that fits the toy house’s purpose and the builder’s skill. Some common styles include:
- Classic cottage with a pitched roof
- Modern flat-roof design
- Rustic cabin style
- Miniature Victorian house
Keep the style simple if you are a beginner. Simple shapes are easier to cut and assemble.
Creating A Simple Blueprint
A blueprint is a drawing that shows how the toy house will look. It includes all parts and their sizes.
Draw the front, back, sides, and top views on paper. Use a ruler to keep lines straight. Mark windows and doors clearly.
This plan helps avoid mistakes during cutting and assembly. It also saves time and wood.
Measuring And Marking
Measure wood pieces carefully based on your blueprint. Use a tape measure or ruler for accuracy.
Mark each piece with a pencil before cutting. Mark both length and width clearly.
Double-check your measurements to prevent errors. Accurate marking ensures all parts fit together well.
Cutting And Preparing Wood
Cutting and preparing wood is a key part of building a toy house. It shapes the wood into the pieces needed for assembly. Proper preparation ensures a safe, smooth, and strong build. Take your time to measure and cut carefully. This makes the final toy house look neat and sturdy.
Safe Cutting Techniques
Safety should always come first while cutting wood. Use sharp tools for clean cuts. Dull blades cause slips and rough edges. Wear protective gear such as gloves and goggles. Hold the wood firmly but do not force the saw. Cut slowly along marked lines. Keep fingers away from the blade path. Use a stable surface to work on. This reduces the chance of accidents.
Sanding For Smooth Edges
Sanding removes splinters and rough spots after cutting. Use medium-grit sandpaper for most edges. Sand in the direction of the wood grain. Check all sides and corners carefully. Smooth edges prevent cuts and make the toy safe for kids. Finish with fine-grit sandpaper for a polished feel. Wipe away dust before moving to assembly.
Pre-assembling Pieces
Lay out all cut and sanded pieces before assembly. Check each piece for size and fit. Make small adjustments if needed. Pre-assembling helps find any mistakes early. It saves time during gluing and nailing. Arrange pieces in the order they will join. This step helps visualize the final toy house shape. It ensures the build will be strong and accurate.

Credit: www.facebook.com
Assembling The Toy House
Assembling your wooden toy house is where your vision starts to take shape. This phase requires patience and precision to ensure each part fits together perfectly. Think of it as piecing together a puzzle, where every joint and connection matters.
Joining Walls And Floors
Begin by aligning the walls with the floor base. Use wood glue along the edges and hold the pieces firmly to avoid gaps. Clamps can be a big help here—they keep everything steady while the glue dries.
Check that the walls are square by measuring the diagonals. If the walls aren’t perfectly perpendicular, your toy house might lean or have uneven edges later on.
Attaching The Roof
The roof needs to be attached carefully to maintain stability. Start by fitting the roof panels together on a flat surface to confirm they match up well. Then, secure them to the top edges of the walls using small nails or screws.
Consider adding a slight overhang for a more realistic look and to protect the walls. Have you thought about how the roof’s angle will affect the overall balance of your toy house?
Securing Doors And Windows
Doors and windows bring life to your toy house, but they must be attached securely. Sand the edges before installation to ensure smooth operation and avoid splinters. You can use tiny hinges for doors, allowing them to swing open, or simply glue them in place if you prefer a fixed design.
Don’t forget to test each door and window after attaching. Is it easy to open and close without forcing? A well-fitted door or window adds charm and durability to your creation.
Finishing Touches
The finishing touches bring your wooden toy house to life. They add color, charm, and protection. These final steps make the toy house more fun and durable. Simple details create a big impact on the overall look and feel.
Painting And Decorating
Choose bright, non-toxic paints safe for children. Use small brushes for neat edges and details. Paint walls, roof, and doors in different colors. Add patterns like stripes or polka dots for extra fun. Let the paint dry completely before moving on.
Adding Furniture And Accessories
Make tiny wooden furniture or buy mini sets. Place beds, tables, and chairs inside the rooms. Add small decorations like rugs, curtains, or pictures. Use glue to secure items so they don’t fall out. These touches make playtime more realistic and exciting.
Sealing For Durability
Apply a clear sealant to protect paint and wood. Choose a water-based, child-safe sealant for safety. Use a brush to cover all surfaces evenly. Let the sealant dry fully before use. This step helps the toy house last longer and stay clean.
Tips For Customization
Adding your personal touch to a wooden toy house can transform it from a simple project into a cherished keepsake. Customization lets you express creativity and make the toy house truly unique. Here are some practical tips to help you bring your vision to life.
Personalizing With Colors
Choosing the right colors can change the whole vibe of your toy house. Think about the mood you want to create—bright colors for fun and energy, or soft pastels for a calm and cozy feel.
Use non-toxic paints to keep the toy safe for kids. Try painting patterns like stripes or polka dots to add character. Remember, you don’t need to cover every inch; sometimes, a splash of color on the shutters or door makes the biggest impact.
Incorporating Lights
Adding lights can make your toy house magical, especially for evening play. Small LED tea lights or battery-operated fairy lights work great because they don’t get hot and are easy to hide inside the house.
Think about placing lights behind windows or under the roof to create a cozy glow. Have you considered how lighting changes the play experience? It adds a whole new layer of imagination and fun.
Using Recycled Materials
Recycled materials can add interesting textures and save you money. Look around for scraps like fabric pieces, buttons, or old jewelry to decorate the house.
Wood scraps can be used to create furniture or garden fences. Using recycled materials not only makes your toy house more unique but also teaches kids the value of sustainability. What cool recycled items can you find around your home?
Troubleshooting Common Issues
Building a toy house out of wood is a rewarding project, but it often comes with a few bumps along the way. You might find joints aren’t as tight as you hoped, some wood pieces have splinters, or measurements don’t quite line up. Tackling these issues early keeps your project sturdy and safe for play.
Fixing Loose Joints
Loose joints can make your toy house wobbly and less durable. First, check if the glue has dried properly. If it hasn’t, apply a bit more wood glue and clamp the joint tightly until it sets.
If the joint is still loose after drying, consider adding small finishing nails or screws to strengthen the connection. Be careful not to split the wood by pre-drilling small holes before inserting screws.
Have you tried using wood filler to fill gaps before gluing? It can improve the fit and make joints stronger, especially with uneven edges.
Repairing Splintered Wood
Splinters not only look rough but can also pose a safety risk. Sand the splintered area gently with fine-grit sandpaper to smooth it out. Always sand along the grain to avoid creating new splinters.
For deeper splinters or cracks, fill the damaged spot with wood filler. Let it dry completely, then sand it flat. This method keeps the surface even and safe for little hands.
Sometimes, replacing the splintered piece is the best option if the damage affects the structure. Do you have extra wood pieces saved for such moments?
Adjusting Measurements
Incorrect measurements can throw off your entire toy house design. Before cutting, double-check your measurements with a tape measure or ruler. Measure twice, cut once is a rule that really helps here.
If a piece ends up too long, trim it carefully with a saw, keeping the cut straight. If it’s too short, you might need to cut a new piece or adjust adjoining parts to fit better.
Consider creating a simple paper template before cutting wood. It helps visualize the size and catch errors early. How often do you use templates in your projects?

Credit: www.youtube.com
Frequently Asked Questions
What Types Of Wood Are Best For Building A Toy House?
Softwoods like pine and cedar are ideal for toy houses. They are easy to cut, lightweight, and safe for children. Avoid treated or toxic woods to ensure safety. Choose smooth, splinter-free pieces for a child-friendly build.
How Do I Ensure Safety When Building A Wooden Toy House?
Use non-toxic paint and smooth all edges to prevent injuries. Avoid small parts that can be choking hazards. Secure joints tightly and check for any sharp points. Always supervise children during play.
What Basic Tools Do I Need For A Wooden Toy House?
Essential tools include a saw, hammer, nails, sandpaper, and wood glue. A measuring tape and pencil help with precise cuts. Safety gear like gloves and goggles is important for protection.
How Can I Decorate The Wooden Toy House Safely?
Use water-based, non-toxic paints and finishes. Avoid small decorative items that can detach easily. Stick to child-safe stickers or fabric for added fun. Ensure all decorations are firmly attached.
Conclusion
Building a wooden toy house is a fun and rewarding project. It teaches basic woodworking skills and creativity. You only need simple tools and materials to start. Take your time and follow each step carefully. The result will be a unique toy that lasts long.
Kids will love playing with something you made yourself. Try different designs to make each house special. Most importantly, enjoy the process and learn from it. This small project can bring big smiles and great memories.




