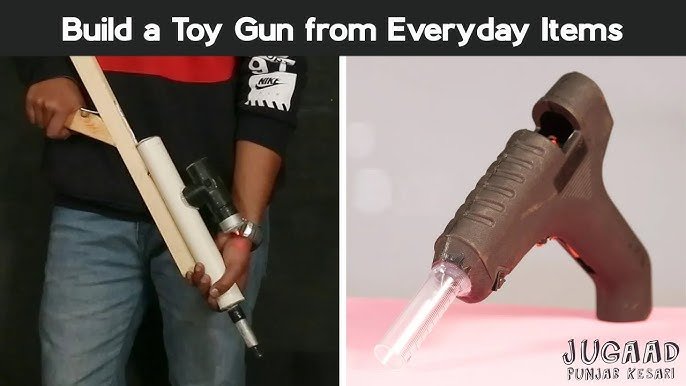
Have you ever wanted to create something fun and exciting with your own hands? Building a toy gun is a great way to do just that.
It’s simple, enjoyable, and gives you a cool project to show off to your friends. Imagine the satisfaction of holding a toy gun you made yourself, knowing exactly how it works inside. In this guide, you’ll discover easy steps and tips that anyone can follow.
Ready to bring your creativity to life and have some fun? Keep reading, and you’ll be building your own toy gun in no time!
Materials Needed
Gathering the right materials is key to building a toy gun that is safe and fun. Selecting simple, easy-to-find items makes the project smooth and enjoyable. Use materials that are sturdy yet lightweight to keep the toy easy to handle.
Here is a list of essential materials needed to create your toy gun. Most of these items are available at home or at local craft stores.
Wood Or Plastic For The Body
- Use lightweight wood like balsa or pine
- Plastic sheets or parts work well too
- Ensure the material is easy to cut and shape
Fasteners And Adhesives
- Wood glue or strong craft glue
- Small nails or screws for extra strength
- Tape such as duct tape or masking tape
Tools For Shaping And Assembly
- Scissors or a small saw
- Screwdriver and hammer
- Sandpaper to smooth edges
Decorative Materials
- Paints or markers for color
- Stickers or decals for design
- Foam or rubber for grips and cushioning
Elastic Bands Or Springs
- Use elastic bands for shooting mechanism
- Small springs add tension and action
- Choose sizes that fit your toy gun design
Safety First
Safety always comes first when building a toy gun. It protects you and others from harm. Taking simple safety steps can prevent accidents and keep the project fun. Before starting, understand the risks and prepare properly. Use safe materials and tools. Follow all safety rules strictly. Safety is not an option but a must.
Use Non-toxic Materials
Choose materials that are safe and non-toxic. Avoid paints, glues, or plastics that release harmful fumes. Check labels for safety certifications. Natural wood, cardboard, and safe plastic are good choices. These materials reduce health risks and make the toy safe to handle.
Wear Protective Gear
Always wear safety goggles to protect your eyes. Gloves help avoid cuts and splinters. Use a mask if sanding or painting. Proper gear stops injuries and keeps you safe. Keep your workspace clean to avoid slips or falls.
Handle Tools Carefully
Use tools only as instructed. Keep sharp tools like knives and scissors away from children. Cut away from your body to avoid injury. Keep tools in good condition. Store tools safely after use to prevent accidents.
Test In A Safe Area
Test the toy gun in an open, clear space. Avoid crowded or fragile areas. Ensure no one is in the line of fire. Use soft projectiles like foam darts or cotton balls. This reduces the risk of injury or damage.
Supervise Children
Always watch children during the building process. Guide them on safe tool use. Teach them about safety rules clearly. Supervision prevents accidents and teaches responsibility. Make safety a part of the fun experience.
Simple Design Ideas
Simple design ideas make building a toy gun fun and easy. These ideas use basic materials and simple shapes. You can create a safe toy that looks cool and works well. Focus on easy cuts, light parts, and clear shapes. This way, the toy gun is perfect for kids and beginners.
Basic Wooden Toy Gun
Use a small wooden board and cut out a gun shape. Sand the edges smooth for safety. Paint it with bright colors or markers. Add a handle by attaching a smaller wooden piece. This design is sturdy and easy to hold.
Cardboard Tube Blaster
Grab a cardboard tube from paper towels or wrapping paper. Decorate it with tape or paint. Attach a cardboard handle with glue or tape. Use rubber bands to create a simple shooting mechanism. This design is light and quick to build.
Plastic Bottle Pistol
Cut a plastic bottle to form the gun body. Use the bottle cap as a trigger or nozzle. Attach a paper or plastic handle at the bottom. Paint or cover the bottle with colored paper. This design recycles materials and looks fun.
Rubber Band Shooter
Build the frame from popsicle sticks or small wooden slats. Use a clothespin or small hook to hold the rubber band. Stretch the rubber band to shoot soft projectiles. This design is simple and offers safe play.

Credit: www.youtube.com
Building The Base
Building the base of your toy gun sets the foundation for everything else. It needs to be sturdy and comfortable to hold, so your design stands out and feels good in your hands.
Think about the materials you want to use. Wood, plastic, or even cardboard can work, but each has its own advantages. Wood offers durability, plastic is lightweight, and cardboard is easy to shape and modify quickly.
Choosing The Right Material
Pick a material that matches your tools and skill level. If you have a saw and sanding tools, wood might be perfect. Without power tools, cardboard or foam can be easier to work with.
Also, consider how the material will feel when you hold the toy gun. If you want a smooth finish, plastic or sanded wood is best. Cardboard might need extra layers or paint to feel solid.
Measuring And Cutting The Base
Measure carefully before you cut. Draw your shape on the material with a pencil to avoid mistakes. A well-measured base keeps your toy balanced and comfortable.
Use sharp tools for clean cuts. Rough edges can make assembly harder and the toy less safe. Taking your time here makes a big difference in the final look.
Assembling The Base
Once cut, join the pieces securely. Use glue, screws, or tape depending on your material. Make sure everything fits tightly to avoid wobbling when you hold it.
Try holding the base as you work. Does it feel good in your hands? Adjust the shape if needed before moving on. A solid base makes the rest of the build easier and more fun.
Adding Details
Adding details to your toy gun is where creativity meets craftsmanship. Small touches can transform a simple design into something truly eye-catching and realistic. Think about what makes a real gun unique and try to replicate those features in a safe, playful way.
Choosing The Right Paint And Colors
Paint can make or break the look of your toy gun. Use bright colors if you want a playful vibe or go for metallic shades to mimic real steel parts. Matte finishes often look more authentic than glossy ones.
Have you tried layering different colors to add depth? A bit of black wash over silver can create a worn effect that catches the eye.
Adding Textures And Patterns
Textures add a tactile dimension to your toy. You can use sandpaper for a rough grip or glue small pieces of fabric to simulate rubberized handles. Patterns like stripes or camouflage make your toy stand out and feel more personalized.
Experiment with simple tools like a toothpick or a sponge to create patterns easily. What textures do you think would make your toy gun more fun to hold?
Incorporating Functional Details
Functional details don’t have to be complex. Adding a trigger guard or a sight can enhance the play experience. Use lightweight materials like plastic rings or foam to keep things safe.
Try making a removable magazine or a sliding bolt. These small interactive parts can make your toy gun feel more real without adding risk.
Using Stickers And Decals
Stickers can add logos, numbers, or symbols that give your toy a unique identity. You can print custom decals at home or buy ready-made ones. Position them carefully to avoid peeling during play.
Have you thought about making your own stickers to tell a story or theme with your toy gun? It’s a fun way to personalize your creation even more.
Creating The Trigger
Creating the trigger is a crucial part of building your toy gun. It controls when the gun “fires,” making it a fun and interactive feature. A well-made trigger adds realism and improves your overall build experience.
Choosing The Right Materials For The Trigger
Pick materials that are sturdy but easy to work with. Common choices include popsicle sticks, small wooden dowels, or plastic strips. You want something that won’t break easily but can still move smoothly when pressed.
Think about the weight of the materials too. A heavy trigger might feel clunky, while a very light one could be too sensitive. Balancing this is key to a satisfying trigger pull.
Designing The Trigger Mechanism
The trigger usually works by pressing a lever that releases a spring or pushes a part forward. You can create a simple lever using a small piece of wood or plastic attached to a pivot point. This pivot allows the trigger to move back and forth.
Make sure the pivot is tight enough to hold the trigger in place but loose enough to allow smooth movement. A small nail or screw can serve as a good pivot.
Adding A Spring Or Elastic For Tension
To make the trigger snap back after being pressed, add a spring or elastic band. Elastic bands are easy to find and work well for beginners. Attach one end to the trigger and the other to the gun’s frame to create tension.
Test different elastic strengths to find the right amount of resistance. Too much tension can make the trigger hard to pull, while too little can cause it to feel loose.
Testing And Adjusting The Trigger
Once assembled, test the trigger several times. Does it move smoothly? Does it return to its original position quickly? If not, adjust the pivot point or the tension on the elastic band.
Don’t be afraid to experiment with small changes. Sometimes moving the trigger slightly or changing the elastic size makes a big difference in how it feels.
Decorating Your Toy Gun
Decorating your toy gun makes it unique and fun to play with. It also adds a personal touch to your creation. Simple decorations can turn a plain toy gun into a cool, colorful piece. Use colors, textures, and patterns to bring your design to life.
Choosing The Right Paint
Pick paint that works well on the material of your toy gun. Acrylic paint is safe and easy to use on wood and plastic. Use bright colors for a playful look or darker shades for a more realistic style. Let each layer dry fully before adding another.
Adding Stickers And Decals
Stickers and decals add instant style without much effort. Select fun shapes or themed stickers that fit your design idea. Place them on smooth surfaces for best results. Seal with a clear coat to keep them from peeling off.
Using Tape For Patterns
Masking tape or washi tape creates sharp lines and cool patterns. Wrap or stick tape in stripes, checks, or other designs. Paint over the tape for a two-tone effect. Remove tape carefully after the paint dries for clean edges.
Applying Texture With Materials
Textures make your toy gun interesting to touch and see. Glue on foam, felt, or fabric pieces for a soft feel. Use sandpaper or sponges to create rough or smooth areas. Mix materials to give your toy a unique look.
Personalizing With Names And Symbols
Write your name or a cool symbol on the toy gun. Use paint pens or markers for easy writing. Choose bold letters or simple shapes for visibility. This makes your toy gun truly one of a kind.

Credit: www.youtube.com
Testing Your Creation
Testing your toy gun is a crucial part of the building process. It helps you see if your design works and if it’s safe to use. Don’t rush this step; take your time to understand how your creation performs under different conditions.
Preparing A Safe Testing Area
Before firing your toy gun, find a clear space free of fragile items and people. Use a soft target like a cardboard box or a stack of paper to catch the projectiles safely. This prevents damage and helps you observe the impact clearly.
Think about your surroundings. Is there enough room to test without interruptions? Safety should be your top priority.
Checking The Mechanism
Start by pulling the trigger slowly and listen for any unusual sounds like grinding or squeaking. These noises might indicate parts that need adjustment or lubrication. If the trigger feels sticky or stiff, your gun might jam during use.
Test the reload function as well. Can you load and fire multiple times smoothly? Consistent performance here shows your design is solid.
Measuring Accuracy And Range
Mark a distance from the target and fire several shots. Note where each projectile lands and how far they travel. This tells you how precise and powerful your toy gun is.
If your shots scatter widely, consider tightening loose parts or adjusting the barrel alignment. You want your toy to hit the target reliably.
Adjusting For Improvement
Use your test results to tweak your design. Maybe the spring needs to be stronger, or the trigger mechanism smoother. Small changes can have a big impact on performance.
Ask yourself: What feels off? What could make your toy gun more fun and safe to use? Your answers will guide your next steps.
Documenting Your Results
Keep a simple log of each test—distances, accuracy, and any changes you make. This helps you track progress and avoid repeating mistakes. Plus, it’s satisfying to see how much your creation improves over time.
Have you ever thought about how testing can turn a simple toy into a masterpiece? Careful testing shapes your skills and your creation alike.
Troubleshooting Tips
Troubleshooting is key to a successful toy gun build. Small problems can stop your toy from working well. Knowing how to fix common issues saves time and frustration.
Check parts carefully and test often. Problems often come from loose pieces or wrong assembly. This section helps you spot and fix issues quickly.
Identifying Loose Or Misaligned Parts
Loose parts can cause poor performance. Look for screws, glue, or tape that may be weak. Align pieces properly to ensure smooth action.
- Press parts gently to check stability.
- Use a screwdriver to tighten screws.
- Realign parts that look crooked or off-center.
Fixing Jamming Issues
Jamming happens when parts block each other. Clear any debris or rough edges inside the barrel or mechanism.
- Remove obstructions carefully.
- Sand rough spots with fine sandpaper.
- Test the moving parts for smoothness after fixing.
Ensuring Proper Spring Tension
Springs power many toy gun functions. Weak or too tight springs cause problems.
- Check if the spring compresses and rebounds well.
- Replace worn springs with new, similar ones.
- Adjust spring placement to avoid over-compression.
Checking For Air Leaks
Air leaks reduce shooting power in some toy guns. Test seals and connections for tightness.
- Use tape or glue to seal gaps.
- Replace damaged rubber seals or O-rings.
- Apply gentle pressure to find leaking spots.
Fun Variations
Adding fun variations to your toy gun project can make the building process more exciting and personalize the final product. Simple tweaks can change how your toy functions or looks, giving you a unique creation that stands out. Think about what features you want—speed, design, or even sound—and you can easily adjust your build to fit those goals.
Customize With Color And Texture
Use different types of paint or markers to give your toy gun a vibrant look. You can try matte finishes for a rugged style or glossy paint for a sleek, futuristic feel.
Adding textured tape or rubber grips can improve how it feels in your hand. Have you considered mixing patterns or using stencils to create cool designs? This small step makes your toy truly yours.
Add Sound Effects
Incorporate simple sound modules or small bells inside the gun to mimic firing sounds. This makes playtime more immersive and fun.
You don’t need complex electronics—a small buzzer or a spring-loaded clicker can do the trick. What sounds would make your toy gun more exciting to use?
Modify The Firing Mechanism
Try changing the type of ammunition, such as using foam darts instead of rubber bands. This can affect the range and safety of your toy gun.
You can also experiment with the tension of the launching mechanism to control power. Have you tested how different materials or sizes of ammo change your toy’s performance?
Build A Multi-barrel Design
Instead of a single barrel, create a toy gun with multiple barrels for rapid firing. This variation adds complexity but also a lot of fun during play.
Use lightweight materials to keep it easy to handle. How might multiple barrels change your approach to aiming and shooting?
Incorporate Target Practice Features
Add a small target or scoring system to turn your toy gun into a game. You can use simple cardboard targets or build a point counter with paper and markers.
This encourages skill development and friendly competition. What kind of challenges would make your shooting practice more engaging?

Credit: www.youtube.com
Frequently Asked Questions
What Materials Are Needed To Build A Toy Gun?
You need basic materials like cardboard, rubber bands, glue, scissors, and markers. These items are safe, affordable, and easy to find. Using non-toxic and lightweight materials ensures safety during play.
How Long Does It Take To Make A Toy Gun?
Building a toy gun typically takes 30 to 60 minutes. The time depends on the complexity of the design and drying time for glue. Simple models can be completed quickly by beginners.
Is It Safe To Build And Use A Toy Gun?
Yes, building a toy gun is safe if you use soft materials. Avoid sharp edges and avoid using hard projectiles. Always supervise children during the building and playing process to ensure safety.
Can I Customize The Design Of My Toy Gun?
Absolutely! Customizing your toy gun is encouraged. You can paint it, add stickers, or modify shapes. Personalizing makes the toy more fun and unique.
Conclusion
Building a toy gun can be fun and educational. You get to use simple tools and materials. Follow each step carefully to stay safe. Take your time and enjoy the process. The final toy gun will be a great project to show.
Share your creation with friends or family. Keep practicing to improve your skills. Remember, safety always comes first in any project. Making things with your hands feels rewarding and creative. Try making different designs next time for more fun.




